Transforming your furniture with crackle paint can breathe new life into your home while adding a delightful vintage touch. Did you know that this technique not only enhances the aesthetic charm of your pieces but also evokes a sense of nostalgia that invites warmth and comfort? Whether you’re looking to revamp a thrift store find or simply wish to add character to your existing decor, understanding how to apply crackle paint is essential. With the right techniques, you can create a beautifully distressed look that celebrates the beauty of imperfection, making your space feel uniquely yours. Dive into this guide to uncover the simple steps that will empower you to craft stunning, rustic furniture pieces that reflect your individual style and charm. Embrace the joy of creative expression while making a cozy, inviting environment for you and your loved ones!
Choosing the Right Furniture for Crackle Paint
Choosing the ideal furniture for crackle painting can transform simple pieces into stunning focal points of your home. Consider starting with items that already possess character-think vintage wooden dressers, picture frames, or small side tables. Solid wood is often the best option, as it tends to hold the crackle finish beautifully, allowing the unique patterns to emerge as the paint dries. You might also explore laminate and MDF, but keep in mind that the results might vary in texture and cracking effect.
When selecting furniture, look for surfaces that have minimal imperfections. Any dents, gouges, or previous paint layers can interfere with the crackle effect, leading to an uneven finish. It’s also important to choose pieces that complement your desired rustic aesthetic; distressed finishes and farmhouse styles are particularly well-suited for a crackled look, enhancing that cozy, lived-in feel that epitomizes cottage living.
For an added layer of charm, consider incorporating pieces with intricate detailing, such as carved legs or ornate hardware. These features will not only highlight the crackle paint but also infuse your space with personality and warmth. Keep your vision flexible; sometimes unexpected finds can lead to the most delightful transformations in your home. Embrace your creativity and allow the beauty of crackle-painted furniture to elevate your cozy, rustic retreat.
Essential Supplies for Crackle Painting
To embark on your crackle painting adventure, gathering the right supplies is essential for achieving that charming, vintage look. Not only do these materials help ensure a successful project, but they also make the process enjoyable and satisfying, allowing your creativity to shine through.
Start with a high-quality crackle medium. This is the heart of your project, as different brands offer varying effects. Look for a translucent product that dries clear and allows for the paint colors beneath to peek through. For the paint itself, choose acrylic paints in your desired shades; they adhere well to the medium and can be layered beautifully. Having both a base coat and a top coat in mind will help you create depth in your design. You might select a soft cream as a base and a muted sage green or distressed turquoise for the top layer to evoke that cozy cottage feel.
Don’t forget to equip yourself with the right tools. A set of soft, natural bristle brushes will allow for smooth application of the paint, while a small foam roller can help you achieve an even base coat. For clean edges and fine details, a set of artist brushes in varying sizes is invaluable. Additionally, a few basic supplies should be at your side: sandpaper for preparing the surface, a drop cloth to protect your work area, and masking tape for any areas you wish to keep paint-free.
Before beginning, make sure you have adequate ventilation in your workspace. Good air circulation makes for a safer and more pleasant crafting environment. When combined, these supplies will set you on a path to create stunning, crackle-painted furniture that radiates warmth and personality.
Step-by-Step Guide to Applying Crackle Paint
To create a gorgeous crackle finish on your furniture, let’s dive into a clear and practical guide that will inspire your next DIY project. This technique evokes a beloved, vintage aesthetic that can transform even the simplest of pieces into charming focal points in your home. Following these steps will ensure your crackle painting adventure is enjoyable and rewarding, leading to results that radiate warmth and character.
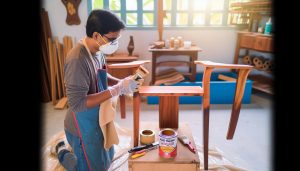
Begin by preparing your workspace and the furniture surface. Choose a well-ventilated area to work in, and cover your floor and surrounding surfaces with a drop cloth to capture any spills. Next, clean the furniture thoroughly to remove dust and grime. If the surface is glossy, lightly sand it using fine-grit sandpaper to create a texture for better paint adhesion. Now, it’s time to apply a base coat. This should be a solid layer of paint that complements your final color and gives depth to the crackle effect. Use a soft bristle brush or foam roller to apply it evenly, allowing it to dry completely as per the manufacturer’s instructions.
Once the base coat is dry, you can add the crackle medium. Using a clean brush, apply a generous coat of the crackle medium in one direction. The thickness of this layer will influence the size of the cracks, so feel free to experiment-thicker applications lead to larger crackles. After applying the medium, work swiftly to apply your topcoat, using a different brush and again moving in one direction. It’s magical to see the cracks begin to emerge as the paint dries, revealing glimpses of the base coat underneath.
To enhance the rustic charm, consider finishing with a light sanding once the topcoat is dry to emphasize the crackled areas further. Finally, seal your masterpiece with a clear topcoat to protect your work and ensure longevity. This layer adds a subtle sheen while safeguarding your newly crafted furniture from wear and tear.
By embracing the crackle painting method, you not only refresh old furniture but also contribute to a cozy, rustic vibe that celebrates handcrafted beauty. Enjoy decorating your space with these personalized pieces that are full of character and stories, and let your creativity shine!
Tips for Achieving a Vintage Distressed Look
To embrace the enchanting charm of a vintage distressed look through crackle painting, it’s essential to consider not just the technique, but the entire aesthetic you want to achieve. Selecting the right color palette is crucial; opt for soft hues that evoke nostalgia-think muted pastels or earthy tones. A classic combination might include a warm cream base coat with a soft sage green topcoat, which, once cracked, reveals the gentle warmth underneath and instantly transports you to a cozy cottage filled with history.
Another effective method to enhance the rustic feel is to introduce layers into your design. Begin with a darker base color to create depth; then, follow with your crackle medium and a lighter topcoat. This interplay not only makes the cracks more pronounced but also creates a beautiful contrast that enriches the overall vintage appeal. Moreover, experimenting with distressing techniques such as sanding edges or adding faux patina can enhance the aged effect, giving your furniture an authentic, timeworn look that tells a story.
For added authenticity, consider selecting furniture pieces with intricate details or carvings that can be highlighted through the crackle process. These elements draw the eye and serve as focal points in your decor. Once you achieve that desired vintage appearance, a touch of wax or a matte topcoat can further emphasize the texture and add sophistication to your finished piece, ensuring it seamlessly integrates into your cozy, rustic home.
Incorporating personal touches, like stenciling or using vintage-inspired decals, can also elevate your crackle-painted furniture. These small details deliver warmth and character, making each piece uniquely your own. Remember, the goal is to create a space that feels inviting and lived-in, where every crack and imperfection adds to the charm and narrative of your home. Embrace the beauty of the journey, and soon you’ll find your furniture masterpieces reflect the comforting essence of cottage living, evoking a heartwarming ambiance that welcomes all who enter.
Common Mistakes to Avoid When Crackle Painting
When embarking on the charming journey of crackle painting, it’s easy to get lost in the excitement of achieving that perfect vintage finish. However, there are several common pitfalls that can mar your efforts and detract from the beautiful, rustic look you desire. Being aware of these mistakes can save you time, materials, and heartache, allowing you to create delightful pieces that enhance your cozy cottage aesthetic.
One of the most prevalent mistakes is rushing through the drying process. Each layer of paint requires a specific amount of drying time for the crackle effect to develop properly. Patience is vital here; if you apply the topcoat too soon, it may blend instead of crackle. Always consult the manufacturer’s recommendations for drying times, and trust the process – good things come to those who wait!
Another pitfall to avoid is using overly thick layers of paint. It may seem tempting to slather on the paint for a more pronounced crackle, but excess thickness leads to uneven cracks and a less desirable finish. Aim for lighter, even coats instead, allowing each one to dry before the next application. This will ensure a more cohesive and delicate crackle that enhances rather than overwhelms your beautiful furnishings.
Choosing the right products is equally crucial. Not all paints and crackle mediums are created equal, and some combinations may never yield the desired results. Conducting a small test patch can save you from disappointment later on. Be sure to select high-quality paints compatible with your chosen crackle medium, as this will significantly influence the final outcome.
Lastly, don’t forget to secure your crackled surface with a protective finish. Some may think a crackled piece is complete without any added sealant, but these delicate cracks need loving care. A light coat of wax or a clear matte topcoat will not only protect your work but will also enhance the texture, adding to its rustic charm. This final step ensures that your lovingly crafted furniture can withstand the rigors of everyday life while still exuding that heartwarming essence of cottage living.
By keeping these common mistakes in mind, you can steer clear of frustration and enjoy the delightful process of transforming your furniture into unique pieces that tell a story. Embrace the little imperfections that come with the journey, and soon your home will be filled with charming, crackled creations that evoke a warm, inviting atmosphere.
How to Seal and Protect Your Crackled Finish
To preserve the beautiful cracks and textures created during your crackle painting journey, sealing and protecting your finished pieces is a vital, yet often overlooked, step. Just like a grandmother’s beloved recipe, your art deserves care and attention to ensure it lasts, bringing comfort and charm to your home for years to come. A protective finish not only reinforces the durability of your work but also enhances the rustic beauty of the crackled effect, allowing it to shimmer subtly in the light.
One of the best options for sealing crackle-painted furniture is a clear matte topcoat. This type of finish provides an elegant, non-glossy surface that complements the vintage aesthetic you’ve worked so hard to achieve. When applying a topcoat, ensure that your crackled surface is thoroughly dry-typically waiting 24 hours is prudent. With a soft, clean brush or a lint-free cloth, gently apply a thin, even layer of the topcoat, taking care to follow the grain of the wood. Multiple light coats are preferable to one heavy application, which can compromise the delicate cracks you cherish.
If you prefer a more natural approach, a golden touch of beeswax can also serve as a protective layer. Simply warm the beeswax slightly and rub it into the surface with a soft cloth, allowing it to penetrate the cracks. This not only seals the finish but imparts a warm sheen that enhances the tactile quality of your piece. The sweet scent of beeswax will remind you of cozy afternoons spent crafting, enveloping your home in a nurturing embrace.
Keeping Your Crackled Finish Beautiful
To truly honor the beauty of your crackled furniture, consider these tips for ongoing maintenance:
- Dust Regularly: Keep the surfaces clean by dusting with a soft duster or microfiber cloth.
- Avoid Water: Limit exposure to moisture, which can affect the finish; use coasters for drinks to prevent rings.
- Spot Clean: For stains, gently clean with a damp cloth followed by a dry one, avoiding harsh chemicals.
By incorporating these sealing methods and maintenance tips, you can ensure that your lovely crackle-painted furniture remains a cherished part of your home, reflecting the creativity and warmth of cottage living. Embrace the joy of knowing that every time you admire your handiwork, you’re not just seeing a beautiful piece of art, but a blend of effort, love, and the rustic beauty that defines cozy, inviting spaces.
Creative Ideas for Using Crackle Paint
Using crackle paint can transform ordinary furniture into captivating pieces that exude rustic charm and vintage allure. Imagine a small side table transitioning into a stunning focal point, with its crackle finish whispering stories of time and craftsmanship. The versatility of crackle paint allows it to be used in various creative ways, making it an ideal choice for DIY enthusiasts who want to breathe new life into their home decor.
For a quaint cottage feel, consider applying crackle paint to picture frames or wall art. Start with a simple wooden frame painted in a solid color, then apply the crackle medium for an aged appearance. This technique works beautifully for family portraits or nature prints, adding an accent of whimsy and history to your walls. You might even experiment with layering colors; for example, a soft blue base with a creamy white crackle can evoke a charming seaside cottage vibe.
Another delightful idea involves using crackle paint on smaller items, such as jars, vases, or candlesticks. These can become unique decorative pieces when coated with crackle paint, especially when filled with seasonal flowers or rustic twinkle lights. Create a delightful centerpiece for your dining table or a mantel display by mixing various sizes and shapes of crackle-painted items, drawing the eye with distinctive texture and color contrasts.
Finally, don’t overlook the potential of incorporating crackle paint into outdoor decor. A wooden bench or garden planter with a crackled finish can add a touch of rustic elegance to your outdoor spaces. Imagine sipping tea with friends on a bench that resembles a cherished heirloom, thanks to the mesmerizing patterns of cracked paint. Such pieces invite warmth and connectivity, making every gathering feel special.
With crackle paint, the possibilities are as endless as your imagination. Embrace the imperfections and let your creativity flow, turning each piece into a unique reflection of your style and love for cozy living.
Inspiring Furniture Makeovers with Crackle Paint
Transforming your furniture with crackle paint can breathe new life into tired pieces while infusing them with a charming vintage aesthetic. Imagine the delight of stepping into a room where a formerly mundane side table or chair now boasts a beautifully cracked finish, reminiscent of a beloved antique. Crackle paint invites a sense of history and craftsmanship, sparking inspiration for a variety of makeovers that celebrate cottage living and rustic design.
Consider a dated wooden dresser, long overlooked and in need of rejuvenation. By applying crackle paint, you can create a stunning centerpiece for any bedroom. Start with a soft, muted base color – perhaps a gentle sage or a pale lavender – to evoke the tranquility of nature. Once dry, apply the crackle medium, followed by a contrasting topcoat, like a creamy white. As the paint dries and cracks emerge, your dresser transforms into a piece worthy of admiration. Adding vintage knobs or hardware can complete this enchanting look, perfect for a cozy retreat.
Another delightful project is to revitalize a garden bench or outdoor table. Imagine spending leisurely afternoons in your garden, surrounded by pieces that reflect a handcrafted warmth. Applying a lovely teal base with a white crackle finish gives an inviting seaside vibe. This combination not only enhances your outdoor decor but also creates a welcoming space to gather with family and friends, surrounded by the beauty of nature.
Don’t be afraid to experiment with smaller accessories, too! Items such as flower pots, candle holders, or even picture frames can benefit from a crackle treatment. A terracotta planter coated in a sunny yellow with a contrasting white crackle will make your flowers pop, while a wooden frame with a rustic finish can showcase favorite memories in an artistic way. When mixed together, these charming pieces create a delightful tableau that brings joy and character to your home, reflecting your unique style.
Every crackle-painted piece tells a story, inviting a touch of nostalgia and warmth into your living space. Whether you’re giving new life to old furniture or adding personal touches to your decor, crackle paint is a versatile tool in your DIY arsenal. Embrace the art of imperfection, and let your creativity flourish, one charming piece at a time.
Maintaining Your Crackle Painted Furniture
Maintaining crackle painted furniture ensures that these charming pieces remain as captivating as the day you applied them. Much like a beloved heirloom, regular care will not only preserve their beauty but also enhance the cozy, rustic atmosphere of your home. Here are some practical steps to keep your crackle finishes looking their best.
One of the simplest yet effective ways to maintain your furniture is by dusting regularly with a soft, lint-free cloth. This helps prevent any buildup of dirt and grime that can dull the vibrant colors and intricate cracks. Should more thorough cleaning be needed, a damp cloth with a mild soapy solution can be used. Avoid harsh chemicals, as they can strip away the delicate layers of paint and finish. After cleaning, always dry the surface gently to prevent moisture from seeping into cracks.
To protect your crackled finish, consider using a clear sealant or topcoat designed for furniture. This provides a barrier against wear and tear while enhancing the aged look. When applying the sealant, be sure to follow your specific product’s instructions, opting for a matte or satin finish that complements the rustic aesthetic. Reapplying the sealant every few years will keep your furniture looking fresh and well-maintained.
Lastly, be mindful of how your crackle painted pieces are used. Placing coasters under drinks and using soft pads for heavy objects can help prevent scratches and damage. If your furniture is exposed to sunlight, rotating or moving items periodically can minimize fading over time. By taking these small steps, your crackle painted furniture will continue to tell its beautiful story and remain a cherished part of your home for years to come.
Embrace the joy of nurturing these artistic creations and watch as they age gracefully, adding to the charm of your rustic living space.
Exploring Alternatives to Crackle Paint
There’s a lovely charm that comes from transforming furniture into stunning statements through the use of crackle paint, but it’s not the only way to achieve that delightful vintage look. For those seeking alternatives that yield beautiful, rustic aesthetics, consider exploring a few creative techniques that embrace a similar distressed vibe without the need for crackle paint.
One enticing option is distressed paint. By using chalk paint, artists can easily create a rustic feel with just a few brush strokes. This paint type is formulated to adhere well and can be sanded down after application to expose the undercoat or the raw surface underneath. This technique allows for an effortlessly aged appearance that captures the essence of cottage living. For instance, try layering a soft pastel chalk paint over a darker base coat, then lightly sanding edges and surfaces to bring out the worn character of the wood beneath.
Another fascinating alternative is decoupage. This method uses paper or fabric to cover furniture, allowing for customized designs that can evoke the same warmth as crackle finishes. Choose vintage newspapers, botanical illustrations, or charming patterns that resonate with your sense of style. Complete the look with a clear sealant to ensure durability and resistance to wear. Decoupage can be surprisingly versatile; a simple cabinet can bloom into a conversation piece adorned with floral motifs or scenic landscapes.
Staining is another timeless alternative that enhances the grain of the wood while providing a rich and inviting color. A weathered stain can evoke a sense of history, fitting beautifully in any rustic or country-inspired home. Consider applying a weathered gray or light brown stain to enhance the wood’s natural texture, giving your furniture an aged but elegant finish. This approach not only highlights the furniture’s craftsmanship but also requires minimal effort for impactful results.
Additionally, consider the impact of textured finishes. From applying a textured gel medium to adding some sand to paint for a more tactile surface, these techniques can give the appearance of age without the signature cracks. Textured finishes can invite touch and intrigue, making your furniture more engaging and giving your space an inviting feel.
In embracing these alternatives, you open the door to a world where creativity and comfort intertwine seamlessly. Whether you’re seeking to revitalize a tired piece or craft something entirely new, these methods promise to imbue your home with warmth and charm, celebrating the beauty of handcrafted creations that echo the joys of rustic living.
Frequently asked questions
Q: What is the best type of paint for achieving a crackle finish on furniture?
A: The best type of paint for achieving a crackle finish is a latex or acrylic-based paint. These types allow the crackle medium to work effectively, reacting properly to create the vintage distressed look. Refer to the “Essential Supplies for Crackle Painting” section for detailed recommendations.
Q: How long does crackle paint take to dry before applying a second coat?
A: Crackle paint typically requires about 1-2 hours to dry before you can apply a second coat. Ensure the first layer is completely dry to achieve the best crackle effect. Check the “Step-by-Step Guide to Applying Crackle Paint” for more timing tips.
Q: Can I apply crackle paint over stained wood furniture?
A: Yes, you can apply crackle paint over stained wood furniture, but it’s crucial to ensure that the stain is fully cured. Lightly sand the surface for better adhesion, which you can read more about in our “Choosing the Right Furniture for Crackle Paint” section.
Q: What techniques can I use to enhance the crackle effect on furniture?
A: To enhance the crackle effect, try varying the thickness of your paint layers and experiment with different crackle mediums. A top coat in a contrasting color can also make the cracks more prominent. Explore “Tips for Achieving a Vintage Distressed Look” for detailed techniques.
Q: Are there specific tools required for applying crackle paint?
A: Yes, essential tools include a clean, soft brush for applying paint, a sponge or cloth for smoothing edges, and a high-quality crackle medium. Check out the “Essential Supplies for Crackle Painting” section for a comprehensive list of tools.
Q: How can I fix a mistake if the crackle paint doesn’t turn out right?
A: If the crackle paint doesn’t turn out as expected, you can sand the area lightly and repaint with the base color to start fresh. Follow the “Common Mistakes to Avoid When Crackle Painting” for more troubleshooting tips.
Q: What kind of sealant should I use after crackle painting furniture?
A: A water-based polyurethane sealant is ideal for protecting crackle-painted furniture. It helps maintain the finish without altering the color. Look into the “How to Seal and Protect Your Crackled Finish” section for detailed sealing techniques.
Q: Can I use crackle paint on outdoor furniture?
A: While crackle paint can be used on outdoor furniture, it’s essential to use exterior-grade paints and sealants to withstand weather conditions. Consider exploring our “Creative Ideas for Using Crackle Paint” for inspirations when adapting for outdoor use.
In Conclusion
Congratulations on learning how to apply crackle paint to achieve that charming vintage distressed look for your furniture! Remember, this delightful DIY project not only transforms your pieces but also brings character and warmth into your cozy home. Now is the perfect time to get creative-don’t wait to start your new crafting journey!
For more inspiration, check out our guides on rustic home design and seasonal gardening to complement your newly styled furniture. If you want to dive deeper into DIY decor projects, explore our article on creating a farmhouse-style centerpiece. Be sure to share your finished projects with us in the comments-we love seeing your handiwork!
Before you go, consider signing up for our newsletter for exclusive tips and DIY resources. Embrace the beauty of cottage living, and let your creativity shine as you transform your space into a comforting retreat. Your next crafting adventure awaits!