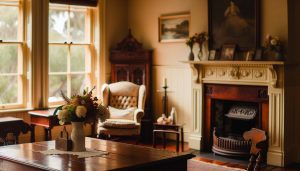
Transforming your furniture with oil-based paint not only enhances its beauty but also ensures durability, making it a cherished piece in your cozy cottage home. Did you know that oil-based paints have a rich, lustrous finish that withstands wear and tear better than many alternatives? This guide will walk you through the steps of applying oil-based paint, addressing common concerns like drying times and finish durability, so you can confidently revitalize your beloved pieces. Embrace the rustic charm of cottage living while indulging your creative side; the painted furniture you’ll create will not only look stunning but will also stand the test of time. Join us on this delightful journey of transformation-let’s bring new life to your furniture and add a touch of handcrafted beauty to your home!
Choosing the Right Oil-Based Paint for Furniture

Choosing the right oil-based paint for your furniture can truly transform your space, adding both durability and character to your beloved pieces. When selecting your paint, consider not only the color and finish but also the unique properties of oil-based paints that make them a go-to for achieving that perfect cottage aesthetic. This type of paint offers excellent adhesion and a smooth, lustrous finish that can enhance the natural grain of the wood, making it an ideal choice for rustic furniture projects.
Begin by searching for paints specifically labeled as “high-quality oil-based” to ensure longevity and a robust finish. Look for paints that contain Alkyd, as they are particularly durable and resistant to wear and tear. Color choices are essential too – earthy tones like sage green, deep blue, or warm cream can evoke that cozy cottage feel, inviting warmth into your home. When making your selection, don’t forget to consider satin or semi-gloss finishes, which reflect light beautifully while remaining easy to clean – a practical consideration for everyday living.
In your pursuit of the perfect paint, remember to check the paint’s drying times and cleanup requirements. Oil-based paints typically take longer to dry compared to their water-based counterparts, which can contribute to a more polished look but requires patience during the process. Also, ensure you have adequate ventilation during application, as the fumes can be more potent. By taking the time to choose the right oil-based paint, your furniture will not only boast a beautiful finish but will also stand the test of time, creating cherished memories in your cozy cottage home.
Essential Tools for Painting Furniture
Painting furniture is not just a project; it’s a journey into craftsmanship that transforms beloved pieces into treasures for your home. To embark on this fulfilling adventure, having the right tools at your side is essential, ensuring that each stroke of oil-based paint results in a flawless and beautiful finish. Here’s what you’ll need to create a charming cottage look that speaks to both personality and durability.
First and foremost, gather high-quality paintbrushes and rollers. A variety of sizes will allow you to tackle every nook and cranny of your furniture. Look for brushes with sturdy bristles-natural bristles are ideal for oil-based paints as they help distribute the paint evenly. A small, angled brush is perfect for edges and detailed work, while a larger brush works wonders on broad surfaces. Don’t forget a roller for larger furniture pieces, as it can cover vast areas much quicker than a brush.
A paint tray is equally important; it holds the paint while you work, allowing you easy access without spills. Invest in a good quality tray lined with disposable liners to make cleanup a breeze. In addition to these essentials, you’ll need sandpaper or a sanding block to prep your furniture, ensuring that the surface is smooth and ready to soak in that luscious paint. Remember, the prepping stage is where the magic begins, as it affects the overall finish of your final piece.
As you’re creating your cozy space, the safety of your surroundings should be a priority. Make sure to have disposable gloves on hand to protect your hands from paint, and consider wearing a mask if you’re working indoors to shield yourself from fumes. A drop cloth will protect your floors and other surfaces from any drips or splatters, adding a layer of care to your workspace.
Finally, don’t underestimate the importance of a good can opener and a stir stick for mixing your paint. Oil-based paints can settle, and a thorough stir is crucial for a consistent color and texture. With these essential tools at your disposal, you’re well on your way to giving your furniture the makeover it deserves. Let creativity flow, and enjoy the process of bringing cottage charm into your home!
Preparing Furniture for a Flawless Finish

To achieve a truly flawless finish when painting furniture with oil-based paint, the preparation phase is essential. Much like a warm cup of tea signals the start of a cozy day, taking a few mindful steps to prep your furniture sets the tone for the entire project. Begin by cleaning the piece thoroughly; dust, grease, and grime can hinder the adherence of paint and tarnish the final look. A simple mix of soap and warm water helps to lift any stubborn residues, creating a surface that’s ready to embrace the fresh coat.
Once you’ve cleaned your furniture, it’s time to focus on the surface. A smooth, even base will make all the difference in how your paint adheres and looks once dry. Use sandpaper or a sanding block, starting with a coarser grit to remove old finishes or imperfections, then progressing to a finer grit to create that silky smooth canvas. After sanding, wipe the surface with a damp cloth to eliminate any dust particles that could mar the finish.
Another important step in the preparation process is assessing the structural integrity of your furniture. Check for any loose joints or parts that may need reinforcing. A bit of wood glue can work wonders for ensuring that your piece is not only beautifully painted but also sturdy and reliable for years to come. Embrace the rustic charm of your furniture; this is your opportunity to retain its character while blending function with aesthetics.
Finally, consider your working environment. Paint in a well-ventilated area to avoid overwhelming fumes from the oil-based product. Lay down a drop cloth to protect your floors and work surfaces, allowing you to paint with confidence and ease. As you prepare your furniture, take a moment to appreciate the transformative journey ahead. With each careful step in this preparation stage, you’re not just painting a piece; you’re nurturing a story that will fill your cozy cottage with warmth and personality. Embrace the beauty of handmade, and let each brushstroke reflect your unique style!
Step-by-Step Guide to Applying Oil-Based Paint
To transform your beautifully prepared furniture with a lustrous coat of oil-based paint, the application process is where the magic truly unfolds. This is your chance to give each piece the rich, warm finish that embodies the cozy charm of cottage living. By approaching the task with a thoughtful mindset, you’ll create a stunning centerpiece that enhances your home’s rustic elegance.
Begin by gathering your essential tools, ensuring that everything is at your fingertips. A high-quality paintbrush with natural bristles or a foam roller works wonders for spreading the oil paint smoothly. If you’re working on intricate details or carved areas, a smaller brush will help you get into those nooks and crannies with finesse. Pour your paint into a clean container and stir gently to ensure an even consistency. It can be a good idea to test your paint on a small, inconspicuous area first to see how it dries and reflects light.
As you start applying the paint, think about the best approach to maintain a smooth, even coat. Use long, gentle strokes, following the wood grain to enhance the natural beauty of the piece. Start at the top and work your way down to avoid drips, allowing gravity to assist you. It’s beneficial to apply thin layers rather than a single thick coat, giving each one ample time to dry and cure. If you’re working on large surfaces, remember to maintain a wet edge to minimize brush marks. Allow your first coat to dry completely-this could take anywhere from 12 to 24 hours depending on the humidity and temperature in your workspace.
Once the first coat is fully cured, take a fine grit sandpaper to lightly sand the surface; this step is vital for promoting adhesion and achieving that coveted smooth finish. Wipe away any dust with a tack cloth before proceeding to apply your second coat. Two or three coats will usually do the trick, resulting in a rich, full color that speaks of comfort and homeliness-qualities every cottage deserves.
Patience is key during this process; the beauty of oil-based paint lies in its durability and depth. After your final coat, allow the furniture to cure undisturbed for at least a week. This extended drying time not only enhances the longevity of your finish but also allows the piece to develop a patina that tells a story of rustic charm and daily use. Embrace this time as a moment to reflect on the joy of creating something unique and personal that fits beautifully within your cozy cottage aesthetic.
Techniques for Achieving a Smooth Coat
To achieve a beautifully smooth coat of oil-based paint on your furniture, understanding the nuances of application can transform your project from ordinary to extraordinary. The secret lies not only in the type of paint you choose but also in your technique and attention to detail. A well-executed paint job can turn even the most modest piece of furniture into a charming centerpiece that radiates the warmth of cottage living.
Start by ensuring that your workspace is organized and well-lit. This allows you to focus entirely on the task at hand. Select a high-quality brush-one made with natural bristles is preferable for oil-based paints, as it holds more paint and provides better coverage. When you begin painting, think of it as a dance; the smooth brushstrokes should flow along the grain of the wood, embracing its texture. This technique enhances the piece’s natural beauty, creating a richer finish that speaks to the craftsmanship of your work.
When applying the paint, aim for thin, even layers. Begin with a light touch, gradually building up to the desired opacity. This method not only prevents drips and runs but also allows each layer to dry properly, promoting better adhesion for subsequent coats. If you’re working on larger surfaces, keeping a “wet edge” is crucial; this means overlapping each stroke slightly before it dries to avoid unsightly lines. If necessary, a fine-grit sandpaper can be used between coats to further smooth out the surface and enhance the overall finish.
Lastly, patience is essential in this process. Allow each coat ample time to dry fully-typically between 12 to 24 hours-so the paint can cure properly before you apply the next layer. This attention to drying times will ensure that your finished piece is not only visually appealing but also durable, ready to withstand the gentle chaos of cottage life. As you admire your handiwork, you’ll appreciate how a little extra care can bring out the beauty in every piece of furniture, creating a cozy atmosphere that feels like home.
Curing Time: Ensuring Durability and Longevity
Creating a cozy cottage atmosphere often hinges on the details, and nothing brings a sense of handcrafted warmth to your furniture quite like a beautifully finished piece coated in oil-based paint. But to achieve that enduring charm, one vital aspect often overlooked is the curing time of the paint. This crucial period not only enhances the durability of your furniture but also ensures that it captures the enchanting rustic vibe you desire.
When you apply oil-based paint, it undergoes a series of chemical reactions that demand proper time to settle. The curing process can typically take anywhere from a few days to several weeks, depending on factors like humidity and temperature. During this time, the paint hardens, providing a robust, durable surface that will withstand the test of time and the gentle wear of everyday life in a bustling cottage environment. To ensure the best results, aim to let each coat dry thoroughly-ideally 24 hours-before applying the next. This not only enhances adhesion between layers but also prevents unsightly imperfections, making your final product as smooth and charming as a countryside breeze.
As you embark on this journey, consider embracing the comforting rhythm of waiting. After all, the joy of creating art lies in the process. Use this time to envision the overall space where your newly painted piece will live, perhaps imagining it by a sun-drenched window or nestled among your favorite plants. Once fully cured, your furniture will not only boast a stunning finish but also an innate connection to the rustic beauty of cottage living.
For the best durability and satisfaction, it’s wise to implement a light touch during use for the first couple of weeks after painting. Encourage family and friends to admire your handiwork rather than put it to the test right away. This little pause allows the paint to fully interact with the environment, creating a resilient bond that stands up to both time and love, ultimately embodying the heartwarming essence of cottage life.
Common Mistakes to Avoid When Painting
When diving into the enchanting world of painting furniture with oil-based paints, it’s essential to navigate the process thoughtfully. While the promise of a charming, rustic finish is tempting, easily avoidable missteps can disrupt your creative flow. Understanding these pitfalls not only elevates your project but ensures that your cherished furniture stands strong against the test of time and the wear of daily life.
First and foremost, skipping proper prep work can lead to a painting nightmare. Even the most exquisite paint cannot mask poorly prepared surfaces. Ensure you thoroughly clean, sand, and prime your furniture before applying that first stroke of color. A dirty or uneven surface will detract from the beauty of your end result and can cause peeling or bubbling over time. Consider how you would want a beloved piece to look and feel, and treat your furniture with the same respect by investing time in its preparation.
Another common mistake lies in piling on thick coats of paint at once. While it may seem efficient, this approach can not only obscure details but also result in uneven textures and longer drying times. Oil-based paints are best applied in thin layers-think of it as a delicate touch that allows you to build up depth and richness. This method fosters a smooth, charming finish reminiscent of cottage-style elegance, giving each piece character and authenticity.
Lastly, don’t underestimate the importance of allowing your paint to cure properly before putting your newly finished furniture into full use. In the excitement of completing your masterpiece, it’s tempting to move it right into your cozy nook. However, the curing time is essential for a durable surface that can withstand wear and tear. By allowing your painted furniture to rest undisturbed, you nurture its connection to the serene charm of cottage living, embracing the journey of creating lasting beauty.
Embracing the process, being mindful of preparation, applying paint with grace, and respecting drying times will ensure that your furniture can bask in the warm glow of rustic charm for years to come. The joy lies not only in the finished product but also in every gentle stroke of creativity woven into your cozy home.
Maintaining Your Oil-Based Painted Furniture
Maintaining oil-based painted furniture is akin to nurturing a cherished piece of art. The effort you’ve poured into transforming your furniture deserves to be celebrated through proper care. By embracing a few thoughtful maintenance practices, you can preserve the beauty and durability of your freshly painted masterpieces, ensuring they continue to tell your home’s story for years to come.
One of the most crucial aspects of maintaining your oil-based painted surfaces is regular cleaning. Dust and grime can accumulate over time, dulling the finish and altering the aesthetic appeal of your furniture. Use a soft, damp cloth for routine cleaning, and avoid harsh chemicals that could strip away the paint. For deeper cleans, a mixture of mild soap and water can work wonders, followed by a thorough drying. This gentle approach keeps the vibrancy and integrity of the paint intact while allowing the charm of its rustic design to shine.
Additionally, it’s wise to periodically inspect your furniture for signs of wear, such as scratches or chips. For minor imperfections, touch-up paint is your best friend. Simply keep a small container of your original paint handy, and anytime you notice a blemish, use a fine brush to blend the area seamlessly. This simple act can revive the original appeal and prevent further damage, reinforcing the heartwarming story each piece contributes to your cozy cottage ambience.
Lastly, consider applying a protective topcoat every few years to enhance the durability of your painted surfaces. A clear polyurethane finish can provide an extra layer of protection against moisture and stains, making it easier to maintain that charming finish you adore. Opt for a matte or satin finish to match the original texture of your oil-based paint, allowing for a harmonious blend between the protective layer and the rustic charm of your furniture.
By implementing these engaging maintenance steps, your oil-based painted furniture can continue to evoke warmth and creativity within your home, standing proud as a testament to the cozy and inviting lifestyle you cherish. Each piece will not only reflect your unique style but also create lasting memories filled with love and craftsmanship. Embrace the journey of upkeep as a celebration of your home’s character, for every touch reveals the heart behind your cottage living dream.
Innovative Finishing Techniques for Extra Charm
The beauty of oil-based paint lies not just in its durability but also in the myriad of creative finishing techniques that can elevate your furniture to whimsical heights. From distressing to glazing, the right technique can infuse your pieces with character and depth, reflecting the cozy essence of cottage living. A beloved approach is the distressed finish, which mimics the charm of well-loved antiques. Simply apply your oil-based paint, allow it to dry, and then lightly sand the edges and corners to reveal a hint of the wood underneath, giving your furniture an inviting, lived-in appearance.
Another delightful technique is whitewashing. This involves diluting white oil-based paint with mineral spirits for a translucent effect that softens the overall look of your furniture. This method enhances the natural grain of the wood while lending an airy feel to your space, perfectly matching the cottage aesthetic. Apply this mixture with a brush or cloth, wiping away excess to achieve your desired level of coverage. The result? A softly layered appearance that adds a subtle texture to your furniture without overpowering its inherent beauty.
Creating Layers and Depth
For those wanting to incorporate a bit of drama, consider the glaze technique. This involves applying a tinted oil-based glaze over your base coat to add depth and richness to your furniture’s finish. Choose a color that complements your base paint; for instance, a warm brown glaze over creamy white can highlight details and curves, lending sophistication to the piece. Apply the glaze with a brush, moving with the grain, and blend it swiftly for a beautiful outcome that evokes the timeless appeal of cottage design.
Additionally, don’t shy away from incorporating stenciling or decoupage as finishing touches. These playful techniques allow for personal expression and can invigorate your furniture with unique patterns or illustrations. Consider adding a subtle floral stencil on the side of a drawer or using decoupage to apply vintage seed packets or botanical prints to the surface of a tabletop. These charming accents can serve as conversation starters and will undoubtedly bring a smile to anyone who experiences your handcrafted beauty.
In the world of oil-based paint, the options are as delightful as they are varied. Embrace your creativity and experiment with different finishing techniques to breathe new life into your furniture, cultivating a space that not only looks beautiful but also tells your unique story of cottage living.
Reviving Old Furniture with Cottage Elegance
Old furniture often carries with it a wealth of stories and memories, making it more than just a piece of decor; it’s a cherished part of our lives. Reviving these beloved items with a touch of cottage elegance not only honors their history but also breathes new life into our spaces. Imagine transforming a tired, outdated chair into a cozy reading nook centerpiece or an old side table into a charming accent piece. With a little creativity and the right techniques, you can achieve a fresh, inviting aesthetic that embodies the essence of cottage living.
One of the first steps in this delightful journey is to choose the right oil-based paint that complements the rustic charm typical of cottage decor. Soft pastels, creamy whites, and muted earth tones can create a calming backdrop, allowing the beauty of your furniture to shine through. A classic white or pale blue can evoke the serene vibes of a sunlit garden, while deeper hues like sage green or dusty rose can add warmth and character. Before diving in, however, be sure to properly prepare your furniture by cleaning and sanding the surfaces to ensure a smooth application of paint.
Once you’re ready to begin painting, consider implementing various techniques that enhance the rustic appeal. For example, using a dry brushing technique can achieve a weathered look, reminiscent of well-loved old furniture. Alternatively, applying a base coat and then a lighter glaze can create a soft, layered effect that captures the dreamy ambiance of cottage style. Don’t forget to accent your pieces with distressing; lightly sand edges and corners to reveal underlying wood or previous layers of paint-this adds depth and a sense of history that’s truly enchanting.
Lastly, embrace the process of adding personalized touches. Incorporating stencils featuring floral patterns or botanical prints will not only infuse your furniture with charm but can also serve as a delightful reminder of nature’s beauty. You might even consider decoupaging old book pages or vintage postcards onto surfaces, crafting a unique narrative for each piece. Such finishing techniques allow you to express your creativity while creating a space that’s not just functional but also filled with love and warmth, capturing the true spirit of cottage living.
Inspiring Cottage Style Paint Color Ideas
Choosing the perfect paint color can awaken the hidden beauty of your furniture, transforming it into a cozy centerpiece that invites you to linger and enjoy the charm of cottage living. Soft, earthy tones or dreamy pastel shades can evoke a sense of warmth and tranquility, essential elements of a welcoming home. For a timeless approach, consider using colors that mimic nature’s palette. A gentle sage green, reminiscent of rolling hills, or a soft lavender that brings to mind blooming flowers can infuse your space with a peaceful ambiance. Don’t shy away from bolder hues either; rich navy or terracotta can serve as striking accents, grounding your furnishings with a touch of elegance.
When you’re ready to delve into color choices, think about how each shade reflects the spirit of cottage life. Neutral tones, such as creamy whites or warm beiges, are fabulous for creating a blank canvas that highlights the texture and craftsmanship of your pieces. These shades have the added benefit of enhancing natural light, making spaces feel airy and open. Alternatively, muted pastels, like dusty rose or pale blue, can transport you to a quaint cottage by the sea, where every detail feels lovingly curated.
Here are a few inspiring color combinations to consider for your next project:
- Sage Green paired with creamy white for a classic, nature-inspired look.
- Dusty Blue as a calming base with accents of soft yellow for cheerfulness.
- Warm Beige highlighted with rich terracotta to add depth and character.
- Muted Lavender complemented by a deep plum for a touch of sophistication.
Experimenting with these colors isn’t just about aesthetics; it’s about storytelling. Each piece of furniture painted with care can narrate a tale of the cottage lifestyle-relaxed, heartfelt, and filled with the simple joys of everyday life. Whether you stick to a cohesive color scheme across your decor or mix and match for a more eclectic vibe, your choices can inspire a cozy atmosphere that reflects your unique connection to cottage living.
Exploring Eco-Friendly Alternatives to Oil Paint
In the charming world of cottage living, embracing eco-friendly alternatives to traditional oil paints offers a delightful way to paint your furniture while keeping the environment in mind. Many homeowners are increasingly seeking options that not only beautify their homes but also align with sustainable living practices. Options like natural acrylic paints, water-based formulations, and milk paints are gaining popularity, each with unique benefits that cater to eco-conscious decorators.
Natural acrylic paints, for instance, provide a similar finish to oil-based paints but with significantly lower volatile organic compounds (VOCs). This means less harmful fumes and a safer atmosphere for your home, especially when working on indoor projects. These paints often come in a variety of beautiful, soft hues reminiscent of traditional cottage color palettes, allowing you to evoke the same warmth and charm. Additionally, they dry much faster than oil-based options, making them perfect for those eager to see their transformations unfold swiftly.
Milk paints are another enchanting choice for those wanting to achieve a rustic or vintage look. Made from natural ingredients like milk protein, lime, and natural pigments, milk paint doesn’t merely cover surfaces; it seeps into the material, creating a durable and uniquely textured finish. This eco-friendly option is available in a range of pastel and muted colors, perfectly suiting the serene aesthetics of cottage decor. Plus, with a bit of creativity, you can achieve the perfect faded or distressed look that gives your furniture that cherished, lived-in feel.
Lastly, consider chalk paints-noted for their matte finish and ease of use. These water-based paints work beautifully on various surfaces, including wood, metal, and even glass. They allow for the social, crafty aspect of painting, encouraging DIY enthusiasts to experiment with techniques such as layering or distressing for a cozy, handcrafted look. Using eco-friendly paints not only supports your vision of a peaceful, rustic home but also promotes healthier living spaces, sparking creativity and connection with the natural world around us.
Exploring these alternatives enables you to preserve the enchanting spirit of cottage living while contributing to a more sustainable future. Embrace the simple joys of handcrafting beauty in your home, where each brush stroke adds layers to your story while nurturing both your furniture and the planet.
Frequently Asked Questions
Q: How long does oil-based paint take to dry on furniture?
A: Oil-based paint typically takes 6 to 8 hours to dry to the touch and can take up to 24 hours for a full cure. To ensure durability, it’s essential to wait at least 24 hours before applying a second coat or using the furniture. This curing time allows the paint to harden properly.
Q: What primer is best for oil-based paint on furniture?
A: A high-quality oil-based primer is ideal for furniture to promote adhesion and durability of the topcoat. Look for primers specifically designed for use with oil paints, as they enhance the paint’s finish and extend the lifespan of your project.
Q: Can you mix oil-based and water-based paints on furniture?
A: Mixing oil-based and water-based paints is not recommended as they adhere poorly and can lead to peeling and chipping. For best results, stick to one type of paint to maintain a uniform finish and durability.
Q: How do you clean oil-based painted furniture?
A: To clean oil-based painted furniture, use a soft cloth dampened with a mild soap solution. Avoid harsh chemicals that could damage the finish. Regular dusting and occasional light cleaning will help maintain its beauty without compromising durability.
Q: What is the best finish for oil-based painted furniture?
A: The best finish for oil-based painted furniture is typically satin or semi-gloss. These finishes not only enhance the color but also provide durability and are easier to clean, making them perfect for furniture that sees regular use.
Q: How can I prevent brush strokes when applying oil-based paint?
A: To prevent brush strokes, use high-quality brushes designed for oil-based paints and apply thin, even coats. Consider using a foam roller for larger areas to achieve a smooth finish. Additionally, avoid overworking the paint once it’s applied.
Q: Is oil-based paint durable for outdoor furniture?
A: Yes, oil-based paint is durable for outdoor furniture when properly applied. It provides a tough, weather-resistant finish. Ensure proper surface preparation and consider applying a protective topcoat to prolong its life against the elements.
Q: When is the best time to paint with oil-based paint?
A: The best time to paint with oil-based paint is during moderate weather conditions-ideally between 50°F and 85°F (10°C to 30°C) with low humidity. This ensures optimal drying and curing times for maximum durability.
Feel free to explore deeper insights and techniques in our sections on “Step-by-Step Guide to Applying Oil-Based Paint” and “Maintaining Your Oil-Based Painted Furniture” for a more detailed understanding.
Wrapping Up
Now that you’ve learned how to apply oil-based paint to your furniture for that charming cottage durability, why not put your newfound skills to the test? Remember, embracing this rustic DIY project not only enhances your home’s character but also brings a personal touch to your living space. If you’re feeling inspired, check out our guide on DIY Decor Projects and explore Seasonal Gardening Tips to complement your cozy interiors.
Don’t let your creativity stop here! Sign up for our newsletter to discover more tips and tricks that can transform your home into a warm and inviting haven. Have questions or want to share your experience? Leave a comment below-we love hearing from our community! Dive deeper into the world of cottage living and think about exploring our other resources on Farmhouse Recipes and Architectural Features. Your cozy journey is just beginning!