Imagine transforming your beloved furniture pieces into stunning statement items that reflect your personal style. Applying transfers to furniture is a delightful way to breathe new life into old surfaces, allowing you to incorporate beautiful, artistic designs without the need for extensive tools or experience. In this guide, we’ll explore step-by-step techniques that will help you elevate your home decor with charming, designer-inspired details. Embrace the simple joy of crafting unique home accents that spark conversation and bring warmth to your space. Whether you’re looking to rejuvenate a vintage find or personalize a thrift store bargain, your journey into the world of furniture transfers awaits, promising creativity and heartfelt satisfaction. Let’s dive in and discover how easy it can be to infuse your home with character and style!
How Transfers Transform Furniture Design
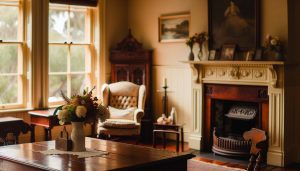
Transforming furniture design with transfers is akin to weaving a story into your cherished home pieces, breathing new life and character into the ordinary. Imagine an old dresser adorned with delicate floral patterns or a worn-out chair revitalized with vibrant, artistic imagery. Furniture transfers serve as a bridge between the charm of rustic living and modern aesthetics, allowing you to express your unique style while crafting a space that feels authentically yours.
One of the most delightful aspects of applying transfers is the ease with which they can elevate everyday items into extraordinary conversation pieces. By thoughtfully choosing themes or colors that resonate with your personal taste, you can effortlessly enhance the atmosphere of your home. Whether it’s vintage botanical prints that echo the nostalgia of cottage gardens or bold geometric designs that embrace contemporary flair, the right transfer can transform a blank canvas into a stunning focal point.
Another beautiful feature of transfers lies in their ability to tell a story-a testament to the blend of rustic charm and creative imagination. As these designs fester on your furniture, they remind us of simpler times while integrating our modern lives. Embracing this practice not only encourages creativity but also fosters a connection to handcrafted beauty. Each piece becomes a reflection of your personality and an invitation for others to step into your world, enveloped in warmth and creativity.
Furthermore, the versatility of transfers means that they can be layered, mixed, and matched with other design elements. You can pair delicate floral transfers with distressed paint techniques or antique finishes, creating a harmonious blend of textures that invite a sense of coziness and nostalgia. This artistic fusion allows you to personalize your home deeply, crafting a comforting sanctuary that resonates with your lifestyle and values. Let your furniture be more than mere objects; let them be a canvas for your artistic expression and a celebration of the simple joys of cottage living.
Essential Materials for Furniture Transfers
Transforming your cherished furniture pieces with transfers can be a delightful journey, and having the right materials at your fingertips is the first step to creating something truly beautiful. As you dive into this creative endeavor, consider the essentials that will elevate your project, bringing a piece of rustic charm and artisan skill into your home.
To begin, you’ll need high-quality furniture transfers. These come in a variety of designs, from vintage florals to modern geometrics, allowing you to select a style that speaks to your heart. Look for brands known for their adherence and durability, ensuring the transfers will stand the test of time and continue to bring joy to your living space.
In addition to your transfers, gather the following materials:
- Adhesive Medium: A mod podge or a similar decoupage medium is essential for ensuring your transfers stick well to the furniture surface and appear seamless.
- Sealer or Topcoat: Protect your newly decorated surfaces with a clear sealer. A water-based polyurethane is ideal, as it provides a durable finish without yellowing.
- Application Tool: A soft cloth, brush, or sponge can help you apply the adhesive evenly and smooth out any bubbles in the transfer.
- Sanding Block: For best results, lightly sand the surface of the furniture before applying the transfer to create a better grip and enhance the overall finish.
- Scissors or Craft Knife: You may want to trim your transfers to fit specific areas of your furniture accurately.
With these materials in hand, you can set the stage for an enjoyable and fulfilling project. Embrace the cozy experience of transforming ordinary furniture into extraordinary pieces that reflect your personal style and the charm of cottage living. As you gather and prepare your materials, imagine how each completed piece will breathe new life into your home, becoming a canvas for your creativity and a cherished part of your decor.
Step-by-Step Guide to Applying Transfers
Transforming your furniture with beautiful transfers can be as rewarding as creating a piece of art. The application process, while straightforward, benefits from a wee bit of preparation and care, making it a delightful venture into the world of DIY decor. Begin by ensuring your piece is clean and free of any dust or oils-this simple step paves the way for successful adhesion. A smooth surface enhances not only the look but also the longevity of your transfer.
Start with your adhesive medium as your best friend. Apply a generous, even coat on the area where your transfer will sit. Lay your transfer design side down, aligning it carefully. Then, using a soft cloth or a smoothing tool, gently rub out any air bubbles, working from the center outwards. This is where the real magic happens, and you can start to see your design come to life. It’s like unwrapping a gift, revealing the beauty hidden beneath a mere piece of wood or fabric.
Once your transfer is in place, it’s time to seal the deal. Apply a coat of your chosen sealer over the transfer, ensuring it is well-covered, but be mindful to avoid using too much product, which could lead to running or smudging. This act not only protects the artwork you’ve created but also adds depth and richness to your piece. Remember, let each layer dry thoroughly before proceeding; patience is a vital ingredient in crafting projects that last.
Finally, once everything is dry and set, take a step back and admire your handiwork. Your furniture now shines with a fresh perspective, reflecting your unique style and cozy cottage living. Embrace this newfound beauty in your home, knowing you’ve infused it with creativity and personal touch, sparking joy in every glance. Your transferred furnishings are more than just decorations; they are stories waiting to be shared in the warm embrace of home.
Creative Techniques for Unique Transfers
There’s a certain magic in transforming a simple piece of furniture into a stunning focal point of your home, and using transfers can unleash your creativity in wonderfully unexpected ways. From delicate florals to rustic typography, the right transfer can elevate your furniture and reflect your personality beautifully. The key to creating unique, eye-catching pieces lies in exploring various creative techniques that allow you to express your individual style while crafting a home that feels warm and welcoming.
One intriguing approach is to layer your transfers. Instead of applying a single design, consider using multiple transfers to create a collage effect. Begin with larger designs as a base, then accent with smaller motifs to add depth and interest. This technique can be particularly effective on furniture like dressers or cabinets, where different sections can feature different designs, creating a story or theme that draws the eye. Additionally, using transparent transfers can allow the wood grain to show through, giving your piece an added dimension while maintaining that natural, rustic charm.
Another delightful technique involves playing with color and texture. Before applying your transfer, consider painting the furniture in a soft, complementary color to enhance the overall appearance. Once the transfer is applied, you might sand around the edges slightly for a weathered look, giving the piece a vintage feel that fits perfectly into a cozy, cottage-style home. Alternatively, using a textured adhesive can create a tactile look that adds further uniqueness to your design.
You can also transform the ordinary into the extraordinary with the help of stencils and mixed media. Try stenciling a subtle background pattern before applying your transfer. This layered look not only adds complexity but also allows for custom color combinations that reflect the feel of your space. Mix materials, such as incorporating fabric transfers and wooden elements together, to create eclectic pieces that are conversation starters, celebrating the beauty of DIY in every corner of your home.
Lastly, embrace the charm of seasonal themes! By swapping out transfers for different seasons, such as pumpkins for fall or playful florals for spring, you can keep your furniture fresh and reflective of the time of year. It not only brings in a festive spirit but also provides an opportunity to continually engage with your craft, inviting creativity into your day-to-day life.
With these creative techniques, your furniture transfers will not only breathe new life into your decor but also tell a story of your unique journey in the world of design, making each piece a cherished memory within your cozy cottage. Embrace the joy of creating beautiful things that feel like home, and let your imagination run wild!
Incorporating Designer Details into Your Home
through furniture transfers can turn everyday pieces into stunning showcases of creativity and style. Imagine walking through a cozy, rustic cottage where every furniture item tells a story, reflects personal taste, and captures the essence of your beloved home. By choosing transfers that resonate with your aesthetic, you can create a harmonious blend of charm and sophistication that elevates any space.
One effective way to integrate those designer details is to carefully select transfers that complement your existing decor. For instance, if your home boasts vintage elements, look for transfers featuring classic designs like damask patterns or nostalgic florals. These can effortlessly accentuate the beauty of an antique dresser or a reclaimed wood table. If contemporary chic is more your style, consider bold geometric designs or elegant typographic transfers to add a modern twist to your furniture. Striking this balance between the old and new creates a layered, inviting atmosphere that feels both lived-in and stylish.
Color selection also plays a vital role in harmonizing your transfers with your furnishings and walls. Choose transfer colors that either contrast beautifully or blend seamlessly with your existing palette. For example, soft pastels can add a touch of whimsy to a rustic piece, while deep jewel tones can infuse a sense of elegance into simple furnishings. To further enhance your design, think about painting the furniture in a soft shade that complements the transfer. This technique not only provides a cohesive look but also allows you to express your personality in a subtle yet impactful way.
Engaging with seasonal themes can also lead to delightful designer details. As the seasons change, your furniture can be refreshed with appropriate transfers-perhaps delicate snowflakes for winter, vibrant leaves for autumn, or lively blooms for spring. This practice not only keeps your decor fresh and exciting but also fosters a connection between your home and the rhythm of nature, creating a true sense of warmth and comfort.
By thoughtfully selecting and applying transfers, you can turn ordinary furniture into bespoke creations that reflect your unique style, while also fostering a cozy and welcoming atmosphere in your home. Embrace the joy of this creative endeavor, and let each piece you transform serve as a testament to your craftsmanship and affection for the quaint charm of cottage living.
Troubleshooting Common Transfer Application Issues
Transferring designs onto furniture can be a delightful way to add character and charm to your pieces, but sometimes the process doesn’t go as planned. Whether you’re a seasoned DIY enthusiast or just starting out, encountering issues during the application of transfers can be frustrating. However, with a little patience and know-how, you can troubleshoot common problems and achieve stunning results that truly reflect the warmth and character of cottage living.
One of the most frequent challenges faced during the transfer application is bubble formation. Bubbles can appear beneath the transfer when adhesive isn’t evenly applied or when air gets trapped during the placement. To avoid this, it’s crucial to use a soft cloth or a brayer to gently smooth out the transfer as you apply it. If bubbles do form, you can often use a pin to gently puncture them and then press down on the area to eliminate excess air. Another essential tip is to work from the center outwards, ensuring that you push air toward the edges rather than trapping it under the transfer itself.
Another common hurdle is the transfer not adhering properly to the surface. This can happen if the surface is too slick or if it wasn’t cleaned thoroughly before application. Always ensure your furniture piece is clean and dry, removing any dust or grease that could hinder adhesion. If you find that the transfer is lifting at the edges post-application, you can reapply some adhesive with a small brush, gently press it down, and cover it with a soft cloth to secure it. Allow it to set according to the adhesive’s instructions, and be patient-the magic is in the details!
Finally, sometimes the colors may not appear as vibrant as anticipated after applying the transfer. Environmental factors such as lighting can affect color perception. If your transfer seems lackluster, consider finishing it with a clear coat of sealer that can enhance the colors and provide additional protection. A matte or satin finish can preserve that cozy, rustic aesthetic while ensuring your piece remains a beloved center of attention in your home.
Embrace these moments as part of the creative journey, and remember that every project is an opportunity to learn and grow your skills. The beauty of cottage living lies in the imperfections, each piece reflecting your personal touch and story. Keep experimenting, and you’ll discover the perfect methods that allow your furniture transfers to flourish in all their charming glory.
Seasonal Inspiration: Transfer Ideas for Every Month
Embracing the changing seasons is not only a delightful way to connect with nature but also an inspiring opportunity to refresh your home decor through furniture transfers. Each month brings its own palette, textures, and themes, inviting you to reflect the beauty of the world outside in your living space. Whether you’re welcoming spring blooms or cozying up to the warm tones of autumn, there’s a transfer idea to enhance your furniture and encapsulate the spirit of each season.
January: Fresh Beginnings
Start the year with revitalizing transfers featuring soft winter scenes, snowflakes, or inspirational quotes. Use these designs on a simple side table or a kitchen island to infuse your space with positivity as you welcome a new beginning. Consider white or pastel colors that symbolize fresh starts, perhaps highlighted by icy blues or soft greens.
February: Cozy Romance
February brings a hint of romance, making it the perfect month to incorporate heart motifs or elegant florals. Apply vintage-style transfers to dressers or nightstands, creating a dreamy atmosphere that invites love into your space. Think rich reds or soft blush hues that evoke warm feelings and comfort, perfect for snuggling up during chilly evenings.
March: Spring Awakens
As spring begins to bloom, consider using botanical transfers featuring foliage or spring flowers like daffodils and tulips. These lively designs will breathe life into furniture pieces, transforming a plain cabinet into a vibrant statement. Pair these colorful transfers with light, airy colors to celebrate the rejuvenation of nature that March heralds.
April: Earthy Textures
April is the month of expressing the beauty of natural textures. Transfers depicting stones, bark, or earthy tones can be charmingly added to rustic furniture. This aesthetic blends beautifully with reclaimed wood, bringing the outdoors inside and aligning your decor with the earth’s renewal process.
May: Flourishing Gardens
May is synonymous with blooming gardens, and using floral transfers can capture this essence beautifully. Think about creating an accent table or chair that showcases lush peonies or hydrangeas. Soft pastels or bold hues can bring a sense of warmth and joy, making your home feel like a blossoming sanctuary.
June: Summer Vibes
With June’s arrival, embrace transfers that reflect the vibrant energy of summer. Nautical themes, sunflowers, or even whimsical summer quotes can be perfect for accentuating outdoor spaces. Apply these to patio furniture to create an inviting environment for gatherings and relaxation under the sun.
July: Patriotic Spirit
During July, consider infusing your home with a touch of patriotism. Transfers featuring stars and stripes can be applied to furniture pieces in your entry hall or living room. Red, white, and blue designs evoke a sense of community and celebration, perfect for summer gatherings.
August: Rustic Retreat
As summer winds down, evoke rustic charm into your home with transfers that showcase wheat, pinecones, or other natural elements. These earthy designs can perfectly adorn items like a dining table or kitchen cabinets, creating a cozy retreat for family gatherings and meals.
September: Autumn’s Arrival
As leaves begin to turn, rich oranges and browns move into focus. Transfers featuring pumpkins, acorns, or autumn leaves can reflect the beauty of this season. Whether on a coffee table or a sideboard, these additions will invite warmth and comfort, mirroring the seasonal harvest.
October: Spooky Elegance
October brings a delightful mix of whimsy and spookiness. Use transfers that showcase subtle Halloween themes, such as owls, bats, or vines, to create a cozy yet festive look. Dark saturations can bring a mysterious air to furniture while maintaining the inviting feel of cottage living.
November: Thanks and Giving
In November, transfers that reflect gratitude, such as thankful phrases or cornucopia designs, can create a warm atmosphere, especially on dining pieces. Warm golden hues alongside rustic designs can make your home feel inviting as family and friends gather for Thanksgiving celebrations.
December: Holiday Cheer
Finally, December is a time for festivity. Transfers that embody winter wonderlands or holiday cheer can adorn your furniture beautifully. Snowflakes, holly, or even cozy winter scenes can all lend your home a magical touch, making it a delightful haven for both relaxation and celebration during the holiday season.
By thoughtfully selecting transfers each month, you can create a home that resonates with the seasons while showcasing your unique style. Let the charm of cottage living inspire you to celebrate the change, bringing warmth and personality into every corner of your space.
Showcase Your Style: Customizing With Transfers
Transforming your furniture with transfers is a delightful way to infuse your personal flair while celebrating the charm of cottage living. With endless options for designs, colors, and styles, you can create unique pieces that reflect your personality and home’s character. Imagine a rustic coffee table adorned with delicate floral motifs that echo the gardens of your childhood or a sideboard embellished with whimsical patterns that capture the playful spirit of summer. These transformations invite you to express yourself creatively, crafting spaces that feel both welcoming and distinctly yours.
To effectively showcase your style, consider mixing different types of transfers based on your preference and the theme of your existing decor. For instance, combining vibrant botanical transfers on a neutral base can create a stunning focal point, while soft, muted designs may lend an air of tranquility perfect for a serene reading nook. When selecting images, keep in mind the color palette and texture of the furniture to ensure harmony. Layering transfers with additional embellishments-like stenciling or hand-painted details-can enhance the overall effect, adding depth and character without overwhelming the eye.
Practical Tips for Customizing Your Furniture:
- Choose transfers that resonate with the mood you want to evoke; vibrant colors for lively spaces or soft hues for a calming effect.
- Experiment with placement-transfers can be strategically applied to corners, drawer fronts, or even the edges for a delightful surprise.
- Seal your transfers with a protective finish to endure everyday wear, ensuring your unique designs remain vibrant and intact.
Additionally, consider seasonal themes as inspiration for your transfers. For every time of year, reflect the natural beauty outdoors, bringing in elements of nature to enhance your living space. Whether it’s snowflakes in winter or sunflowers in summer, adapting your furniture to mirror the changing seasons can keep your home feeling fresh and connected to the world outside. The joy of utilizing transfers is not just in decorating; it’s about creating narratives in your home that can delight both residents and guests alike, weaving stories of comfort, creativity, and a deep connection to nature. As you embark on this creative journey, remember: there are no hard rules-just the joy of bringing your vision to life.
Mixing Transfers with Other Design Elements
Mixing different design elements can elevate your furniture transfers from simply beautiful to truly breathtaking. Imagine walking into a room and experiencing an artistic creation that invites you to explore further, where each piece tells a story, and every detail harmonizes to create a cozy, rustic haven. By thoughtfully incorporating various elements, you can create a tapestry of textures and styles that embody the warmth and charm of cottage living, encouraging a sense of belonging and comfort.
Begin by contemplating the balance between your transfers and the existing features in your space. Consider layering different finishes and materials to achieve a cohesive look. For example, if you have a wooden table adorned with botanical transfers, pair it with woven textures like a jute table runner or hand-spun linen napkins. The natural fibers will complement the organic feel of the transfers, creating an inviting dining experience. You can also utilize colors from your transfers to inform your choices in upholstery or decorative accents, unifying your theme without overwhelming the senses.
Accentuating with Paint and Texture
Don’t hesitate to delve into bold strokes of paint to highlight your transferred designs. A piece with soft floral transfers can beautifully contrast against a painted base of rich sage green or airy sky blue, bringing depth and vibrancy. Decoupage techniques can also be applied to mix textures; layering chippy paint with delicate transfers creates a rustic look while allowing the raw beauty of the furniture to show through. Adding stencils or hand-painted details adjacent to your transfers can further enhance their charm while personalizing your pieces.
- Embrace Color Harmony: Use colors within your transfers to guide the palette of your room; infused hues contribute to a seamless flow.
- Pair Different Patterns: Don’t shy away from combining floral transfers with subtle plaid or striped textiles for a layered yet balanced aesthetic.
- Incorporate Natural Elements: Style with potted plants, wood accents, or stoneware that resonate with the transfer designs to cultivate a cohesive environment.
While , let your intuition guide you. Each piece you choose to incorporate should resonate with your unique style and foster a space filled with joy and comfort. This harmonious blend is the essence of cottage charm, where handcrafted beauty and community connections thrive, inviting all who enter to experience the heartwarming ambience of your home.
Maintaining and Caring for Transferred Furniture
To ensure your transferred furniture remains a cherished centerpiece in your cozy cottage, maintaining its beauty and integrity is essential. Just like nurturing a beloved garden, gentle care goes a long way in preserving the design details of your transferred pieces. Regular light dusting with a soft, dry cloth will keep your surfaces clean without damaging the delicate transfers. Avoid using harsh chemicals or abrasive materials, as these can fade or scratch the designs, diminishing their charm.
It’s beneficial to establish a seasonal cleaning routine. For instance, during spring cleaning, take the time to inspect your furniture for any signs of wear. If you notice edges lifting or minor peeling on your transfers, don’t fret; they can often be lovingly repaired. A small brush of mod podge or clear acrylic sealer can help secure any fragile areas and refresh the look of your furniture. Consider applying a fresh coat of sealer annually to protect against moisture and UV rays, preserving the vibrancy of your transfers for years to come.
Prolonging the Life of Your Furnished Décor
In addition to cleaning and repairs, it’s wise to place your transferred furniture in spots that minimize exposure to direct sunlight and humidity. Vintage pieces paired with beautiful transfers can fade over time if consistently exposed to bright light, so positioning them strategically can extend their lifespan. Additionally, incorporating elements like coasters under hot dishes or decorative trays can help prevent scratches and water damage, maintaining that charming rustic allure.
As you strive to preserve your transferred treasures, remember that every scuff or scratch can tell a story, adding to the character of your home. It’s about creating an inviting atmosphere that reflects your personality and creativity. So, enjoy the journey of caring for your furniture, celebrating simple joys, and continuing to weave together the threads of handcrafted beauty and cozy living.
Success Stories: Transformative Transfer Projects
The magic of furniture transfers lies in their ability to transform ordinary pieces into stunning statement items that resonate with personal style and creativity. One inspiring success story comes from a community in a quaint cottage filled with stories. A homeowner took an old, weathered coffee table and turned it into a charming centerpiece for the living room using vintage floral transfers. After carefully sanding the surface to create a smooth canvas, they applied a coat of chalk paint in a soft pastel hue, allowing the flowers to whisper their beauty against the delicate color. This not only revived the table but also added a touch of nostalgia and warmth, reminiscent of a summer garden.
In another remarkable transformation, a couple decided to breathe new life into an inherited dresser that had seen better days. By using bold geometric transfers in contrasting colors, they created a modern yet rustic appeal. The process involved carefully measuring and placing the transfers on each drawer, ensuring alignment that provided a pleasing visual flow. The couple shared their journey via a local craft group, creating ripple effects of inspiration, encouraging others to embark on their DIY adventures. This project not only turned their dresser into a unique focal point in their bedroom but also fostered community spirit as they exchanged tips on blending contemporary designs with traditional furniture.
When it comes to children’s furniture, transfers can ignite a world of imagination. A DIY enthusiast transformed a plain wooden toy chest with playful animal designs that delighted their young ones. By engaging children in the application process, not only did they spend quality time together, but they also nurtured creativity and ownership. The bright colors and whimsical illustrations brought a sense of joy into their playroom, bridging the gap between practicality and playful design.
As you embark on your own transformative journeys, remember that the beauty of using transfers lies in their versatility and the stories they tell. Whether you’re revamping antiques or freshening up modern pieces, each project offers an opportunity to reflect your unique sense of style while creating a warm and inviting atmosphere in your cozy abode. Celebrate these transformative moments, and let your furniture be a canvas of memories, creativity, and charm, inspiring all who enter your home.
Frequently Asked Questions
Q: What are the best surfaces for applying furniture transfers?
A: The best surfaces for applying furniture transfers include smooth, clean, and well-prepared wood, metal, or glass. Ensure the surface is free of dust, grease, and old finishes to achieve a successful transfer. Refer to the “Essential Materials for Furniture Transfers” section for more preparation tips.
Q: How can I prevent bubbling when applying furniture transfers?
A: To prevent bubbling during transfer application, use a smoother tool like a credit card to press down firmly and evenly onto the transfer. Start from the center and work your way outwards. This technique helps eliminate air pockets. For troubleshooting more issues, check the “Troubleshooting Common Transfer Application Issues” section.
Q: Can I use furniture transfers on painted surfaces?
A: Yes, furniture transfers can be used on painted surfaces, provided they are fully dry and cured. Lightly sanding the paint will help the transfer adhere better. Make sure to check compatibility with your specific paint type for the best results.
Q: How do I seal furniture transfers after application?
A: Sealing furniture transfers is crucial for durability. Use a clear water-based sealer or topcoat after the transfer has dried completely. Apply it gently with a brush or spray to avoid disturbing the transfer. See “Maintaining and Caring for Transferred Furniture” for detailed sealing options.
Q: How do I achieve a vintage look with furniture transfers?
A: To achieve a vintage look with furniture transfers, choose designs that feature classic motifs or distressed finishes. Layer them with paint techniques such as dry brushing or antiquing. This combination can bring your furniture to life with a charming, rustic feel, perfect for cozy cottage living.
Q: Is it possible to reposition a furniture transfer after application?
A: Once a furniture transfer is applied and adhered, repositioning it is challenging and may damage the transfer. It’s best to plan your placement carefully before pressing down. If you want flexibility, consider practicing the layout with a mock transfer in advance.
Q: What type of paints work best with furniture transfers?
A: For optimal adhesion with furniture transfers, chalk paints and acrylic paints work best. They provide a matte finish that enhances the transfer’s appearance and durability. Explore more details in the “Mixing Transfers with Other Design Elements” section to see how to integrate paint styles effectively.
Q: Can I create my own designs for furniture transfers?
A: Yes, creating your own designs for furniture transfers is very possible! Use stickers or printable transfer paper with inkjet printers. Create custom images or patterns that reflect your style for a truly personalized touch. For more creativity, dive into “Showcase Your Style: Customizing With Transfers.”
Insights and Conclusions
As you embrace the transformative art of applying transfers to your furniture, remember that this process not only enhances the beauty of your space but also reflects your unique style. Don’t wait to create those stunning designer details at home-start your project today! If you’re eager for more inspiration, check out our guides on rustic DIY decor projects and seasonal gardening tips to complement your new creations.
Have questions or need assistance? Feel free to drop a comment below, and don’t forget to subscribe to our newsletter for the latest ideas and updates on cozy cottage living. Transform your home into a haven of charm and creativity, and let these handcrafted beauties tell your story! Your cozy, rustic lifestyle begins now; dive deeper into our community and explore more about architecture and DIY ideas that celebrate simple joys.