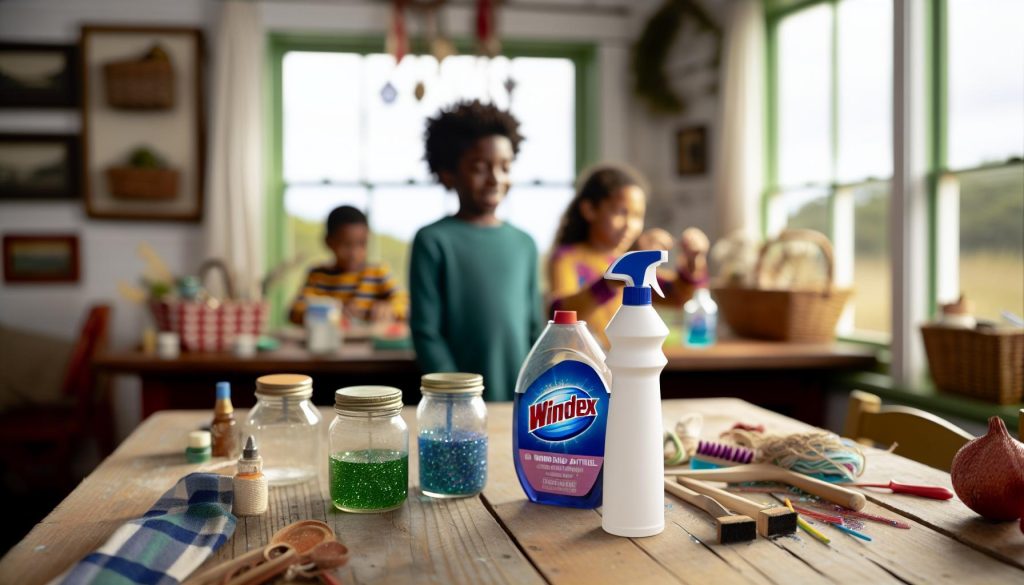
Crafting slime has become a delightful favorite among kids, blending creativity and fun in one gooey package. But did you know that some everyday household items can serve as slime activators? In this guide, we’ll explore the intriguing question: Is Windex a slime activator? With its bubbly texture and vibrant colors, slime not only sparks imagination but also offers a wonderful opportunity for hands-on learning and sensory play. If you’re a parent or caregiver seeking engaging activities for your little ones, understanding how different ingredients work in slime-making can open up a world of DIY fun. So let’s dive into the cozy art of crafting slime and discover how Windex might just elevate your children’s next crafting adventure!
Is Windex a Safe Slime Activator?
Is Windex a popular choice for slime making? While some adventurous crafters have experimented with it, using Windex as a slime activator is mixed in terms of safety and effectiveness. Windex contains ammonia and various cleaning agents that may not be suitable for children or safe to use in slime recipes intended for play. The key to a successful slime lies in balancing fun and safety, especially in a cozy cottage environment where little hands are often eager to dive into DIY projects.
When considering alternatives for slime activators, it’s essential to think about ingredients that are non-toxic and kid-friendly. Natural options like contact lens solution paired with baking soda or safe crafting glue work wonders without the concern of chemical exposure. These alternatives allow for safe experimentation, ensuring both enjoyment and peace of mind for parents. Additionally, using simple household products fosters creativity and resourcefulness, aligning beautifully with cottage living values.
For those crafty afternoons filled with laughter and gooey delights, remember that creating a safe, enjoyable environment is just as important as the slime itself. Engaging children in the process – from mixing to customizing their slime – adds to the joy of cottage life and nurtures physical and imaginative skills. So, while Windex may be a tempting shortcut, sticking to safe, tried-and-true activators makes for a wholesome crafting experience that everyone will cherish.
Exploring the Science Behind Slime Ingredients

Understanding the science behind slime ingredients can turn an ordinary crafting session into a magical exploration for kids. At its core, slime is all about chemistry-the interaction between different substances to create that delightful, gooey texture. While traditional recipes often rely on combinations such as glue and borax, many crafters have branched out into experimental territory, including unconventional ingredients like Windex. However, this raises important questions about safety and effectiveness.
To create slime, a key component-typically a liquid glue-is combined with a thickening agent. In many recipes, this agent is a cross-linking polymer; substances like borax or contact lens solution with baking soda help to bond the molecules together, turning the liquid into a stretchy, pliable mass. The science behind this transformation lies in the polymer chains found in glues. When the cross-linking agent is introduced, it links those chains, creating a thicker consistency. Grab some old-school white glue or clear glue for your base; both work wonderfully and offer unique textures for your creations!
For cottage crafters, the allure of using common household items in slime recipes can foster creativity and resourcefulness. Instead of venturing into potentially unsafe territory with Windex-a cleaner that contains ammonia-consider using:
- Contact lens solution: when paired with baking soda, this serves as a safe and effective activator.
- Liquid starch: another popular choice that creates wonderfully stretchy slime.
- Homemade options: various recipes use cornstarch, water, and even gelatin for different textures.
Experimenting with these safe alternatives not only ensures a fun and engaging crafting experience but also connects children to the cozy spirit of cottage life-where simplicity and nature reign supreme. By teaching kids the fundamentals of slime-making, they learn valuable lessons in chemistry, problem-solving, and, most importantly, the joy of creating something with their own hands. In this way, you’re not just making slime; you’re nurturing young minds and encouraging creativity in the comforting embrace of cottage living. Embrace the journey and let every sticky, gooey creation serve as a reminder of the simple joys found in crafting together!
The Best Types of Slime for Cottage Kids

In the heart of cottage life, where creativity thrives amidst nature’s beauty, slime-making emerges as one of the most delightful projects for young hands. Ideal for sparking imaginations and fostering experimentation, slime can come in various textures and colors, each providing a unique sensory experience for children. Choosing the best types of slime can elevate the fun while ensuring a safe crafting environment.
Among the favorites for cottage kids, fluffy slime stands out with its light, airy consistency. This version is often created using shaving cream mixed with glue and an activator. The result is a puffy delight that’s not only tactile but also visually enchanting as it expands with each squish. For those little ones who enjoy a sparkly twist, incorporating glitter into the base will make every session feel like a magical adventure.
Another captivating option is butter slime, which achieves a smooth, buttery texture thanks to the addition of softening agents like lotion or even clay. This type of slime is particularly satisfying for kids who love the tactile experience of manipulating their creations. Parents can involve children in the blend of different colors-think pastel shades or even earthy tones that resonate with the rural charm of cottage living.
Combining educational fun with crafting, edible slime offers a safe alternative for younger children who might be tempted to taste their creations. Simple recipes that use ingredients like cornstarch and water can lead to a playful exploration of texture and taste. Not only does this version remove any concerns about ingredients, but it also introduces children to basic food science in a delightful way.
Here are a few types of slime that crafters in cottages can enjoy:
- Fluffy Slime: Light and airy, perfect for squishing.
- Butter Slime: Smooth and creamy, great for tactile play.
- Edible Slime: Safe and tasty, ideal for younger crafters.
- Traditional Slime: Basic glue and borax mix for classic fun.
Encourage your crafters to personalize their slime with scents or essential oils, making the process even more immersive. Perhaps a hint of lavender to calm them down after an energetic day of play? The act of making slime can become a cherished ritual, where each batch teaches kids about textures, colors, and creativity. Ultimately, embracing these cozy crafting moments in a rustic home setting enriches the family bond, celebrating the simple joys of togetherness while creating delightful, messy masterpieces to cherish for days to come.
Creative DIY Slime Recipes Using Windex
In the delightful world of cottage crafting, where nature-inspired creativity blooms, using Windex as a slime activator presents an intriguing option for young makers. This classic window cleaner can provide a unique twist to the traditional slime-making process, allowing kids to experiment while maximizing the fun. However, it’s essential to approach this with a gentle hand, as safety and enjoyment go hand in hand.
For those eager to dive into the slime-making adventure, here is a simple recipe that utilizes Windex to create a soft and stretchable slime. Combine equal parts of clear school glue and Windex in a bowl, stirring them together until fully blended. The ammonia in the Windex acts as a powerful activator, bringing the mixture to life and allowing for that satisfying squishiness kids love. For an added touch of enchantment, allow your little crafters to choose food coloring or glitter to personalize their creations, transforming a basic recipe into a bespoke masterpiece that reflects their personality.
- Ingredients:
- 1 cup clear school glue
- 1 cup Windex
- Optional: food coloring or glitter
- Instructions:
- Mix the clear glue and Windex in a bowl.
- Add food coloring and glitter, if desired, and mix until combined.
- Stir until the slime begins to clump and pull away from the bowl, then knead with your hands until smooth.
Keep in mind that while Windex can be a fun activator, it is crucial to supervise children during the process, emphasizing that it is not safe to ingest. This ensures that the experience remains enjoyable and educational, focusing not only on crafting but also on learning the importance of handling materials safely. Embrace the laughter and creativity filling your cozy spaces as children gleefully manipulate their colorful slimes, crafting not just with their hands but also with their imaginations.
Alternative Slime Activators for Creative Crafters
In the enchanting world of crafting, the search for alternative slime activators can lead to delightful discoveries that enhance the slime-making experience for kids and parents alike. While Windex is a popular option due to its ammonia content, there are several other household ingredients that can spark creativity and create that satisfying squelch we all cherish.
For a charming alternative, consider using liquid laundry detergent. Its ability to activate slime is remarkable and usually results in a stretchy, pliable texture that’s perfect for hours of fun. To get started, mix together equal parts of clear school glue and liquid laundry detergent, then stir until the slime begins to clump. Allow the kiddos to add food coloring or tiny beads for texture, transforming each batch into a unique creation that reflects their personalities.
Another exciting option is contact lens solution paired with baking soda. This combination provides a safe, easy-to-find activator that yields fantastic results. Simply mix 1 cup of clear school glue with 1/2 teaspoon of baking soda, then slowly add contact lens solution until the mixture forms a delightful slime. This method not only teaches kids about measurements and chemistry but also ensures they have a blast experimenting with different colors and add-ins, from glitter to small toys.
Lastly, cornstarch can be introduced as a fun textural element. By mixing cornstarch with a little water and food coloring, you can create an oobleck-like substance that is both slippery and interesting to play with. This edible alternative is perfect for younger crafters and a great way to explore the concept of non-Newtonian fluids, providing an educational twist to their crafting adventure.
With these alternative activators, your cottage crafting sessions can feel fresh and inspiring, offering endless possibilities for slime-making fun and creativity! Embrace the warmth of home and the joy of crafting as little crafters concoct their very own gooey masterpieces, filling your cozy corners with laughter and imagination.
Engaging Cottage Crafts for Kids: Slime Edition
In the heart of cottage life, where imaginations run wild and creativity blossoms, crafting slime is a beloved activity among kids. The gooey, stretchy textures offer endless fun and tactile delight, making it a perfect choice for family crafting sessions. Engaging in these activities not only nurtures creativity but also fosters quality time spent together, filled with laughter and exploration.
When it comes to making slime, many parents wonder about the safety and effectiveness of various activators, including Windex. While some enthusiasts swear by its ammonia content for achieving that perfect slime consistency, it’s essential to prioritize safety, especially for younger hands. Consider opting for more kid-friendly alternatives that are easy to manage and safe to use. Ingredients like liquid laundry detergent, contact lens solution, and cornstarch are not only effective but also reduce any potential health concerns. Embracing these alternatives ensures that your crafting sessions are filled with joy without the worry of harsh chemicals.
Creating slime is not just about the end product; it’s about the process of making it together. Encourage kids to express their unique personalities through the addition of vibrant colors, sparkles, and different textures. Maybe set up an inspiring crafting space on your cottage porch where natural light streams in, creating a cozy atmosphere. Gather some clear school glue, mix in the chosen activator, and watch as the magic unfolds. Allow children to create their own slime masterpieces while learning about mixing, measuring, and the fascinating science behind the combinations they’re playing with.
Remember, the true essence of cottage crafting lies in the shared experience and the memories created along the way. As families bond over gooey creations, they embrace the joys of rustic life-filled with laughter, learning, and the warmth of home. So, gather your supplies, let creativity soar, and enjoy the delightful world of slime-making together!
Tips for Making Slime with Kids Super Fun
Engaging in slime-making with kids can be a delightful adventure that sparks imagination and creativity. To enhance the experience and ensure it’s a fun, memorable activity, consider incorporating a few thoughtful strategies that turn a simple craft into a cherished family tradition. Begin by transforming your workspace into a cozy, inviting atmosphere. Lay out colorful sheets of newsprint or use a picnic blanket on the porch, allowing the natural light to illuminate your crafting session. This not only keeps the mess contained but also encourages outdoor engagement, fostering a connection with nature as you craft together.
Next, make slime-making interactive and educational by introducing various themes and colors. For example, encourage kids to create “ocean slime” with blue and green hues, sparkling glitter, and tiny seashells. Alternatively, a “galaxy slime” with purples, blacks, and silvers can lead to fascinating discussions about stars and space! Let the children choose their colors and add-ins, giving them the freedom to express their creativity and individuality. This helps them to learn about mixing colors and the science behind slime as they observe changes and textures.
To keep the energy and excitement high, establish a friendly competition or collaborative effort. Set challenges such as who can create the stretchiest slime or the most unique texture. You could also have them work in pairs to concoct the ultimate slime blend. By fostering teamwork and light-hearted fun, you not only deepen family bonds but also create moments filled with joy and laughter.
Finally, wrap up your crafting session by allowing each child to share their creation with the group. Encourage storytelling about their slime’s ‘powers’ or where it’s from, further stoking their imagination. Celebrate everyone’s unique creations with a small sharing ceremony, reinforcing that the process of making is just as important as the final product. In this warmth of cottage life, you’re not just crafting slime-you’re crafting memories that last a lifetime.
How to Customize Your Slime Craft Experience
Engaging in the art of slime-making is not just about the end product; it’s an opportunity to weave in creativity, science, and joy into the experience for kids. To truly customize your slime crafting journey, consider introducing a range of interactive elements that spark curiosity and creativity. Whether using Windex as a unique activator or exploring alternative options, tailoring the slime-making process allows children to express their individuality while crafting cherished memories.
One delightful method to personalize your slime experience is to create themed projects. Imagine a “Nature Slime” where kids add bits of dried flowers or leaves, transforming ordinary slime into a sensory-rich adventure. Or try a “Seasonal Slime” that reflects the colors and textures of the current season-think warm hues for autumn or frosty blues and whites for winter wonder. By encouraging children to incorporate natural elements or seasonal decor, you cultivate an appreciation for nature’s beauty while fostering their artistic skills.
Another effective way to customize is by varying the ingredient ratios and activators. While Windex can produce a stretchy and fun slime, don’t hesitate to experiment with different ratios of glue, water, and activators to achieve diverse textures. Pair this with vibrant food dyes or glitter to enhance the sensory experience. Encourage discussions about the properties of the ingredients and how they interact-instilling not just creativity but also scientific inquiry, as children observe the delightful transformations.
Lastly, consider a collaborative challenge or competition to keep spirits high and engage social skills. Set up stations where each child can try their hand at creating different variations of slime, or host a friendly contest to see who can make the most colorful or unique slime blend. This not only reinforces teamwork and cooperation but also allows for joyful laughter and shared accomplishments.
In the heart of cottage life, each slime session becomes more than just a craft; it evolves into a joyous ritual, enhancing connections among family and friends. Through custom themes, interactive learning, and collaborative fun, you’re not just crafting slime-you are nurturing creativity, bonding over shared experiences, and embracing the simple, rustic joys of life.
Addressing Common Slime-Making Mistakes
Creating slime can be an exhilarating, creative experience for kids, but sometimes the journey may not go quite as planned. Missteps can lead to less-than-perfect slime, leaving crafters feeling disappointed. Understanding common mistakes can turn these moments into opportunities for learning and laughter, enhancing the joy of slime-making in a cottage setting.
One of the most frequent errors is using the wrong ratio of activators to glue. When using Windex as a slime activator, it’s essential to start with small amounts and gradually increase until the desired consistency is achieved. Too little activator can result in gooey, unformed slime, while too much can lead to a stiff and rubbery texture. Encourage kids to experiment in small batches before committing to larger quantities, turning it into a playful science experiment of trial and error.
Another common pitfall occurs when children overlook the necessity of mixing thoroughly. If the ingredients aren’t combined well, patches of sticky glue may remain, preventing the slime from reaching its full stretchy potential. A good rule of thumb is to mix in a large bowl and use a sturdy spoon or spatula, allowing everyone to take turns and feel involved in the process. This hands-on approach not only makes for a better slime but also cultivates teamwork and patience within the group.
In the excitement of crafting, it’s easy to forget the importance of patience and waiting for the slime to reach its optimum consistency. Kids may be tempted to rush the process, but allowing the slime to rest can make a remarkable difference. Just like a fine bread dough, giving slime time can enhance its stretchiness and overall performance. Suggest a friendly waiting game or activity while they wait, perhaps storytelling or a seasonal craft, to keep spirits high.
Lastly, safety should not be overlooked. A common mistake in slime-making, particularly when using unconventional ingredients like Windex, is neglecting to read labels. It’s vital to ensure that all components used are safe and appropriate for children. Always conduct a patch test if trying new ingredients, and discuss safety guidelines, emphasizing the fun of crafting responsibly. By fostering these discussions, you not only dive into a creative project but also instill a sense of care and awareness about the materials they’re using.
In essence, while the path to slime perfection may include a few slip-ups, these small misadventures contribute to the greater experience, creating cherished memories and instilling valuable lessons about patience, teamwork, and safety in a warm cottage atmosphere. Embrace the artistic chaos, celebrate each unique creation, and above all, enjoy the process!
Safety Tips for Kids’ Craft Projects
Crafting can be a delightful adventure for young crafters, filled with creativity and hands-on learning. However, especially when using a product like Windex as a slime activator, safety must take center stage. Understanding how to ensure a secure crafting environment not only protects our little artists but also enhances the overall enjoyment of their creative experience in the cozy atmosphere of the cottage.
One of the most crucial aspects of safe crafting is reading labels. Always take the time to examine what’s inside the products being used. While Windex can be a fun activator, it’s essential to verify that the version you’re using doesn’t contain harmful chemicals or additives that could pose risks to children. Consider opting for gentler alternatives when possible, and involve the kids in the selection process to teach them the importance of being mindful of ingredients. This practice can turn a simple trip to the store into an exciting lesson in safety.
Create a secure crafting workspace by laying down protective coverings-think newspaper or an old tablecloth. This not only protects surfaces but also allows for easier cleanup, making the process less stressful for everyone involved. Additionally, designate an area for supplies that’s out of reach of younger siblings or pets. Safety goggles and gloves can also add an extra layer of protection, giving children the sense that they are true scientists in their crafting endeavors!
Another vital component is supervision and encouraging good habits. Always have an adult present during crafting times, especially if new materials are being used. Reinforce the idea of keeping hands away from the face and not ingesting any crafting materials, regardless of how enticing they may look or smell. By establishing these protocols, children can learn the importance of safety while enjoying the freedom of unleashing their creativity.
Incorporating these safety tips into your crafting sessions can foster not only a sense of responsibility but also a deeper appreciation for the art of making. As children engage in their inventive processes, remind them that creating is as much about the joy of exploration as it is about the final product. Embrace the beautiful mess, cherish the laughter shared, and let the spirit of cottage life fill your hearts with warmth and fun as you craft together.
Embracing the Joy of Slime-Making in Cottage Life
Crafting slime in a cozy cottage setting can transform an ordinary afternoon into a delightful adventure. Imagine children giggling with excitement as they mix colorful ingredients, watching the gooey concoction come together in their hands. This simple yet joyful activity is not only a way to unleash creativity but also an opportunity to bond with family and friends amidst the rustic charm of cottage life.
Incorporating slime-making into your cottage crafts can be incredibly rewarding. The generous amounts of tactile engagement captivate young minds, stimulating both sensory exploration and imagination. Gather your little crafters and let them customize their slimes with natural colorants like beet juice or spirulina, fostering not just creativity but also an appreciation for nature’s palette. Adding aromatic essential oils can turn the experience into a fragrant journey, filling the cottage with comforting scents while enhancing the sensory experience.
A touch of adventure can also be added by organizing a themed slime-making day. Perhaps a mermaid lagoon theme where shades of blue and green prevail, or a galaxy slime exploration utilizing glitter and dark hues to mimic the night sky. Be sure to document these moments with photographs, capturing the essence of joy and collaboration; these memories can be cherished conversations around the fireplace on chilly evenings.
It’s important to embrace the inevitable mess that comes along with crafting; after all, some of the best memories are made from spills and laughter. Create a decorative cleanup station filled with aprons, wipes, and a cheerful dustpan decorated with stickers for the little ones to use once the fun is over. In this way, you not only craft unique slime creations but also deepen familial bonds through shared laughter, creativity, and the simple pleasures that embody cottage life. As the sun sets on another beautiful day, take a moment to reflect on the joy that these small, shared experiences bring to your home.
Frequently Asked Questions
Q: Can Windex be used as a slime activator?
A: Yes, Windex can be used as a slime activator due to its ammonia content, which helps bind the ingredients together. However, it’s essential to test on a small scale to ensure the slime’s texture meets your expectations. For detailed recipes, refer to the section on creative DIY slime recipes.
Q: What are the benefits of using Windex in slime making?
A: Using Windex in slime-making can create a smoother, more stretchy consistency than other activators. The ammonia also helps maintain slime’s elasticity, making it more enjoyable to play with. Be sure to check the full article for tips on customizing your slime experience.
Q: Is Windex safe for kids when making slime?
A: While Windex generally contains safe ingredients, it’s crucial to supervise children during the slime-making process. Ensure they wash their hands after handling and avoid ingesting any materials used. For more safety tips, see the safety tips section of our guide.
Q: What alternatives can I use instead of Windex for slime?
A: Alternatives to Windex for slime activators include contact lens solution, liquid starch, or baking soda mixed with vinegar. These options can provide similar textures while being potentially safer for younger kids. Check alternative slime activators to find the best fit for your craft.
Q: How do I adjust the slime recipe if using Windex?
A: When using Windex, start by adding it slowly to your glue mixture until you reach the desired consistency. If the slime is too sticky, add more Windex in small increments. For more details on slime-making adjustments, explore the common slime-making mistakes section.
Q: Where can I find creative slime recipes using Windex?
A: You can find creative slime recipes using Windex in our guide’s dedicated section. It includes variations tailored for different textures and colors, making it perfect for kids’ crafts. Dive into our section on creative DIY slime recipes for inspiration.
Q: How does Windex affect the longevity of homemade slime?
A: Windex can enhance the longevity of homemade slime by preventing it from drying out, thanks to its hydrating properties. However, store the slime in an airtight container to maximize its lifespan. Learn more about maintaining your slime in the full article.
Q: What should I do if my slime doesn’t form properly with Windex?
A: If your slime doesn’t form correctly, consider adjusting the amount of glue or Windex you’re using. Experimenting with different ratios can help you find the perfect balance. For troubleshooting tips, check the addressing common slime-making mistakes section in our guide.
Wrapping Up
As we wrap up our exploration of whether Windex is a slime activator in the Cottage Kids’ Craft Guide, remember that embracing creativity through crafting not only brings joy but also fosters learning and experimentation. If you’re eager to dive deeper into the world of DIY decor projects or perhaps discover seasonal gardening tips, be sure to check out our other guides-there’s a treasure trove waiting for you!
Feeling inspired? Join our cozy community by subscribing to our newsletter for the latest updates and delightful crafting ideas right in your inbox. Don’t forget to share your slime-making adventures with us in the comments below; we love hearing about your creative journeys! Keep experimenting, and let the simple joys of cottage living encourage your imagination and childlike wonder. Your next craft project awaits!


