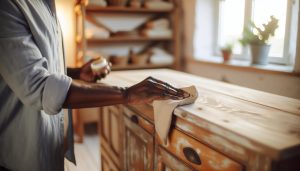
If you’ve ever marveled at the charming allure of chalk-painted furniture, you know that the final touch can make all the difference. Applying clear wax not only enhances the beauty of your piece but also provides a protective seal, ensuring your handcrafted masterpiece stands the test of time. In this guide, we’ll walk you through the steps to achieve a perfect application, turning your furniture into a cozy focal point in your home. Whether you’re new to DIY or a seasoned pro, mastering this technique will help you embrace the rustic, inviting style that cottage living celebrates. So, grab your supplies and let’s dive into the wonderfully satisfying world of chalk paint and clear wax!
How Clear Wax Enhances Chalk Painted Furniture
When it comes to enhancing the charm and durability of your chalk-painted furniture, clear wax acts like a protective hug, wrapping your pieces in a smooth, velvety finish. This magical substance not only deepens the color and gives your furniture a lovely sheen but also serves as a barrier against scratches, stains, and daily wear and tear. Imagine running your fingers over the surface and feeling that satisfying softness, all while knowing that your lovingly restored pieces are in safe hands. Clear wax transforms the finish into something substantial, creating a stunning contrast against the matte nature of chalk paint.
Applying clear wax is not just about aesthetics; it’s also a vital step in ensuring the longevity of your projects. The wax penetrates the paint, making it more resilient while enhancing the vintage look that chalk paint is known for. It accentuates the texture, bringing out the subtle details in your hand-painted creations. As the wax is buffed to perfection, it provides a rich depth, making everyday items feel special, almost like treasured heirlooms. Incorporating this simple yet effective finish elevates the overall visual appeal of any piece, turning even the most mundane items into focal points of your cozy cottage home.
Moreover, the clear wax offers a water-resistant finish, safeguarding your investment against everyday spills and splatters that can happen in bustling family life. With a soothing coat of wax, your furniture not only looks beautiful but is also more practical for real living environments. The ease of application and the immediate results make clear wax a favorite in the DIY community, allowing everyone from seasoned crafters to budding home decorators the chance to create with confidence.
Ultimately, embracing clear wax in your projects is about celebrating the imperfections and histories that make your furniture unique. As you apply the wax and watch your pieces transform, you’ll feel a connection to the warmth and creativity of cottage living, reminding you that every brushstroke is a step towards crafting a home that is not just beautiful but filled with heart and personality.
Choosing the Right Clear Wax for Your Project

When it comes to enhancing your chalk-painted furniture, the right clear wax is akin to a perfect companion, elevating both the aesthetic and durability of your cherished pieces. With an abundance of options on the market, how do you choose the one that best suits your project? Consider factors such as the finish you desire, ease of application, and the specific needs of your furniture. Some waxes offer a matte finish that beautifully complements the rustic charm of farmhouse decor, while others provide a richer sheen, bringing a touch of elegance to your cozy living space.
To begin, let’s explore the different types of clear wax available.
- Beeswax-based waxes: These are excellent for achieving a natural finish that nourishes the wood beneath, perfect for vintage or distressed looks. Their creamy consistency makes them easy to apply, allowing for a soft touch that fits beautifully into a cottage aesthetic.
- Softer paste waxes: Often more forgiving in application, these waxes glide on smoothly and are great for intricate details, ensuring that even the most textured pieces retain their character while providing protection.
- Liquid waxes: Ideal for those seeking quick application and drying times, liquid waxes are less labor-intensive and can be buffed easily, ensuring a glossy finish without extensive effort.
When selecting the right product, it’s also vital to consider the color of the wax. A clear wax is universally loved for its versatility, but there are also tinted options available that can add a subtle hue to your furniture, enriching the chalk paint’s color and highlighting its unique characteristics. A warm brown tint, for example, can enhance the warmth of a creamy off-white chalk paint, evoking feelings of hearth and home.
Lastly, look for a wax with good durability, especially if the furniture will see daily use. This will ensure that your labor of love stays protected from scratches and spills, allowing you to enjoy your creations for years to come. By , you are not just finishing a piece of furniture; you’re expressing your creativity and infusing your home with warmth, comfort, and a sense of community that is at the heart of cottage living.
Step-by-Step Guide to Applying Clear Wax

Applying clear wax to your chalk-painted furniture is like wrapping a beloved gift in the finest of wrappings-it not only enhances the visual appeal but also preserves its beauty for years to come. The process may seem daunting at first, but with a few simple steps, you can achieve a stunning finish that reflects your cozy, rustic style. Here’s a delightful guide to ensure your application is as smooth and enjoyable as the wax itself.
Begin by gathering your materials to create a peaceful workspace. You’ll need a can of clear wax, a soft cloth or brush for application, and a lint-free cloth for buffing later. Before starting, ensure your chalk-painted piece is completely dry; this can typically take several hours depending on environmental conditions. Once you’re ready, take a small amount of clear wax and apply it to your brush or cloth. A little goes a long way, especially with softer paste waxes that glide effortlessly across textured surfaces.
Application Technique
Work in small sections, applying the wax in circular motions. This technique not only helps in smoothing the wax onto the surface but also ensures even coverage. Don’t forget to pay attention to the details; if your furniture piece has intricate carvings or edges, use a smaller brush to get into those crevices. As the wax begins to absorb, you’ll notice a beautiful soft sheen appear, emphasizing the depth of the chalk paint beneath.
After you’ve covered the entire surface, let the wax sit for a brief moment-about 10 to 15 minutes-before buffing it to your desired shine. Using a clean, lint-free cloth, gently buff the surface using a back-and-forth action. This step not only brings out a lovely luster but also ensures that the wax is well adhered to the surface, providing the protection your furniture needs.
Final Touches
Remember, patience is key as the finished look might require a couple of coats of wax based on how much protection you desire. Allow the first coat to cure for at least 24 hours before applying a second coat. This simple process will elevate your furniture, making it feel like a cherished treasure of rustic charm and handcrafted beauty, perfectly at home in your cozy cottage.
So, roll up your sleeves and dive into this delightful step of your DIY project. Embrace the creative journey and let your passion shine through in every brush stroke!
Essential Tools for Perfect Wax Application

Applying clear wax to your chalk-painted furniture is a transformative experience, turning a simple DIY project into a cherished piece of your home’s story. To embark on this delightful journey, it is essential to have the right tools at your fingertips. The right equipment ensures a smooth application and enhances the beautiful finish, reminding you of the days gone by and the artistry embedded in our everyday lives.
Begin with a high-quality can of clear wax. Look for a reputable brand that offers a creamy, soft formula that glides on effortlessly. A wax specially formulated for chalk paint will not only bind beautifully but also provide that rich, protective layer you’re aiming for. Equally important is the application tool: a soft wax brush is your best friend. Its bristles, designed to press the wax into the paint, help achieve a seamless finish-adding character to every contour of your delightful piece.
A lint-free cloth is crucial for the final buffing stage. This will help you achieve that velvety sheen without any pesky fibers ruining the look. If you fancy more control during the process, consider using a clean, soft paint brush for intricate areas or carved details to ensure every nook and cranny receives your loving touch. Lastly, an old t-shirt or another cotton fabric can serve as your buffing cloth, giving your finish that elegant glow.
Bonus Tips for Tool Maintenance
Your tools are an investment in your project and, by extension, in your home’s charm. After each use, clean your brushes thoroughly with mineral spirits or soap and warm water, ensuring they stay in perfect condition for the next spell of creative handiwork. Storing your wax in a cool, dry place extends its life and effectiveness, allowing you to return to your cherished projects whenever the muse strikes.
With these essential tools in hand, you’ll find pleasure in the wax application process, celebrating the rustic beauty of your creations. Take a moment to enjoy the smell of the wax, the feel of the materials, and the joy that comes with breathing new life into your beloved furniture.
Common Mistakes When Applying Wax and How to Avoid Them
Applying clear wax to your chalk-painted furniture can be a delightful experience, yet it’s easy to fall prey to some common pitfalls that might muddle your efforts. One such mistake is applying too much wax at once. Less is often more when it comes to wax application; overloading your brush can lead to a sticky surface that takes longer to cure, resulting in an uneven finish. To avoid this, dip your brush lightly into the wax and apply it gradually, allowing each layer to be worked into the paint without creating a heavy build-up.
Another frequent error is neglecting the importance of buffing after application. Many DIY enthusiasts apply the wax only to find the furniture looking dull or uneven. Buffing is essential not just for achieving that lovely sheen but also for ensuring the wax is evenly distributed across the surface. Use a lint-free cloth and apply gentle pressure as you buff in circular motions; this helps to activate the wax and enhances its protective qualities.
Timing can also turn into a troubling factor during your project. Some people rush the drying process or mistakenly assume they can hastily reapply wax. Wax needs time to cure properly, usually around 24 hours. Throughout this time, keep your piece in a dust-free environment and avoid water exposure. If you’ve applied multiple layers, allow sufficient time between applications for optimal results.
Moreover, it’s important to remember to avoid waxing furniture pieces that are not fully cured or dried from the chalk paint application. Patience is a virtue here; waiting for the paint to completely dry ensures the wax adheres properly, creating a beautiful transition from paint to a protective finish. Embrace the creative journey; after all, each cherished piece tells its own story, and your care in preserving it will shine through in every detail.
How to Buff Your Wax Finish to Perfection
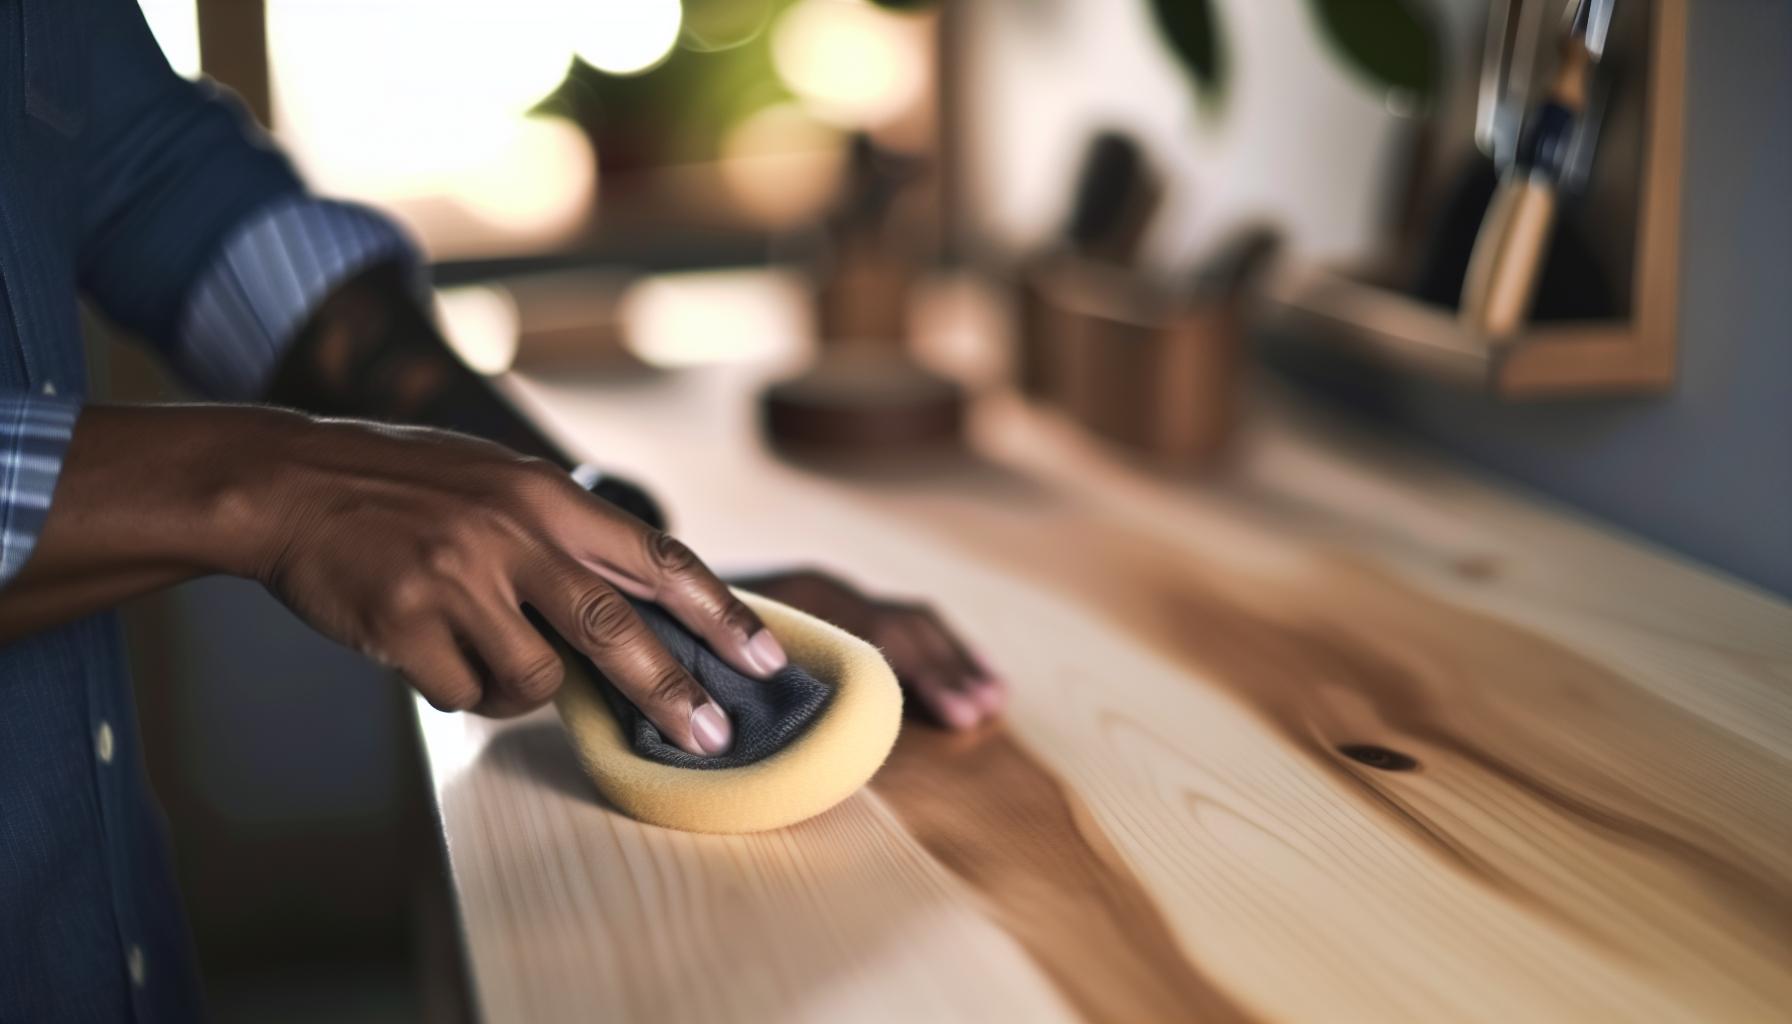
Applying a beautiful coat of clear wax to your chalk-painted furniture isn’t just about the initial layer; the magic truly happens when you take the time to buff it to perfection. Buffing can elevate your furniture from simply completed to beautifully polished and ready to shine in your cozy cottage. As you dive into this gratifying process, remember that the right techniques can enhance the depth of color in your painted piece, adding a soft luster that captures the warmth and rustic charm of your home.
To achieve that desirable sheen, begin with a lint-free cloth-old t-shirts, flannel, or microfiber cloths work wonderfully. Gently wrap the cloth around your hand, ensuring a snug fit, and start buffing the waxed surface using circular motions. This technique not only smooths out the wax but also activates its protective qualities, creating a durable finish that will resist everyday wear and tear. As you buff, pay attention to any areas that may have excess wax; these spots can appear cloudy if not properly smoothed out.
Another delightful tip is to approach buffing as a mindful activity. Relish the process of transforming your piece while enjoying a cup of your favorite tea or listening to calming music. The gentle rhythm of buffing can be quite meditative, allowing you to connect deeper with your creative project. As you feel the surface beneath your cloth, you’ll notice how the wax begins to respond-transitioning from a soft matte to an enchanting glow that hints at the story behind your work.
Finally, don’t rush this step. After applying wax, allow it to cure for a full 24 hours before you begin buffing. This patience ensures that you maximize the wax’s potential, resulting in a beautifully polished finish that not only protects your chalk-painted masterpiece but also adds a rich depth and character that embraces your heartfelt cottage living aesthetic. Enjoy the sweet satisfaction of knowing that you’ve carefully crafted not just furniture, but a piece of your home’s story.
Caring for Your Chalk Painted Furniture After Waxing
After you’ve taken the time to lovingly apply clear wax to your chalk-painted furniture, caring for it is essential to maintain its beauty and longevity. Just like nurturing a flower garden, the upkeep of your furniture involves thoughtful attention and gentle handling. The clear wax not only enhances the color and adds a lovely sheen but also provides a vital layer of protection against daily wear, making proper care all the more important for sustaining its charm.
Start by regularly dusting your pieces with a soft, lint-free cloth to prevent any buildup of dirt or grime that can dull the finish. For cleaning, opt for a mild soap mixed with warm water and a soft cloth; be sure to avoid harsh chemicals or abrasive materials that could strip the wax finish. It’s best to ensure that any damp cloth is only slightly moist – excess water can seep into the chalk paint and compromise the integrity of your furniture. Follow up with a dry cloth to remove any moisture, ensuring the wax remains intact and functional.
Revitalizing Your Wax Finish
Every once in a while, your chalk-painted furniture will benefit from a little refresh to its wax finish. This can be done by applying a light layer of clear wax again, which helps to restore the luster and protective qualities of the finish. Simply use a clean, soft cloth to apply a thin layer of wax, buffing it in with gentle circular motions. Allow it to cure for about 24 hours before using the piece to ensure the wax is set properly.
Creating a Safe Environment
To protect your chalk-painted treasures, consider their location in your home. Direct sunlight can fade colors over time, so if your piece is near a bright window, think about adding a sheer curtain or relocating it slightly to minimize exposure. Additionally, keep your furniture away from excessive heat sources, like radiators, which can cause the wax to break down more rapidly.
The art of caring for chalk-painted furniture is about embracing the imperfections and the beauty of handcrafted living. By employing these gentle care practices, you not only enhance the lifespan of your cherished pieces but also cultivate an inviting atmosphere in your home that celebrates the rustic charm of your cottage lifestyle. Let the warmth of your creativity and the joy of nurturing these pieces reflect in every corner of your sanctuary.
The Benefits of Sealing Chalk Paint with Wax
Sealing chalk paint with wax not only elevates its aesthetic charm but also enhances its durability, making it an invaluable step in your furniture painting journey. The application of clear wax serves as a protective barrier, shielding your lovingly crafted pieces from the everyday wear and tear that comes with family life. Imagine your favorite rustic side table gracing your living room, glowing with that warm, inviting patina wax provides, while also standing strong against spills, scratches, and scuffs. This combination of beauty and functionality embodies the spirit of cottage living, where every piece tells a story and contributes to a cozy home atmosphere.
The benefits of waxing extend beyond protection to enrichment of color and texture. When you apply clear wax over chalk paint, it deepens the hue and adds a rich, velvety finish that can transform plain, chalky surfaces into something truly captivating. This process allows the inherent simplicity of chalk paint to shine, creating a surface that feels both sophisticated and approachable. Moreover, wax is easy to apply and allows for a degree of customizability-more layers can be added for increased depth, while different application techniques can create unique textures and finishes.
Another essential aspect of sealing with wax is its ability to enhance the longevity of your furniture pieces. The wax forms a breathable seal, which works over time to protect the underlying paint, reducing the risk of chipping and fading without altering its color. This characteristic is particularly beneficial in a bustling family home, where furniture takes the brunt of daily activities. Additionally, the ease of maintenance that comes with waxed surfaces makes them practical; a quick dust or gentle wipe with a damp cloth can keep them looking fresh for years, allowing you more time to enjoy the little moments in life rather than worry about upkeep.
In practice, here are some important reasons to seal chalk paint with wax:
- Protection: Provides a barrier against spills and wear.
- Enhanced Color: Deepens the hues and adds a visually appealing sheen.
- Durability: Increases the lifespan of painted surfaces, reducing chipping and fading.
- Easy Maintenance: Simplifies cleaning and care for busy households.
By choosing to seal your chalk-painted furniture with wax, you’re not just enhancing its appearance-you’re actively preserving the love and labor of your handiwork. Embrace this process as a vital part of crafting your rustic home, where each decision is imbued with purpose and passion. Let your creativity flow as you transform antique finds and thrifted pieces into cherished heirlooms that echo the warmth of a cottage life filled with joy, togetherness, and rustic elegance.
Alternative Finishing Options Beyond Clear Wax
Exploring alternative finishing options for your chalk-painted furniture can ignite a spark of creativity and introduce captivating new textures and sheens that wax alone might not achieve. While clear wax is a beloved choice for its protective qualities and warm finish, there are several other methods and products that can help customize and enhance your rustic pieces even further.
One popular alternative is using polyurethane, which comes in water-based and oil-based varieties. Water-based polyurethane has the advantage of drying clear and quickly, making it a favorite for those eager to complete projects swiftly. It provides a durable finish that resists scratches and moisture, perfect for high-traffic areas in your home. On the other hand, oil-based polyurethane often gives a richer and slightly amber hue, which can add depth and warmth to darker paints. Remember to apply with a soft brush and always test on a small, inconspicuous area to ensure compatibility with your chalk paint.
Another charming option is milk paint. This natural finish, derived from milk protein, offers a matte look that beautifully complements rustic aesthetics. Milk paint can be layered for a distressed effect or buffed to a soft sheen. It bonds exceptionally well with chalk paint, providing additional protection and a unique texture that can make your furniture pieces stand out. Moreover, since milk paint is available in an array of colors and can be mixed to create custom shades, it invites a hands-on approach to create the exact look you desire.
If you are leaning toward a more modern and sleek appearance, consider experimenting with water-based topcoats specifically designed for chalk paint. These products typically come in various finishes-from matte to satin to gloss-allowing you to choose the shine that best reflects your style. They dry quickly and are easy to clean up, making them a practical choice for DIY enthusiasts.
Incorporating these alternatives can breathe new life into your furniture projects while keeping the spirit of cottage living alive. Embrace the joy of transforming simple pieces into vibrant, functional art that not only beautifies your space but also tells a story through its crafted layers. Here’s to celebrating creativity in our homes, one brushstroke at a time!
Creative Techniques for Distressing With Wax
To create a truly enchanting and personalized touch to your chalk-painted furniture, consider the art of distressing with wax. This creative technique not only enhances the rustic charm of your pieces but also gives them an authentic, timeworn look that tells a story of warmth and nostalgia. When done correctly, distressing can bring out the nuanced colors and textures of your paint, transforming ordinary furniture into captivating focal points within your cozy home.
Start by applying clear wax to add depth and a protective layer to your chalk paint. Once the wax is in place, you can begin the distressing process. Use a soft, lint-free cloth to apply a thin layer of brown or antique wax, focusing on the edges and areas where natural wear and tear would occur. This darker wax creates a beautiful contrast against lighter paint hues, accentuating the charming imperfections that evoke cottage life. You can also experiment with sandpaper or a sanding block to gently rub back sections, revealing the original wood or lighter undercoat for an even more rustic finish. The key here is modesty; subtle distressing adds character without overwhelming the piece.
Tips for Effective Distressing
- Test First: Always test your wax application on a small, inconspicuous area before distressing the entire piece. This ensures that you’re happy with the effect and color it will achieve.
- Layer Gradually: Apply wax in layers, building up the depth slowly rather than applying too much at once. This method allows for better control and a more refined finish.
- Focus on High-Contact Areas: Concentrate on distressing corners, edges, and drawer pulls-places that typically show wear in lovingly used furniture.
- Embrace Imperfections: Remember that the goal is to celebrate the uniqueness of each piece. Don’t fret over making everything perfect; the charming flaws add character.
Remember, the beauty of distressing with wax lies in its ability to enhance the story behind each piece of furniture. As you embark on this creative journey, let your instincts guide you. Whether you opt for a light touch or a more rugged finish, the end result will be a distinctive piece that radiates warmth and invites everyone to gather around, sharing stories and creating cherished memories in your cozy cottage. Embrace the joy of handcrafted beauty, and let every brushstroke celebrate the lovely imperfections of your artistic process.
How to Revitalize Old Waxed Furniture
Revitalizing old waxed furniture can breathe new life into beloved pieces that may have lost their luster over time. Whether it’s a cherished heirloom or a thrift store find, the right care and attention can transform your tired furniture into a stunning centerpiece of your cozy home. Start by inspecting the piece for signs of wear and any areas where the wax has dulled or accumulated dirt. This initial assessment is vital, as it helps determine the specific treatment your furniture needs.
To rejuvenate the finish, begin with a thorough cleaning. Using a soft cloth lightly dampened with a solution of water and mild soap, gently wipe down the surface. This step removes built-up grime without aggressively disturbing the wax. After cleaning, allow the furniture to fully dry. Next, apply a fresh layer of clear wax to restore the shine and protect the surface. Using a small amount of wax on a lint-free cloth, rub it in circular motions, working in small sections to ensure even coverage. A thin layer is ideal, as it can be built upon if more depth is desired.
Buffing for a Beautiful Finish
Once the wax has dried for about 10 to 15 minutes, it’s time to buff the surface to create that gorgeous sheen. Using a clean, soft cloth, buff the surface with a bit of elbow grease; this helps the wax to penetrate deeper and establishes a nice glow that enhances the furniture’s colors. When buffing, pay special attention to areas that might need a little more shine or where the use of the piece has been more prominent.
Long-Term Care
To keep your revitalized furniture looking its best, embrace a routine of light maintenance. Regular dusting with a microfiber cloth and periodic reapplication of wax every six months can prolong the life of your finish and the beauty of your piece. If you notice any scuffs or marks in the future, a quick touch-up with wax will usually suffice, helping you maintain the warmth and charm of your cozy cottage decor.
Remember, every scratch and imperfection tells a story. These pieces can be instrumental in creating that welcoming atmosphere that defines a charming home. Reinvigorating your old waxed furniture isn’t just about aesthetics; it’s also an act of love, connecting you to the essence of rustic living and the simple joys of handcrafted beauty.
Tips for Long-Lasting Protection of Your Furniture
Maintaining the charm and allure of your chalk-painted furniture is as vital as the initial application of clear wax. To ensure your pieces remain in delightful condition, adopt a few thoughtful habits and preventive measures. Regular care can significantly extend the lifespan of your waxed finish, allowing you to savor the beauty of these handcrafted treasures for years to come.
Begin with gentle cleaning to remove dust and debris. Use a soft, lint-free cloth for daily upkeep, and for deeper cleans, a slightly dampened cloth with warm water and a touch of mild soap will do wonders without compromising the wax layer. Avoid harsh chemicals or abrasive materials, as these can strip away the protective seal you’ve lovingly applied. Instead, embrace the simplicity of natural cleaning solutions that are safe for your cottage interiors.
In terms of waxing frequency, consider reapplying clear wax every six months to a year, depending on the wax’s wear due to usage and environmental factors. This not only preserves the finish but also helps in keeping the surface hydrated and supple. When it comes time to reapply, opt for a thin coat to build the depth gradually, rather than overwhelming the surface with excess product.
To safeguard your furniture against scratches and spills, place coasters under drinks and protective pads beneath heavier items. For areas subjected to high traffic or use, decorative runners or cloths can shield surfaces while still showcasing the rustic charm of your setup. When accidents happen, such as a spill or scuff mark, a quick touch-up with the same wax can refresh the area and maintain your piece’s integrity.
Lastly, remember to create a comfortable environment that encourages you to appreciate these pieces. Surround your furniture with elements that reflect your personality, inviting warmth and creativity into your space. By fostering a routine of careful maintenance and fostering an appreciation for the handcrafted beauty around you, your chalk-painted furniture will not only endure but will also continue to tell its unique story within your cozy home.
FAQ
Q: How long does clear wax take to dry on chalk painted furniture?
A: Clear wax typically takes 24 to 48 hours to dry completely, depending on humidity and temperature. It’s crucial to allow proper drying time to ensure a durable finish. For best results, avoid using waxed furniture during this drying period.
Q: Can you apply clear wax over a matte chalk paint finish?
A: Yes, clear wax can be applied over a matte chalk paint finish. In fact, it enhances the depth of color and adds a protective layer. Make sure the paint is completely dry before applying wax for optimal adhesion and appearance.
Q: What happens if you apply too much clear wax?
A: Applying too much clear wax can lead to a sticky surface and an uneven finish. If this occurs, let the wax dry for at least 24 hours, then buff off the excess with a soft cloth. Alternatively, consider a second light application for needed coverage.
Q: How often should I reapply clear wax on my chalk painted furniture?
A: It’s advisable to reapply clear wax every 6-12 months, based on usage and wear. Regular maintenance helps maintain the protective barrier and luster of your chalk painted furniture, ensuring it remains beautiful over time.
Q: Is it necessary to buff clear wax after applying it?
A: Yes, buffing clear wax is essential. It not only enhances the sheen of the finish but also ensures better durability. Use a soft cloth to buff the surface until you achieve the desired level of shine, which can take several minutes.
Q: Can I use a different type of wax with chalk paint?
A: While clear wax is common, you can use other types, like colored or dark wax, for different effects. Just remember that dark wax can alter the color significantly. Always test on a small area first to ensure you like the result.
Q: How do I clean chalk painted furniture sealed with clear wax?
A: To clean chalk painted furniture with clear wax, use a soft, damp cloth and mild soap. Avoid harsh chemicals that can damage the wax finish. Regular dusting and gentle cleaning will help maintain the integrity of the finish.
Q: Can you apply a topcoat over clear wax?
A: It is generally not recommended to apply a water-based topcoat over clear wax, as it can interfere with adhesion and cause clouding. If you desire additional protection, wait for the wax to cure completely and consider using an oil-based topcoat designed for waxed surfaces.
Wrapping Up
Thank you for exploring the art of applying clear wax to chalk-painted furniture! Remember, this technique not only enhances the beauty of your pieces but also provides a perfect seal for lasting durability. If you have any questions or uncertainties, feel free to reach out; your DIY journey matters to us! Don’t forget to check out our exciting guides on rustic home styling and DIY decor projects for more inspiration, and we invite you to explore our seasonal gardening tips that will bring added charm to your cozy space.
Be sure to subscribe to our newsletter for exclusive content and be part of our community celebrating the simple joys of cottage living. Every project you embark on is a step toward a more beautiful home filled with handcrafted beauty. We’d love to hear your feedback or any transformations you’ve made-share your thoughts in the comments below! Let’s keep crafting together and embrace the magic of rustic charm.