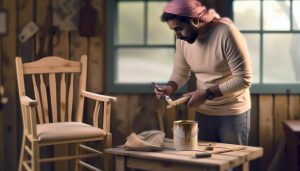
Transforming tired furniture into stunning focal points can breathe new life into your home, especially in a cozy cottage setting. Using vinyl wrap is a wonderful, budget-friendly way to achieve a modern makeover, making it perfect for those seeking a personal touch in their decor. Imagine refreshing a worn dining table or revamping an old dresser with vibrant colors and patterns that reflect your style without the cost of new furniture.
Whether you’re a DIY novice or a seasoned pro, applying vinyl wrap is a rewarding project that brings a sense of satisfaction and creativity to your space. Plus, it opens the door to eco-friendly design, allowing you to repurpose items you already own rather than contributing to waste. So, let’s explore the simple tricks and techniques for applying vinyl wrap that will inspire you to embrace your craftiness and create a charming atmosphere in your rustic home. Your furniture deserves a beautiful story-let’s start writing it together!
Choosing the Right Vinyl Wrap for Your Furniture
When embarking on the delightful journey of vinyl wrapping your furniture, selecting the right vinyl wrap is crucial to achieving a stunning transformation that enchants your living space. Imagine stepping into a cozy cottage where each piece of furniture tells a story, reflecting comfort and creativity. Whether you’re looking to revamp an old chair or give a tired table a new lease on life, the ideal vinyl wrap can bring that rustic charm to the forefront.
Firstly, consider the texture and finish of the vinyl. Matte finishes exude a soft, understated elegance, perfect for achieving a farmhouse feel, while gloss finishes can add a modern touch that brightens up your decor. For a more tactile experience, embossed patterns can replicate the look of wood or fabric, blending harmoniously with cottage aesthetics. Beyond appearance, durability is key; high-quality vinyl wraps are resistant to scratches and fading, ensuring your lovingly refreshed pieces withstand the test of time and everyday use.
Moreover, think about the color palette that complements your cottage theme. Earthy tones such as sage green, soft beige, and muted blues can evoke a sense of serenity, while vibrant hues may add a splash of joy and whimsy. Choosing a color that aligns with the natural surroundings not only enhances your home’s warmth but also reflects your personal style. Many suppliers offer sample swatches, enabling you to envision how each vinyl wrap interacts with your existing decor and lighting.
Finally, don’t overlook the size and application technique necessary for your project. Larger pieces of furniture may require a thicker vinyl with good stretchability, while smaller items can often work well with thinner, more pliable options. Gaining insight from online forums or video tutorials can equip you with tips from seasoned DIY enthusiasts, thus fostering a community of creators who share in your enchanting journey of transforming your home.
In your quest for the perfect vinyl wrap, immerse yourself in the cozy charm of cottage living, embracing the joy that comes from crafting beautiful spaces that welcome all who enter.
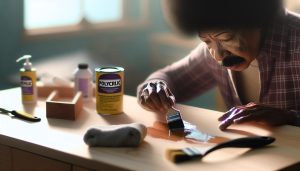
Essential Tools for a Successful Vinyl Wrap Project

Transforming your furniture with vinyl wrap can be a delightful adventure, much like nurturing a garden into full bloom. To ensure your project flourishes, having the right tools at your fingertips is essential. A well-equipped workspace not only enhances your crafting experience but also contributes to a smoother application process, bringing that charming, rustic aesthetic to life.
Begin your journey with a quality vinyl wrap that resonates with your desired style and texture. Having extra tools, like a cutting knife and a straight edge, will allow for precise measurements and cuts. A measuring tape is indispensable; it ensures you achieve the perfect fit for each piece of furniture. Beyond basic tools, a heat gun can be a transformative asset. Utilizing gentle heat allows the vinyl to adapt to curves and contours, resulting in a seamless finish that’s both appealing and durable.
Equipping yourself with a squeegee or hard card is vital for smoothing out bubbles and ensuring a firmly adhered surface. A soft cloth for cleaning the surface before applying the wrap removes dust and grease, setting the stage for a flawless application. Finally, don’t overlook a reliable workspace-whether it’s your cozy kitchen table or your garden shed-where you can lay out your materials and plan your design unobstructed. Every little detail contributes to crafting a finished product that echoes the warmth and creativity of cottage living.
Here is a handy list of tools you’ll need:
- Vinyl Wrap: Choose your preferred color and finish.
- Cutting Knife: For precise cuts and adjustments.
- Squeegee or Hard Card: To smooth the vinyl during application.
- Heat Gun: Useful for reshaping and contouring the vinyl.
- Measuring Tape: Ensures accurate measurements for each piece.
- Soft Cloth: For cleaning before application.
- Dedicated Workspace: A clean, flat area to work comfortably.
Harnessing these tools will set you on a path toward creating stunning transformations, filling your home with handcrafted beauty and the inviting charm characteristic of rustic living. Embrace the joy in every step, knowing that you are about to breathe new life into your beloved furniture!
Preparing Your Furniture for Vinyl Wrapping

Transforming your beloved furniture with a vinyl wrap begins long before you make that first cut. The secret to a stunning makeover lies in the crucial preparation phase that sets the foundation for your creative expression. Just as a gardener prepares the soil before planting, taking the time to ready your furniture ensures that your final result will be as delightful and lasting as a well-nurtured bloom.
Before diving into the project, start by selecting furniture items that require a refresh. Perhaps a well-loved side table or a worn-out dining chair can benefit from a contemporary twist. Once you’ve chosen your pieces, gently clean the surfaces to remove dust, grease, or old wax. A soft cloth paired with a mild cleaner can do wonders, ensuring the vinyl adheres properly and creating a flawless finish that showcases your artistry. For stubborn stains or residue, consider using rubbing alcohol, as it prepares the area for a smooth application.
Another important step is to assess the condition of the furniture. Repair any chips, scratches, or dents to create an even surface for the vinyl to cling to. Use a wood filler or dedicated repair kit, allowing it to dry fully before continuing. While waiting, this is an excellent time to envision how the finished piece will look. Get lost in the myriad of colors and textures available, drawing inspiration from your surroundings and the charming rustic accents found in cottage living.
Lastly, measure twice and cut once! Taking careful measurements ensures that the vinyl wrap will fit perfectly onto the furniture without unsightly creases or excess material. With your tools ready and your furniture prepped, you’re not just embarking on a project but inviting a new chapter into your home, one that reflects your personality and nurtures the spirit of cozy, handcrafted beauty. Embrace this creative journey, welcoming the joy it brings into your serene living space.
Step-by-Step Guide: Applying Vinyl Wrap Like a Pro
Applying vinyl wrap to your furniture is like painting a blank canvas; it opens up a world of possibilities for creativity and personal expression. With a few straightforward steps, you can transform your pieces into stunning focal points that reflect your unique style. Whether it’s bringing a burst of color to a plain coffee table or revamping a vintage chair with a modern twist, the process is both fulfilling and approachable.
Start by measuring your vinyl precisely. Cut a piece that is slightly larger than the area you intend to cover; this provides some leeway for adjustments as you apply the wrap. Always remember the adage, “measure twice, cut once” – it prevents unnecessary waste and disappointment. Next, gently peel back a corner of the vinyl and fold it over a section of the furniture. Begin applying the wrap from one side, using a credit card or a similar tool to smooth it out as you go. This helps to push out air bubbles and ensures a firm bond between the wrap and the surface.
Key Steps to Achieve a Flawless Finish
- Heating: For a tight and snug fit around curved areas, use a heat gun or hairdryer on the low setting. This makes the vinyl more pliable and easier to shape.
- Trimming: Once the vinyl is applied, use a sharp utility knife to trim away excess material along the edges. Take your time with this step to ensure a clean edge.
- Sealing: After trimming, consider applying a sealant designed for vinyl or using a finishing spray to enhance durability, especially on surfaces prone to wear.
Don’t forget to take breaks during the application process. Enjoy a cup of herbal tea or a slice of homemade pie as you reflect on your progress; it helps to maintain motivation and injects joy into the project. The satisfaction of seeing your furniture revived with new life will be an inspiring sight that resonates with the spirit of cottage living. Celebrate this transformation, for every wrap tells a story and every piece is a reflection of the love and care you put into your home.
Top Tips for Smooth Vinyl Application
When transforming your furniture with vinyl wrap, the journey can be as enchanting as the result itself. Picture yourself nestled in your cozy cottage, armed with a roll of vibrant vinyl, ready to breathe new life into an old piece. To ensure this creative endeavor goes off without a hitch, consider these key tips that will help you achieve a seamless and stunning application every time.
Firstly, work in a clean and clutter-free environment. A well-lit space where you can spread out your materials allows for better visibility and reduces the risk of dust or debris interfering with your wrap. Before starting, ensure your furniture is completely cleaned and dried-this includes removing any oils, dirt, or previous finishes that may hinder adhesion. A simple vinegar and water solution can work wonders for a thorough clean.
Next, take your time during the application process. It’s all about patience and precision to avoid those pesky air bubbles. Start by gently peeling away a corner of the vinyl and sticking it down slowly. Instead of rushing to press the entire piece at once, work in sections, smoothing as you go. Don’t forget to backtrack if needed; lifting and repositioning the vinyl is much easier than trying to fix an air bubble afterward. Another secret weapon is a soft cloth or squeegee-these tools help push out air and can prevent any unsightly wrinkles.
To enhance your skills further, experiment with temperature. If you find it challenging to wrap around edges or curves, gently warming the vinyl with a heat gun or hairdryer on a low setting makes the material more pliable, allowing it to conform better to the contours of your furniture. Always ensure you maintain a safe distance to avoid damaging the vinyl.
Lastly, embrace the beauty of imperfections. Every handmade project embraces a bit of character. If you end up with a small wrinkle or bubble, don’t despair! Often, these can be creatively integrated into your design, perhaps by strategically adding a decorative element like a charming sticker or embellishment. Remember, your home should reflect your personality and creativity, so have fun with it and enjoy the process of making something truly your own.
Troubleshooting Common Vinyl Wrapping Issues
When diving into the delightful world of vinyl wrapping, it’s not uncommon to encounter a few bumps along the way. Just like the gentle imperfections of cottage living, embracing the unfamiliar can lead to truly beautiful results. Here, we’ll explore some common issues you might face while applying vinyl wraps to your furniture, along with practical solutions that will restore your creative flow.
One prevalent challenge is the formation of air bubbles beneath the vinyl. These pesky intruders can disrupt the smooth finish you’re striving for. To combat this, start with a squeegee or soft cloth during application. Gently push the air bubbles toward the edges, allowing them to escape. If you discover a stubborn bubble after installation, don’t panic! A small pin can work wonders: puncture the bubble carefully and press the vinyl down to release the trapped air. This technique helps ensure a seamless look without sacrificing the integrity of your project.
Another issue you might face is the vinyl sticking unevenly, particularly around edges or intricate designs. This can occur if the surface wasn’t sufficiently cleaned or if the application wasn’t smoothed properly. If you find yourself in this predicament, your friend in this situation is heat! Using a heat gun on a low setting can help re-soften the vinyl; just be cautious to avoid excessive heat that could warp the material. Follow by smoothing it out with your squeegee, and watch the vinyl conform beautifully to your furniture’s contours.
Lastly, if you notice wrinkles forming in the vinyl post-application, don’t lose heart. Similar to how a cozy knit blanket may have a few knitting flaws, your project can embrace its unique charm. Lightly warming the vinyl and gently pulling on it can help to smooth out those creases. Consider integrating any remaining imperfections into your overall design. Perhaps adorn your piece with a rustic knick-knack or a handmade sign that celebrates its character, transforming it into a statement piece that tells a story.
In each of these scenarios, patience and a bit of creativity are your best tools. Embrace the process, for every challenge is an opportunity to create something uniquely yours, reflective of your cozy cottage style and handmade beauty. Remember, it’s not just about fixing problems-it’s about enjoying the journey of creating a heartfelt piece that speaks to your home and your story.
Creative Design Ideas for Vinyl-Wrapped Furniture
Creating a cozy, rustic atmosphere in your home doesn’t have to break the bank, and vinyl wrapping offers a delightful way to breathe new life into your furniture. Imagine transforming your drab old pieces into stunning showstoppers that reflect your unique aesthetic. With a bit of creativity and the right design ideas, your vinyl-wrapped furniture can tell a story, elevate your space, and embrace the charming essence of cottage living.
Consider using vinyl wraps with nature-inspired patterns, such as floral prints or wood textures, to bring a touch of the outdoors inside. These designs not only enhance the cozy feel of your home but can also serve as a conversation starter. For instance, a dining table wrapped in a rustic wood finish can set the stage for memorable family gatherings, while a side table in a vibrant floral print could add a pop of color to your living room. The versatility of vinyl allows you to easily switch up styles with the seasons, transforming spaces from warm autumn vibes to fresh spring pastels.
Play with Color and Texture
Moreover, don’t shy away from bold colors and adventurous textures. A classic white vinyl wrap can give an elegant touch to furniture pieces, while a rich navy or emerald green can create a cozy focal point in a neutral palette. You might even consider layering different textures; for example, combining smooth vinyl with a linen or burlap finish on complementary furniture can invite visual interest and warmth into your space.
Accessorize with Purpose
Accessorizing your vinyl-wrapped pieces can significantly enhance their charm. Pairing them with handmade decorations, such as a woven basket or a rustic wooden tray, can create a beautifully curated look. Adding comfortable throws or cushions in complementary colors or patterns can soften the space and invite relaxation, making your home a haven of comfort and style.
Ultimately, the key to creative design lies in your personal touches and thoughtful choices. Embrace the journey of transforming each piece into a reflection of your personality and lifestyle. With vinyl wraps, the possibilities are boundless, offering a perfect opportunity to craft a space that feels authentically you, celebrating the simple joys of cottage living. So, roll up your sleeves and let your creativity shine; your next cozy masterpiece awaits!
Caring for Your Vinyl-Wrapped Furniture
Preserving the beauty and integrity of your vinyl-wrapped furniture is essential to enjoying its aesthetic charm for years to come. These delightful makeovers not only elevate your space but also serve as a testament to your creativity and style. To ensure that your vinyl wraps remain vibrant and in excellent condition, there are some straightforward yet effective care routines to follow, enabling you to bask in the cozy allure of your home environment.
First and foremost, regular cleaning is vital. Gently wipe down your vinyl-wrapped surfaces with a soft cloth and a mixture of warm water and mild soap. Avoid using abrasive cleaners or scrub brushes, as they can damage the vinyl and dull its finish. For those stubborn spots, a little bit of vinegar mixed with water can work wonders without being harsh on the material. Remember to pat dry your furniture after cleaning to avoid any moisture seeping in at the edges of the wrap, which could lead to peeling or warping over time.
Preventative Measures
To keep your vinyl-wrapped pieces looking fresh, consider placing them in areas that minimize exposure to direct sunlight and extreme temperatures. Prolonged exposure to UV rays can cause fading and warping, while excessive heat can compromise the adhesive. If your furniture is indoors, try rearranging it to a spot that receives filtered light or using sheer curtains to diffuse sunlight. For outdoor vinyl-wrapped items, opting for covers or moving them to shaded areas can significantly extend their lifespan.
Dealing with Wear and Tear
In a cozy, rustic home, wear is inevitable, but swift action can prevent further damage. If your vinyl starts to bubble or peel, you can use a heat gun or hair dryer on a low setting to carefully shrink the wrap back into place. This gentle heating method softens the adhesive, allowing you to smooth out imperfections. For deeper scratches or tears, consider using a vinyl repair kit that matches your wrap’s color for seamless refurbishing.
By embracing a thoughtful care routine, you ensure that each piece of vinyl-wrapped furniture continues to tell its unique story while reflecting the warmth and charm of your cozy cottage living. Enjoy the process of maintaining beauty in your home, allowing your creativity to shine through every lovingly cared-for detail.
The Cost-Effectiveness of Vinyl Wrap Makeovers
With the rising cost of home renovations and furnishings, finding affordable yet stylish solutions is more vital than ever for cozy cottage living. Vinyl wrap offers a transformative option that not only revives tired furniture but also saves you a considerable amount compared to traditional refinishing methods. Imagine taking a scratched-up dresser or an outdated table and breathing new life into it with just a few yards of vinyl. This modern makeover trick is both wallet-friendly and rewarding, allowing you to express your unique style without breaking the bank.
One of the key advantages of vinyl wrapping is its cost-effectiveness. While professional refinishing or replacing furniture can easily cost hundreds or even thousands of dollars, wrapping offers a significant reduction in expense. A small investment in high-quality vinyl can yield stunning results that emulate more expensive materials like wood or leather, creating a fresh look for a fraction of the price. Many homeowners find that even large pieces like cabinets can be updated for under $100, making it a feasible DIY project even for those on a budget.
Moreover, the durability of vinyl wrap contributes to its cost-effectiveness over time. Unlike paint, which may chip or fade, quality vinyl can withstand wear and tear, making it a smart long-term investment. It can easily be cleaned and maintained without the need for complicated upkeep, leading to reduced spending on repairs and replacements. Think of it as not just a makeover for today but a sustainable solution that preserves the charm and character of your home for years to come.
In embracing the art of vinyl wrapping, you also tap into a world of creativity and self-expression. Customizing your furniture provides a chance to reflect your personal style while fostering a welcoming atmosphere that is the essence of cottage living. Plus, there’s something truly satisfying about taking part in a hands-on project that transforms your space. As you experiment with different colors and textures, each piece becomes a testament to your pioneering spirit, bringing not only beauty but a cozy story to your home. So roll up your sleeves, and let’s get wrapping-your stylish, cost-effective transformation awaits!
Exploring Different Styles and Finishes in Vinyl Wrap
Imagine walking into your cozy cottage, greeted by the enchanting beauty of your lovingly wrapped furniture. Vinyl wrap opens up a world of possibilities for transforming your space, allowing you to express creativity while embracing the warmth of rustic home design. As you explore different styles and finishes available for vinyl wrapping, you’ll discover that each choice carries its unique charm while breathing life into your beloved pieces.
There are numerous styles to consider when selecting vinyl wrap, from classic wood finishes that resonate with a farmhouse aesthetic to modern textures that add a touch of sophistication. Embrace the rustic appeal by opting for wood grain vinyl wraps in shades of oak, walnut, or even distressed finishes that evoke that charming lived-in look. Alternatively, for a more contemporary vibe, you can choose sleek matte or glossy finishes in bold colors, which can beautifully offset the natural elements of your outdoor cottage atmosphere.
When it comes to designs, the choices are equally diverse. Florals and nature-inspired patterns are popular among those looking to capture a quaint countryside feel, while geometric shapes and abstract designs can inject modern flair into your decor. If you’re leaning toward personalization, consider custom vinyl wraps that reflect your personality, such as monograms or patterns inspired by local flora.
Mixing and Matching Finishes
A delightful aspect of vinyl wrapping is the ability to mix and match finishes. For instance, combining a soft faux-leather texture for your chairs with a rustic wood finish on your table creates a captivating contrast that invites warmth and style into the room. You can also play with layering vinyl types – layering with metallic foils can be particularly striking on drawer fronts or cabinet doors. This way, every piece becomes an opportunity to tell a story, transforming your furniture into bespoke treasures that capture the essence of your cozy cottage lifestyle.
No matter your choice, vinyl wrap serves as an excellent canvas for creativity. So, as you embark on this delightful journey of renewal and restyling, remember to let your unique tastes shine through, infusing every corner of your home with your delightful spirit and authenticity. Each vinyl-wrapped piece will not only enhance the beauty of your surroundings but also foster a sense of comfort and welcome for friends and family who gather to enjoy your warm, inviting cottage.
Sustainable Choices: Eco-Friendly Vinyl Options
In a world increasingly focused on sustainability, choosing eco-friendly vinyl options for your furniture wrap can add an environmental dimension to your creative home makeover. By selecting vinyl wraps made from recycled materials, or those that are PVC-free, you can give your beloved pieces a fresh look while also reducing your carbon footprint. These eco-conscious choices not only reflect a commitment to the planet but also align beautifully with the rustic charm of cottage living, where nature and simplicity intersect harmoniously.
When considering your vinyl options, look for brands that prioritize sustainability in their production processes. Many manufacturers now offer wraps that are both environmentally friendly and durable, ensuring that your furniture can withstand the test of time without compromising on aesthetics. Water-based adhesives are another fantastic choice, as they minimize harmful chemical emissions compared to traditional solvent-based adhesives. This small, yet significant change can contribute to a healthier indoor environment for you and your family.
Choosing Sustainable Materials
Going beyond aesthetics, it’s important to understand the materials you are using. Many vinyl wraps are now available in styles that mimic natural wood finishes, incorporating recycled content that ensures you’re not only beautifying your home but also contributing to a more sustainable future. Opt for products highlighted as low-VOC (volatile organic compounds), which helps maintain better air quality in your cozy cottage, allowing your handcrafted decor and seasonal flowers to truly shine.
Additionally, consider the long-term benefits of vinyl wrapping compared to traditional refinishing methods. Unlike paint or lacquer, which can require multiple applications and significant resources over time, a high-quality vinyl wrap will preserve its fresh look with minimal upkeep. Therefore, opting for sustainable vinyl is not merely a stylish choice; it embodies a commitment to sustainability that resonates with both vintage charm and modern living.
By embracing eco-friendly vinyl options, you’re not just innovating your furniture; you’re also telling a story of responsibility and creativity. Your beautifully wrapped pieces can inspire conversations about sustainable living and demonstrate how thoughtful choices enhance both the aesthetic and ethical dimensions of your cozy cottage lifestyle.
Inspiring Before and After Vinyl Wrap Transformations
Transforming tired furniture into stunning focal points can be thrilling, especially when you see the dramatic before-and-after effects of vinyl wrapping. Imagine a once-dull coffee table adorned with scratches and stains, now radiating charm with a fresh, wood-grain vinyl wrap that not only revitalizes its appearance but also aligns perfectly with your cozy cottage aesthetic. Stories of transformation often inspire creativity, encouraging others to embrace their DIY spirit and embark on similar enchanting projects.
- From Drab to Fab: A faded dining chair, once forgotten in the corner, can be rejuvenated with a vibrant floral vinyl that invites warmth and personality into your space. This easy upgrade requires minimal effort but yields maximum impact, transforming the piece into a statement item that sparks joy and conversation during family gatherings.
- Mixing Styles: Consider a rustic dresser updated with a sleek, modern vinyl. By selecting a matte finish in a contemporary pattern, you can create an eye-catching contrast that harmonizes old-world charm with modern simplicity, demonstrating how vinyl can cater to diverse tastes within snug living spaces.
- Functional and Beautiful: Even storage can serve as a design element. An old trunk wrapped in vintage map vinyl can become not just a storage solution, but a conversation starter, evoking dreams of travels while keeping your blankets cozy and organized. This combines functionality with the enchantment of storytelling.
Vinyl wrap transformations go beyond mere aesthetics; they tell a tale of creativity and resourcefulness. Each successful renovation brightens your space while reinforcing a sense of home. Share your journey through photos that capture the essence of these changes, illustrating how a little imagination can breathe new life into cherished pieces. When showcasing your projects, consider joining community maker profiles or local DIY gatherings where you can inspire others to take their own leaps into the world of vinyl wrapping. The beauty of these transformations extends beyond your home, fostering connections and a shared appreciation for handcrafted beauty in our cottage living culture.
Faq
Q: How do I choose the best vinyl wrap for my furniture?
A: To choose the best vinyl wrap for your furniture, consider factors like color, texture, and pattern that complement your existing decor. Look for high-quality vinyl that’s durable and easy to clean. For inspiration, check out the “Choosing the Right Vinyl Wrap for Your Furniture” section of our article.
Q: What are the most common mistakes when applying vinyl wrap?
A: Common mistakes when applying vinyl wrap include not cleaning the surface properly, rushing the application, and failing to use a heat source for better adhesion. To avoid these pitfalls, refer to our “Top Tips for Smooth Vinyl Application” section for effective strategies.
Q: Can vinyl wrap be removed easily without damaging furniture?
A: Yes, vinyl wrap can typically be removed without damaging the underlying furniture if done carefully. Use a heat gun or hair dryer to gently warm the vinyl, making it easier to peel off. For more tips, check the “Troubleshooting Common Vinyl Wrapping Issues” section.
Q: How long does vinyl wrap last on furniture?
A: Vinyl wrap can last between 3 to 7 years, depending on factors like exposure to sunlight and wear. To extend its life, ensure proper care, as outlined in the “Caring for Your Vinyl-Wrapped Furniture” section of our article.
Q: Is vinyl wrapping furniture cost-effective compared to painting?
A: Yes, vinyl wrapping is often more cost-effective than painting because it requires less prep work and can be easier to apply. For a detailed comparison, explore the “The Cost-Effectiveness of Vinyl Wrap Makeovers” section for insights.
Q: What tools do I need for vinyl wrapping furniture?
A: Essential tools for vinyl wrapping furniture include a utility knife, squeegee, heat gun, and cleaning supplies. A comprehensive list can be found in the “Essential Tools for a Successful Vinyl Wrap Project” section of our article.
Q: Can vinyl wrap be applied to uneven surfaces?
A: While applying vinyl wrap to uneven surfaces can be challenging, it’s possible using heat to mold the vinyl better. Ensure to measure and cut sections meticulously for a seamless finish. More techniques can be found in our “Step-by-Step Guide: Applying Vinyl Wrap Like a Pro.”
Q: What are some creative design ideas for vinyl-wrapped furniture?
A: Creative design ideas for vinyl-wrapped furniture include using contrasting colors, combining patterns, or using textured vinyl for a rustic effect. For inspiration, check out the “Creative Design Ideas for Vinyl-Wrapped Furniture” section to spark your imagination.
In Summary
Congratulations on embarking on your journey to transform your furniture with vinyl wrap! By now, you should feel inspired and equipped with the tricks needed for a stunning modern makeover. Remember, achieving a fresh look can rejuvenate any space and add a personal touch to your cozy cottage decor. Don’t wait too long to try these techniques-start your project today and unleash your creativity!
If you’re eager for more tips, be sure to explore our other articles on DIY decor projects and rustic home design to keep the momentum going. Have questions or insights? We’d love to hear from you in the comments below! And don’t forget to sign up for our newsletter for exclusive content and updates that celebrate the charm of cottage living. Embrace the joys of handcrafted beauty and let your home reflect your unique style!