Transforming your furniture with a glaze finish can elevate everyday pieces into charming standouts, adding depth and dimension that captures the eye and heart. Did you know that a simple glaze can not only enhance the beauty of your furniture but also reflect your unique style? Whether you’re looking to revitalise an old heirloom or personalize a new find, this guide will uncover secrets to achieving that perfect, rustic look that embodies cozy cottage living. Embrace the joy of crafting and reimagining your home as we explore techniques that will inspire your creativity and help you create that inviting atmosphere you cherish. So, grab your supplies and let’s add a splash of charm to your decor!
How Glazing Enhances Furniture Beauty
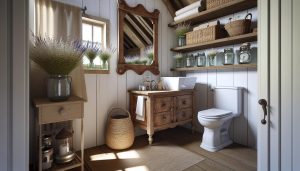
When you think about transforming your furniture, glazing might not be the first technique that comes to mind, but it truly can work wonders. This artful process elevates the beauty of your pieces, enhancing their texture and depth in remarkably charming ways. Glazing can infuse a rustic warmth into your decor, adding to the cozy atmosphere that many seek in cottage-style living. By gently applying a glaze over your furniture’s surface, you create a soft sheen and an inviting layer that catches the light beautifully, revealing intricate details and subtle color variations that might otherwise go unnoticed.
Imagine a well-worn dining table with a natural wood finish-glazing can elevate this simple piece into a statement of artisan craftsmanship. By offering a decorative yet protective layer, glazing not only enhances the aesthetics but also helps to preserve the underlying wood, leaving your beloved furniture with a story to tell while enhancing its imperfection with a handcrafted vibe. It’s the principles of rustic design: embracing the beauty of age while adding a touch of artistry. As you embark on your glazing journey, consider how it can harmoniously blend with your décor, seamlessly reminiscing on the charm of yesteryears while fitting snugly into your present-day aesthetics.
Among the myriad benefits of glazing is its ability to add dimension. With a few simple techniques, such as rag rolling or brushing, color and texture become layered, creating depth that invites the eye and enlivens any room. Effectively used, glazing can accentuate architectural features, highlight inherent details in wood grains, or even transform plain surfaces into pieces of art. As you explore the possibilities, remember that each layer of glaze you apply contributes to the enchanting narrative of your home, encouraging a connection between your cherished furniture and the overall spirit of your living space. Whether you’re revamping a thrifted find or refinishing a family heirloom, glazing gives your furniture the opportunity to shine with fresh beauty and timeless charm.
Selecting the Right Glaze for Your Project
Selecting the right glaze for your furniture project is crucial, as it can dramatically affect the final aesthetic and overall feel of your beloved pieces. With a little knowledge and creativity, you can find the perfect glaze that enhances the rustic charm of your home while reflecting your personal style. Consider starting with a color palette that resonates with your existing décor, as this will guide you in choosing hues that harmonize with the ambiance of your living space. Whether you are leaning towards light, airy tones or deep, rich shades, the glaze you select will set the tone for how warm and inviting your furniture feels.
When choosing a glaze, think about the finish types available: opaque, translucent, and metallic are all popular options. Opaque glazes provide solid coverage, which is perfect for hiding imperfections and giving a clean look, while translucent glazes allow the beauty of the wood grain to shine through, adding texture and depth. For a touch of elegance, consider metallic glazes that can catch the light beautifully, creating an enchanting sparkle in your rustic abode. In addition to color and finish, it’s essential to factor in the type of base for the glaze-water-based glazes tend to be easier to work with and clean up, while oil-based glazes can offer durability and a richer finish.
Once you’ve narrowed down your choices, it’s beneficial to test your glaze on a small, inconspicuous area of the furniture. This way, you can see how the glaze interacts with the wood and how it dries, ensuring that it aligns with your vision. Don’t forget to consider the application method as well; different techniques can yield diverse results, so it’s wise to experiment with various brushes, rags, or sponges for the desired effect.
In your journey of transforming furniture pieces through glazing, allow yourself the freedom to blend techniques and colors. Open your heart to experimentation, for part of the magic lies in the discovery of what resonates with you most, whether it’s a warm, earthy brown or a delicate blush. The right glaze becomes more than just a layer of finish-it is an opportunity to tell your story and enhance the cozy, inviting atmosphere that embodies your cottage lifestyle.
Preparing Your Furniture for Glazing
To breathe new life into your rustic furniture, preparation is key. The process of glazing can transform ordinary pieces into artisanal treasures, but it begins long before the first brushstroke. An essential aspect of ensuring a successful glazing experience lies in thoroughly preparing your furniture. This means cleaning, sanding, and priming the surface, letting each step enhance the natural beauty of the wood and provide a canvas that elevates your artistry.
Start by giving your furniture a good cleaning with a damp cloth to remove any dust, dirt, or old polish. This initial step sets the stage for a smooth application of glaze. Once it’s clean, inspect the surface for any imperfections, such as scratches or rough patches. These can be addressed by sanding the furniture lightly with fine-grit sandpaper. Not only does this process smooth the surface, but it also helps the glaze adhere better. For a cozy touch, imagine transforming a beloved piece of farmhouse furniture that has seen family gatherings and quiet evenings into something that reflects your unique style and warmth.
Next, consider applying a primer if your furniture has a dark stain or if you’re transitioning from a darker base to a lighter glaze. A neutral base can help in achieving the desired finish while ensuring that the true color of your glaze shines through. Once the primer is dry, give the surface one final gentle sand to keep it velvety smooth, wiping away any dust with a clean, dry cloth afterward. Your goal here is to create a surface that feels inviting to the touch, echoing the charm of cozy cottage living.
As you prepare your furniture, take a moment to envision the final look you wish to achieve. This foresight will guide you in your glazing application, creating a harmonious piece that blends beautifully with your space. With your surfaces prepared, you are now poised to embark on the delightful journey of glazing, turning your rustic finds into cherished artworks that tell your story and enrich the warmth of your home.
Step-by-Step Guide to Applying Glaze
Applying a glaze to your furniture can breathe new life into weary pieces, transforming them into stunning focal points that echo your style and charm. The process, while creatively rewarding, is straightforward-perfect for anyone ready to infuse their home with personality and warmth. Here’s a step-by-step guide to help you navigate the journey of glazing your furniture, ensuring each piece tells its own unique story.
Gather Your Materials
Before diving into the application itself, it’s essential to gather all your supplies. You will need:
- Glaze (in your chosen color)
- Paintbrushes (a wide brush for larger areas and a smaller brush for details)
- Rags or sponge for wiping
- Paint thinner or mineral spirits (for cleanup)
- Protective gloves
- Drop cloth or newspaper to protect your work area
- Sealant for finishing touches
Mixing the Glaze
Once you have your materials ready, it’s time to prepare the glaze. In a mixing container, combine your glaze with a small amount of water to achieve a more transparent finish. The desired consistency will allow for the wood grain to show through, creating that coveted depth. Aim for a mix that feels soft and fluid-this will ensure easier application while allowing the color to settle into the crevices of the wood.
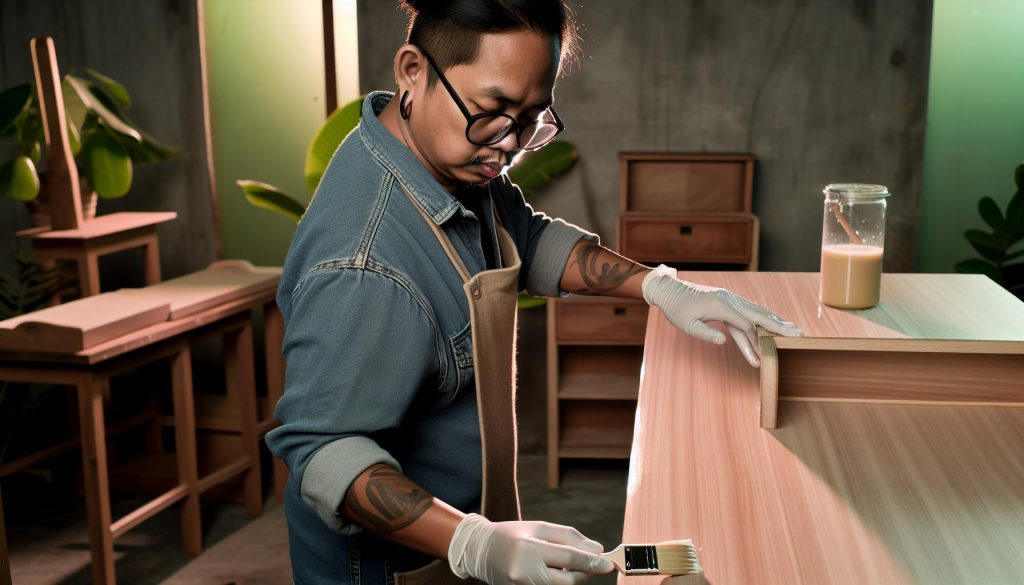
Application Techniques
Start your glazing by applying a thin layer using a brush. Work in small sections to maintain control, especially if your furniture has detailed carvings or grooves. Using the wide brush, apply the glaze following the natural lines of the wood, and be generous but mindful, letting the glaze flow into the details.
Here’s the magic part: once applied, take a damp rag or sponge and wipe away the excess glaze. This technique not only enhances the depth but also reveals the beauty of the wood beneath-creating those charming variations that tether the piece to its rustic roots. For a more dramatic distressed effect, use a light touch when wiping; if you prefer a subtle look, more glaze can be allowed to remain.
Final Touches
After the glazing is applied and you’re satisfied with the look, let the piece dry completely. Depending on the atmospheric conditions, this might take a few hours. Once dry, a sealant can be applied to protect your newly glazed surface from wear and tear. Choose a matte or satin finish that aligns with your desired style, ensuring the piece remains both functional and beautiful.
With patience and love, your glazed furniture will not only enhance your home but also celebrate the joy of craftsmanship-a testament to the cozy living that warms every corner of cottage life. Embrace the process, and let your creativity shine as you transform each piece into a cherished memory.
Techniques to Create Depth and Dimension
Creating an enchanting depth and dimension in your furniture glazing project can transform dull pieces into captivating focal points that radiate personality and charm. One effective technique is to utilize layering. By applying multiple thin layers of glaze rather than a single thick coat, you allow the underlying wood grain to peek through, lending a multicued richness to the surface. Each layer can be a different shade, adding complexity and character to your furniture, much like the subtle hues found in nature.
Another method to consider is the incorporation of texture. Before applying glaze, experiment with different tools to create varied textures – sponges, combs, or even crumpled plastic wrap can yield uniquely rustic finishes. For instance, gently stippling the surface with a damp sponge before glazing can enhance depth by creating shadowed areas that the glaze will settle into. This not only embraces the handcrafted vibe cherished in cottage decor but also ensures that your piece feels inviting and warm.
As you apply the glaze, think about the direction of your brush strokes. Applying glaze in a way that follows the natural lines of the furniture can amplify the visual dimension. Aim to accentuate details like edges and carved elements. Don’t be afraid to dab or twist the brush slightly at the end of your stroke to create random patterns that mimic the organic feel of weathered wood. The beauty of glazing lies in the ability to personalize each project, so allow your creativity to flow as freely as the glaze itself.
Finally, remember that lighting plays a crucial role in enhancing depth. After your glaze has dried and you’ve applied a sealant, position your furniture near natural light or incorporate soft ambient lighting to highlight the nuanced layers of the glaze. The interplay of light and shadow will bring out the beauty you’ve created, ensuring that every glance at your piece tells a story of warmth, craftsmanship, and the joyous spirit of cottage living. Embrace these techniques as you embark on your glazing journey, and let each piece of furniture radiate the cozy charm that homes are made of.
Mistakes to Avoid When Applying Glaze
When embarking on the enchanting journey of glazing furniture, it’s essential to embrace the process while being mindful of common pitfalls that can hinder your creative flow. One of the most frequent mistakes is applying too much glaze at once. Instead, approach your glazing with the gentle touch of a cottage artisan: apply thin layers gradually, allowing each to dry before adding the next. This technique not only ensures better control over the final look but also highlights the intricate details that make your piece delightful. Think of it as layering flavors in a beloved farmhouse recipe; each addition plays its part in creating a beautifully nuanced result.
Another area to watch is the choice of application tools. Using a brush that’s too stiff or a roller designed for wall paint can lead to undesirable textures or streaking. Instead, opt for softer brushes or even your fingers to create that handcrafted vibe. Experiment with sponges or cloths to dab or wipe the glaze; this adds depth and offers a cozy, rustic finish reminiscent of sun-kissed, weathered wood.
Moreover, neglecting proper surface preparation can also spell disaster for your glazing endeavors. Always start with a clean, sanded surface to allow the glaze to adhere properly. Any dust, old finish, or imperfections will become more pronounced under the glaze, transforming your masterpiece into a source of frustration. Remember, just as a well-tended garden lays the groundwork for a bountiful harvest, so too does careful preparation pave the way for a stunning finish.
Finally, be wary of rushing the drying process. Just as a baking loaf needs time to rise, your glaze requires patience to cure effectively. Avoid positioning your glazed furniture in direct sunlight or too close to heat sources while it dries, as this can lead to uneven finishes or bubbling. Allowing your piece to breathe nurtures the beauty and character inherent in the glazing process, ensuring you’ll create furniture that not only serves a purpose but becomes a cherished heirloom full of stories and warmth.
Caring for Glazed Furniture: Best Practices
Embracing the charm of glazed furniture is a delightful way to enhance your home’s aesthetic, but caring for these exquisite pieces can be crucial to retain their enchanting beauty for years to come. Much like nurturing a flourishing herb garden, providing the right care can yield a rewarding relationship with your beloved furnishings. To keep your glazed furniture looking its best, consider the following best practices that weave together traditional wisdom and modern techniques.
To begin with, maintaining a regular dusting routine is essential. Use a soft, lint-free cloth to gently remove dust and dirt. Avoid harsh chemicals or abrasive materials that can scratch the surface; instead, a simple solution of warm water mixed with a few drops of mild soap will do wonders. After cleaning, always remember to dry the surface thoroughly to prevent moisture from seeping into the glaze and compromising its finish.
Protecting Your Glazed Furniture
Moreover, proper positioning can significantly impact the longevity of glazed pieces. Keep your furniture out of direct sunlight, as prolonged exposure can fade the colors and alter the glaze’s finish. If sunlight is unavoidable, consider using sheer curtains to diffuse brightness. It might also be worth placing coasters or placemats under your decorative items to prevent scratches and dents, preserving the crafted character of your glaze.
Seasonal Care Tips
As seasons change, so too should your care routines. In colder months, manage humidity levels in your home, as extremely dry conditions may lead to cracks in the glaze over time. A humidifier can help create a cozy environment reminiscent of your favorite rustic cottage. During the warmer months, ensure that your furniture doesn’t come into contact with hot items, as extreme temperature differences can damage the finish.
In the spirit of cottage living, infuse a sense of joy in your maintenance practices. Maybe put on your favorite tunes as you tend to your furniture, or plan a small tea gathering around your beautifully glazed pieces, celebrating the artistry and craftsmanship that adorns your home. Every wipe, every careful placement, speaks to a loving appreciation of handcrafted beauty that completes your cozy, rustic sanctuary. Embrace these practices, and your glazed furniture will continue to tell its charming story for many seasons to come.
Inspiring Glaze Ideas for Rustic Furniture
Glazing offers a wonderful opportunity to breathe new life into rustic furniture, allowing the natural beauty of the wood to shine through while adding character and charm. Imagine a weathered farmhouse table transformed with a subtle antique glaze, which enhances the grain and introduces a soft sheen that seems to whisper stories of yesteryears. The key lies not only in selecting the right color but also in understanding how glazing can enhance the unique aspects of each piece.
One inspiring idea is to use a deep, rich walnut glaze on previously unfinished wooden chairs or stools. This warm tone not only deepens the existing color but highlights the natural knots and imperfections, giving them a one-of-a-kind appeal. When applying the glaze, consider using a simple rag to work the product into the crevices, allowing the depths to showcase the craftsmanship of the wood. The result is a captivating contrast that invites guests to stop, admire, and perhaps even run their hands over the beautifully finished surface.
Another fascinating approach is to experiment with layering different glazes. For instance, applying a light grey wash followed by a soft white glaze can create an ethereal, misty effect that feels both fresh and timeless. This technique works wonders on items like reclaimed wood dressers or sideboards, lending them an air of serene elegance. Additionally, this layered approach can help conceal minor imperfections while embracing the rustic charm that defines cottage living.
For those looking to add a playful touch to their interiors, consider using vibrant colors such as teal or coral as a glaze. Applying these hues over a distressed finish can yield a captivating pop of color that brightens up neutral palettes, making your living space inviting and cheerful. A small accent piece, such as a side table or a wooden bench, can serve as a statement in a hallway or living room, drawing the eye and sparking conversation.
Ultimately, the beauty of glazing rustic furniture lies in creating pieces that reflect your personality and home. By thoughtfully selecting and applying glazes, you can transform simple items into cherished treasures, experiencing the simple joys of a cozy, handcrafted lifestyle. Embrace your creativity, and let each piece tell its own story!
Troubleshooting Common Glazing Issues
Navigating the world of furniture glazing can be a delightful adventure, but it’s not without its bumps along the way. As you transform old wooden pieces into stunning, rustic treasures, you may encounter a few common challenges that can turn your creative journey into a puzzling experience. Fear not; many of these issues are easily resolved with a little know-how and preparation.
First, consider the frustration of an uneven glaze application. This often occurs when the glaze is applied too thickly or not evenly distributed. To combat this, ensure that you’re working in thin, even layers and using a high-quality brush or rag designed for glazing. If you find yourself with smudges or streaks, don’t panic! Simply dampen a clean cloth slightly and gently wipe over the area to smooth out any imperfections. This will help maintain the soft, inviting look of your piece without the need for a complete redo.
Another common concern is the glaze drying too quickly, which can lead to unsightly brush marks or a patchy finish. This can be particularly troublesome in warmer environments or if you’re working with a fast-drying glaze. To prevent this, consider working in a cooler, more humid space or using a slower-drying glaze formula. Adding a handful of drops of retarder can also extend the open time of the glaze, giving you the luxury to manipulate it without the worry of it drying on your brush.
Additionally, glazing can sometimes obscure the beauty of the wood grain if applied carelessly. If your intention is to enhance natural details rather than cover them up, pick lighter, more translucent glazes. A simple trick is to test the glaze on a scrap piece of wood. This way, you can observe how the color interacts with the wood grain prior to making any commitments to your beloved furniture pieces.
Lastly, if you’re experiencing bubbling or peeling after drying, this may indicate that the surface was not properly cleaned or that moisture was present when the glaze was applied. To remedy this, always ensure your furniture is clean and dry before application. If bubbles do occur, lightly sand the area once it’s fully dry, then reapply the glaze in thinner coats, ensuring a smooth, even finish.
By embracing these troubleshooting tips and nurturing a spirit of creativity, you’ll turn each challenge into an opportunity to refine your glazing skills, ultimately bringing your rustic furniture visions to life. Enjoy the beautiful transformation as you create a cozy atmosphere filled with character and charm that celebrates the unique stories of the past.
Exploring Different Glazing Styles and Finishes
The magical world of glazing opens a treasure chest of styles and finishes that can transform simple furniture into stunning centerpieces. Whether you’re resting your coffee on a rustic farmhouse table or displaying your cherished knick-knacks on a delicate shelf, the right glaze can enhance the beauty of natural wood, drawing out its intricacies and inviting warmth into your space. Imagine bringing out the elegant grain of reclaimed wood, adding a touch of antiqued charm to a modern piece, or even infusing vibrant hues into a drab item-glazing empowers your creativity!
Types of Glazing Styles
When exploring different glazing styles, consider the following popular options to bring out the character of your furniture:
- Transparent Glaze: This style is perfect for showcasing the original wood while adding a layer of color and protecting the surface. It often enhances the grain without hiding it, creating a luminous effect that warms any room.
- Opaque Glaze: Here, the glaze completely covers the wood, allowing for bold shades that can transform furniture into eye-catching statement pieces. This is ideal for creating a vintage or shabby chic look.
- Distressed Glaze: Achieving an aged, rustic appearance, this style often combines dark colors with techniques that reveal underlying layers, perfect for farmhouse style décor.
- Metallic Glaze: For those drawn to a touch of glamour, metallic glazes add a reflective quality that can elevate contemporary pieces, inviting modern elegance to your cottage-inspired home.
Choosing the Right Finish
Apart from selecting the style of glaze, considering the finish can dramatically affect the outcome of your project. Here are a few to ponder:
- Satin Finish: Offering a soft sheen, this finish strikes a balance, providing a classic, sophisticated look while still revealing the beauty of the wood.
- Matte Finish: Perfect for a more rustic and earthy vibe, matte finishes absorb light rather than reflect it, giving your furniture a charming touch of understated elegance.
- Glossy Finish: For a more contemporary twist, high-gloss finishes create a clean, modern look, best suited for sleek designs and vibrant shades.
Experimenting with different glazing styles and finishes can transform the ambiance of your home, welcoming in an inviting charm reminiscent of cozy cottage living. Whether you’re at a community craft fair searching for inspiration, or spending a lazy Sunday indoors, glazing offers endless possibilities for creativity. As you dive into your projects, remember to savor the process, for it is the act of creation that fills our spaces with love and history.
DIY Glazing Projects to Transform Your Home
There’s something truly enchanting about bringing new life to old furniture with a dash of glaze, allowing you to infuse your home with warmth, character, and a touch of handcrafted beauty. Whether you’re reimagining a tired coffee table or giving a breath of fresh air to a vintage sideboard, DIY glazing projects can serve as the perfect creative outlet. As you embark on these transformative endeavors, you’ll not only enhance the aesthetics of your pieces but also indulge in the simple joy of crafting that is so central to the cottage living ethos.
Begin your journey by gathering a few essential materials: a suitable glaze (transparent or opaque, depending on your vision), brushes or sponges for application, and rags for wiping away excess glaze. For added flair, consider incorporating natural elements like spices or herbs into your glaze for warm undertones or delightful textures. A charming idea could be to glaze a rustic dining table, which, when paired with mismatched chairs, can create a delightful setting for family dinners. Remember, the application process is your opportunity to showcase your personality-experiment with sponging, brushing, or even finger painting to achieve unique effects that resonate with your style.
Project Ideas to Spruce Up Your Space
To inspire your creativity, here are a few delightful DIY projects:
- Antique Glazed Mirror: Transform an old mirror frame with a distressed glaze technique. The subtle depth will enhance its vintage charm, making it a stunning focal point in any entryway.
- Charming Garden Planters: Use a bright, opaque glaze on terracotta pots, adding character to your patio or windowsill. This personalization can turn a simple plant into a work of art.
- Rustic Bookcase Revamp: A transparent glaze over a wood bookcase can bring out the grain and add a cozy touch to your reading nook. Pair it with soft lighting and plush cushions for an inviting atmosphere.
These projects not only appeal to the eye but also serve as heartfelt connections to your space, enriching the lived experience within your home. As you dust off those paintbrushes and mix your perfect glaze, let each stroke enable you to create depth and dimension, turning your ordinary furniture into extraordinary heirlooms filled with the spirit of cottage living. Embrace the process, engage your community for ideas and inspiration, and watch your home transform into a testament to your creative hand and heart.
Frequently Asked Questions About Furniture Glazing
Curiosity about furniture glazing often leads to delightful discoveries and creative pursuits. Many DIY enthusiasts wonder how to blend artistry and functionality seamlessly, especially when tackling their own projects. A well-executed glaze can transform ordinary pieces into charming statements, enhancing depth and character that celebrate rustic charm and personal style.
One frequently asked question is, “How do I choose the right glaze for my furniture?” The answer depends on the project’s aesthetic goals. If you crave a weathered look with added texture, consider a matte or chalk-based glaze that imparts an aged appearance. Conversely, if your vision leans towards vibrant nuances, clear or tinted glazes can amplify colors and surfaces without overshadowing the furniture’s natural beauty.
Another common inquiry revolves around “What are the best techniques to apply glaze?” Layering is key! Begin with a base coat and allow it to dry completely before introducing your glaze to accentuate details. Techniques like sponging or rag rolling can create unique effects, giving your piece personality and warmth. Remember, don’t rush the process; patience allows each layer to tell a story.
When it comes to caring for glazed furniture, many wonder if the finish requires special maintenance. A simple dusting with a soft cloth is usually sufficient to keep the charm of your glazed pieces intact. For deeper cleans, a mixture of mild soap and water can remove grime without damaging the glaze. Avoid harsh chemicals, as they may dull the finish and rob the piece of its handcrafted allure.
Lastly, aspiring artisans often ponder, “What common mistakes should I avoid?” One major pitfall is overloading your brush with glaze. This can lead to streaks or uneven finishes. Instead, apply thin layers, allowing each to dry before adding more. Another mistake is neglecting to test your glaze on a small area first; this simple step ensures the color and finish align with your vision, leading to satisfying outcomes.
Engaging with these questions not only demystifies furniture glazing but also inspires creativity and connection within your home. Each project is a reflection of your journey, merging comfort and artistry in a symphony of rustic beauty. Embrace the process, share your experiences, and take pride in crafting spaces that speak to the heart.
Faq
Q: How can I achieve a smooth glaze finish on furniture?
A: To achieve a smooth glaze finish, apply a thin layer of glaze with a brush or sponge. Use long, even strokes and avoid overworking the glaze. Allow it to sit for a few minutes before gently wiping off excess with a clean cloth. This technique will help create an even surface without streaks.
Q: What types of paint can be glazed?
A: You can glaze over latex paints, chalk paints, or oil-based paints. Ensure the base coat is fully cured before adding glaze. Choose a compatible glaze that complements the underlying color for optimal results. This approach helps to create depth and highlights the furniture’s features.
Q: How do I fix mistakes made during glazing?
A: If mistakes occur while glazing, wait for the glaze to dry completely. Then, lightly sand the area to remove imperfections and apply a new layer of glaze. For small errors, using a damp cloth can gently lift unwanted glaze before it dries, allowing for corrections on the spot.
Q: Can I use a spray glaze for furniture?
A: Yes, spray glaze can provide a smooth, even finish and is user-friendly. Ensure you use a good quality spray glaze specifically designed for furniture. Hold the can about 6-12 inches away from the surface and apply in light, even coats for the best results.
Q: How long does glazed furniture take to dry?
A: Glazed furniture typically takes about 24 hours to dry completely. However, full curing can take longer, depending on humidity and temperature. It’s best to avoid heavy use or additional coatings until the glaze is fully cured to ensure durability.
Q: What is the best time of year to apply glaze to furniture?
A: Spring and fall are generally the best times to apply glaze to furniture, as humidity levels are usually lower, promoting effective drying. Aim to work in a well-ventilated area to expedite the drying process regardless of the season.
Q: How do I protect glazed furniture from damage?
A: To protect glazed furniture, apply a clear topcoat or sealant after the glaze is fully cured. Use coasters and avoid placing hot items directly on the surface. Regularly dust and clean with a soft, damp cloth to maintain its appearance without damaging the glaze.
Q: Is it necessary to sand furniture before applying glaze?
A: Yes, sanding furniture before applying glaze is recommended to create a smooth surface and enhance adhesion. Use fine-grit sandpaper, then wipe down the surface with a damp cloth to remove dust and particles for the best glazing results.
In Summary
As you embrace your creative journey in applying glaze to your furniture, remember that every brush stroke adds not just depth and dimension, but character and warmth to your home. If you’re inspired to explore further, check out our guides on DIY Rustic Decor Ideas and Seasonal Gardening Tips for more ways to enhance your cozy cottage living experience. Don’t hesitate! Gather your materials and start bringing your visions to life today.
Have questions or want to share your own glazing tips? We’d love to hear from you in the comments! Sign up for our newsletter for more inspiration and exclusive content. Let’s keep nurturing our love for handcrafted beauty and community connections together; your next project awaits!