There’s something truly magical about furniture that tells a story, and applying furniture wax is the key to achieving that vintage cottage glow. This simple yet transformative process not only enhances the wood’s natural beauty but also protects it, celebrating the handcrafted charm of rustic living. Are you longing to breathe new life into tired pieces or to add that sought-after aged patina to your home? Learning how to apply furniture wax can bring both beauty and durability to your beloved furnishings. As we guide you through this delightful DIY project, you’ll uncover tips and techniques that can turn even the simplest designs into stunning focal points in your cozy cottage. Embrace the joy of nurturing your space, and let’s embark on this creative journey together!
Choosing the Right Furniture Wax for Your Cottage Style

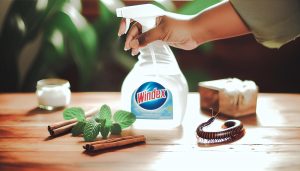
When it comes to enhancing the charm of cottage-style furniture, the right wax can make all the difference. Selecting a suitable wax isn’t just about sheen; it’s about embracing the essence of rustic warmth and handcrafted beauty. Look for products that combine natural ingredients with lasting durability. Briwax, for example, is a well-regarded option among furniture restoration enthusiasts. This beeswax and carnauba blend not only enriches wood but also provides a soft luster that aligns beautifully with the quaint aesthetics of cottage decor [[3](https://www.woodcraft.com/products/briwax-furniture-wax-1-lb)].
When choosing the right furniture wax, consider the finish you desire. For a traditional, matte look that accentuates the wood grain without overpowering it, opt for a soft, non-glossy wax. On the other hand, if you seek a touch less subtlety, a polished finish can add a contemporary flair. It’s also essential to consider the specific wood types you are working with. Hardwoods may take wax differently than softer woods, so testing the wax on a small, inconspicuous area first is always advisable. This way, you not only ensure the desired effect but also safeguard against any potential surprises.
In addition, recognize the importance of color as it plays a vital role in selecting your wax. For lighter woods, a clear wax can maintain the piece’s brightness, while darker hues can benefit from a tinted wax that enhances richness and depth, contributing to the cozy, inviting atmosphere your cottage embodies. Always remember, the right wax is not just a protective layer; it’s a conduit for expressing the unique character and history of your furniture, inviting all who enter your home to appreciate the simple joys of cottage living.
Essential Tools for Waxing Furniture Like a Pro

Achieving that coveted vintage cottage glow while waxing furniture is not just about the wax itself; it’s also about employing the right tools to do the job beautifully and efficiently. Equipped with the proper instruments, you can transform your handcrafted furniture into stunning pieces that whisper stories of warmth and tradition, inviting all who step into your home to revel in the cozy atmosphere. To embark on this delightful journey of enhancing your furniture, here are the essential tools you’ll need.
- Lint-Free Cloths: A stash of soft, lint-free cloths is a must for applying wax and buffing it to a soft sheen. Choose materials like microfiber or cotton that won’t leave fibers behind but will pick up the wax evenly.
- Wax Applicator Pads: These handy pads help you apply the wax smoothly across different surfaces. Look for options that fit comfortably in your hand and are washable for reuse.
- Polishing Brush: A quality natural-bristle polishing brush allows for even buffing of the waxed surface, especially in those hard-to-reach corners of intricate furniture details.
- Protective Glove: Although natural waxes are often safe, wearing disposable gloves while working can keep both your hands and your furniture clean, offering a professional touch to your project.
- Drop Cloths: Lay down drop cloths to protect your surrounding areas from any spills or drips. This is especially essential when working on larger pieces or in areas with cherished flooring.
- Small Containers: Use small, airtight containers to store leftover wax. Not only does this keep it fresh for future projects, but it also helps avoid waste as you enjoy your waxing adventures.
With these tools at your side, you’ll not only be prepared-but you’ll also feel inspired to dive into your next furniture project. Whether you’re refreshing an old treasure from a community market or bringing new life to a family heirloom, these essentials elevate your DIY crafting experience, enriching the rustic charm of your cottage home. As you embrace the simple joys and handcrafted beauty of cottage living, let every stroke of wax and every buff of cloth celebrate the unique character each piece of furniture has to offer.
Step-by-Step Guide to Applying Furniture Wax

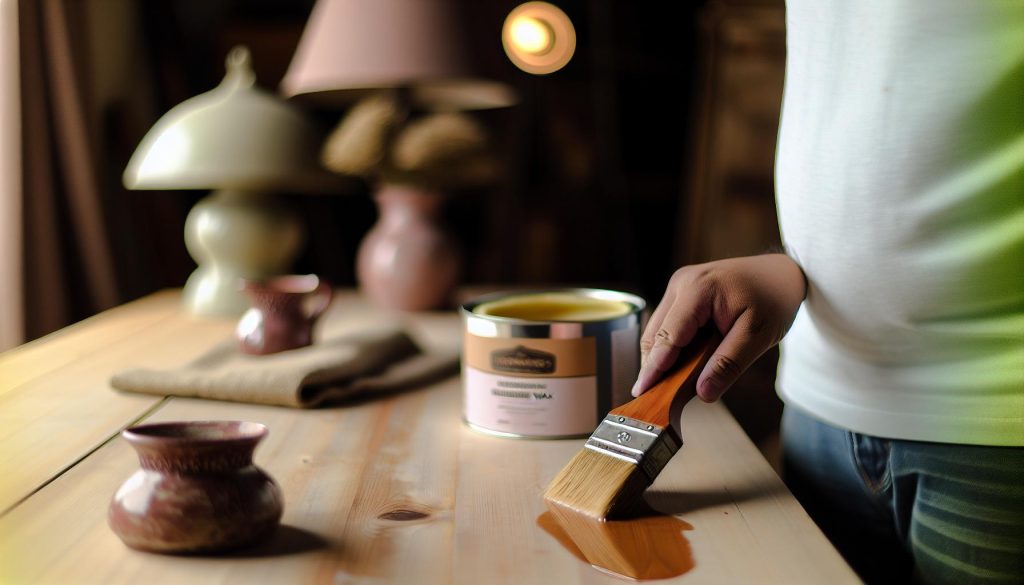
To achieve that nostalgic, vintage cottage glow, applying furniture wax is an art that celebrates the beauty of simplicity and tradition. Start by ensuring that the surface you’re working on is clean and free from dust and debris. Give the piece a gentle wipe down with a soft cloth, and if necessary, lightly sand any rough spots to create a smooth canvas for your wax application. Proper preparation will not only enhance the final look but will also ensure that the wax adheres well and performs its protective duties.
Next, it’s time to embark on the actual waxing process. Using a clean lint-free cloth or a wax applicator pad, dip it into your chosen wax. Remember, less is often more-start with a small amount of wax and gradually add more as needed. Apply the wax in small, circular motions, working it into the grain of the wood. This technique helps the wax penetrate deeper and ensures an even application. For intricate pieces, your natural-bristle polishing brush can be invaluable for getting into nooks and crannies where your cloth might not reach.
Once you’ve coated the entire surface with wax, allow it to sit for a few minutes to let the wax settle and harden slightly. After this initial set, take your polishing brush or a fresh lint-free cloth to buff the surface. Buffing brings out the sheen and enhances that warm, cozy glow that characterizes cottage living. Don’t rush this step; spend time ensuring every area is evenly polished, reflecting the love and care you’ve invested in your project.
Finally, remember that waxing isn’t just a one-and-done process. Regular maintenance is key to keeping your furniture looking its best. Depending on the usage and exposure to elements, consider applying a fresh coat of wax every 6 to 12 months. This practice not only prolongs the life of your furniture but also allows you to enjoy the satisfaction of nurturing the pieces that bring warmth and character into your home. Embrace this journey of transformation-it’s these simple acts of care that weave the stories of cottage living into the very fabric of your home.
Tips for Achieving a Beautiful Vintage Finish
Achieving that sought-after vintage finish on your furniture can transform mundane pieces into stunning focal points that radiate the charm of cottage living. To get started, consider the type of wax you choose. Opt for high-quality, all-natural furniture wax that enhances the wood’s grain while providing a protective layer. Clear wax typically highlights the natural color, while tinted waxes can add depth and character. For those looking to imbue a rustic charm, colored waxes can be perfect for enhancing the intricacies of raw or distressed wood surfaces, giving them a beautifully worn look.
When applying the wax, pay attention to the technique. Aim for a thin, even layer to prevent buildup, which can lead to a tacky finish. Use a clean lint-free cloth to apply the wax in circular motions, working it into the wood grain. This not only ensures deeper penetration but also helps create a lovely patina that’s indicative of years of loving use. Don’t hesitate to experiment with layering-applying multiple thin coats is often more effective than one thick layer.
Another tip for achieving that coveted vintage look is to embrace imperfections. Minor scuffs and scratches can enhance the character of your pieces, making them feel more authentic. If your piece has existing wear, consider using it to your advantage by layering wax to accentuate these features rather than hiding them. For a touch of nostalgia, consider adding decorative touches, like stenciled designs or transfers that reflect the whimsy of cottage aesthetics.
Lastly, consistent maintenance is essential. To keep the vintage vibe intact, reapply wax every 6 to 12 months, especially on surfaces that see a lot of use. This not only preserves the beauty of your furniture but also allows you to relive the process of caring for your cherished pieces. After all, in the world of cottage living, every artifact tells a story-nurturing them only enhances their narrative and your own connection to them. Embrace the beauty of handcrafted decor, let your creativity shine, and step into the fulfilling journey of preserving rustic charm in your home.
Common Mistakes to Avoid When Waxing Furniture

When embarking on the delightful journey of waxing furniture, the path can be strewn with well-meaning but common pitfalls. Waxing is an art that transforms everyday pieces into cherished heirlooms, and avoiding a few key mistakes can ensure your efforts yield stunning results that embody the cozy charm of cottage living. One prevalent misstep is applying too thick a layer of wax. While the desire for an enviable sheen is understandable, a heavy application can lead to a tacky, uneven finish that detracts from the beauty of your work. Instead, embrace thin, even layers-multiple applications will provide that desired luster without overwhelming your furniture.
Another mistake many make is hasty application without adequate preparation. It’s easy to overlook the power of a clean surface. Dust, dirt, and old polish can mar the final look. Always start by thoroughly cleaning your furniture; a simple solution of water and mild soap can work wonders. Once dry, take a moment to ensure the wood is free of any residues, allowing the wax to bond beautifully with the surface and highlighting the grain as it was meant to be seen.
Many budding DIYers also fall into the trap of over-eager buffing. Immediately after applying wax, the urge to buff it to perfection can lead to smudging and uneven spots. Instead, give the wax a little time to set according to the product’s instructions-this patience pays off by ensuring a smoother, more durable finish. Keep in mind that it’s better to let it cure for a while. When buffing, use a soft cloth and gentle pressure to reveal the stunning patina beneath, celebrating the handcrafted nature of your work, rather than forcing a shine that may not be there yet.
Lastly, neglecting to test your wax on a small, inconspicuous area before proceeding can be a costly error. Different woods and finishes may react variably to the same product, and what looks fabulous on one piece could yield unexpected results on another. A simple patch test can provide invaluable insight, ensuring you can adjust your technique or product choice to achieve that perfect vintage look. By sidestepping these common pitfalls, you’ll not only enhance the beauty of your furniture but also deepen your appreciation for the art of crafting a cherished home filled with warmth and rustic charm.
How to Care for and Maintain Waxed Surfaces
Once you’ve lovingly waxed your furniture to bring that enchanting vintage cottage glow to life, the next step is understanding how to care for and maintain those beautiful surfaces. Think of waxing as giving your pieces a cozy blanket; with a little care, they’ll remain warm, inviting, and stunning for years to come. Regular maintenance ensures that the charm and character of your rustic furnishings endure, allowing you to bask in their handcrafted beauty while enjoying the simple yet profound joys they bring to your home.
To keep your waxed furniture looking its best, consider a few essential practices. Start with gentle cleaning; simply use a soft, damp cloth to wipe away dust and dirt. Avoid harsh chemicals, as they can strip away the wax and compromise the finish. Instead, opt for mild soap solutions that are safe for wood surfaces. After cleaning, ensure to dry the surface thoroughly to prevent moisture from becoming trapped beneath the wax.
Regular Re-waxing
Waxed surfaces benefit immensely from periodic re-waxing, particularly in high-traffic areas or if the furniture is exposed to sunlight. Aim to apply a thin layer of wax every six months to a year. This not only enhances the shine but also provides a protective barrier against everyday wear. As you reapply, follow the same principles of thin, even coats to avoid a sticky and uneven finish. Remember to buff gently with a soft cloth to reveal a polished sheen that will make your furniture look as good as new.
Protecting Your Furniture
Consider the placement of your waxed pieces-keep them away from direct sunlight, which can fade and damage the wood over time. Using coasters, placemats, or cloth under decorative items can also prevent scratches and dents, ensuring that your treasured items stay pristine.
Addressing Issues Promptly
If you notice any stains or watermarks, tackle them right away. Blot spills immediately with a dry cloth, and for more stubborn marks, a dab of mineral oil can work wonders to rejuvenate the wax. For deeper scratches, consider buffing the area gently with fine steel wool in the direction of the grain before reapplying wax.
By embracing these practices, you create a nurturing environment for your furniture, allowing it to age gracefully while adding to the inviting aura of your cottage home. The beauty of caring for your waxed surfaces lies in the personal touch you bring to each piece, celebrating both their stories and your own. As you tend to your beloved furnishings, you not only enhance their charm but also deepen your connection to a lifestyle rich in simplicity and rustic warmth.
Creative Ways to Use Furniture Wax in Decor
Transforming your space goes beyond just furniture; it’s about creating an atmosphere that feels warm and inviting. Furniture wax isn’t just for preserving the finish of your beloved pieces-it can also serve as a tool for enhancing your décor in creative and unexpected ways. Imagine using wax to add a subtle sheen to not just surfaces, but to your entire cottage aesthetic.
One delightful way to employ furniture wax is through decorative accents. Apply a thin layer of wax on wooden trays, picture frames, or small knick-knacks to elevate their charm instantly. It enhances the wood’s natural grain and adds a protective layer against dust and moisture. Enhance your cozy corner by repurposing thrifted wooden items: a rustic tray can become a focal point on your coffee table by showcasing seasonal decor or a selection of fragrant candles.
Fabric Softener for Textiles
Did you know that furniture wax can be used on fabric? Mixing a tiny amount with a fabric softener can work wonders, particularly on natural fabrics. This mixture can be used to keep your linen curtains and cotton cushions looking fresh and vibrant. Just a light application-and a quick buff-will not only extend their life but may also enhance their texture and help create a more luxurious feel throughout your space.
Creating a Vintage-Style Finish
For a unique touch, consider using furniture wax to develop that coveted vintage-look finish on newer items that might feel too polished. A blend of colored wax applied in strategic spots can tone down a bright hue, providing a rustic, lived-in look. For instance, a bright white cabinet can come to life with a soft gray or brown wax, highlighting details like carvings or edges, and bringing the impression of age and depth without sacrificing durability.
Seasonal Décor Enhancements
As seasons change, so can your décor. Use furniture wax to embellish wooden ornaments or accents you can swap out with the seasons. A bit of gentle wax on carved pumpkin figures or wooden hearts can give them a soft glow that catches the light beautifully, enhancing their presence without making them overpowering. This allows for an easy celebration of seasonal festivities, while also embracing a cohesive rustic theme throughout your home.
By thinking outside the box and incorporating furniture wax into various aspects of your decor, you can craft an inviting space that truly reflects the warmth of cottage living. Whether it’s through enhancing the beauty of occasional pieces or adding depth to fabric items, furniture wax holds a charm that resonates deeply with the essence of a cozy, rustic lifestyle.
Enhancing the Rustic Charm of Your Home with Wax
Embracing the rustic charm of your home means reconnecting with natural materials and the simple joys of cottage living. One of the most delightful methods to enhance that warm, inviting atmosphere is through the use of furniture wax. Not only does it protect your beloved pieces, but it also elevates their character. A well-applied wax can enrich the wood’s grain, impart a soft sheen, and reintroduce an authentic sense of coziness that brand-new furniture often lacks.
To achieve a beautiful vintage glow, begin with pieces that need a bit of TLC. Select your favorite wooden furniture-perhaps a worn dining table or a charming side table-and give it a thorough cleaning. Once dry, apply a thin layer of high-quality furniture wax using a soft cloth or brush, working it into the grain. Allow the wax to sit for a few moments before buffing with a clean cloth to bring out a subtle luster. This technique not only highlights the unique patterns of the wood but also imbues your space with a timeless touch that is essential for authentic cottage decor.
Beyond traditional furniture, consider using wax on smaller decorative elements that contribute to your home’s rustic aesthetic. A beautifully waxed picture frame or wooden bowl can shine on its own or serve to complement other decor. You might also create custom waxed coasters from reclaimed wood. Applying wax to these items will protect their surfaces while enhancing their texture and appearance, making everyday objects a delightful part of your home’s design.
As seasons change, use furniture wax to refresh the rustic charm of your decor. For instance, lightly waxing wooden seasonal decorations, such as hand-carved ornaments for autumn or winter, can revitalize their appearance and create a cohesive look throughout your home. By integrating these simple techniques and allowing the natural beauty of wood to shine, you’ll cultivate an ambiance that reflects heartfelt craftsmanship and a rustic lifestyle-perfect for anyone looking to embrace a refreshingly cozy, cottage-style home.
Troubleshooting: Fixing Wax Application Issues
When engaging with the charm and character of cottage living, it’s essential to address any hiccups that may arise during the waxing process. The beauty of furniture wax comes not only from its protective qualities but also from how it enhances the natural aesthetics of wood. However, even seasoned DIYers may encounter issues that can affect the final look of their beloved pieces.
One common trouble is wax streaking. This often occurs when too much wax is applied or if it hasn’t been buffed properly. If you find your surface looking uneven or streaky, don’t despair! Simply take a clean, soft cloth and buff the affected area gently in circular motions. For stubborn streaks, a little mineral spirits on the cloth can help dissolve the excess wax, allowing you to reapply a cleaner layer. Remember, less is often more; a thin application is the key to achieving a smooth, even finish.
Another issue to watch out for is cloudy wax, which can occur if the wax hasn’t fully cured or if moisture has gotten under the layer of wax. If your waxed surface looks milky or hazy, it may simply need some additional buffing with a dry cloth. However, if the problem persists, consider stripping the wax and starting again. Using a quality wax-removal solution, carefully wipe away the existing wax and allow the surface to fully dry before reapplying a fresh, thin coat.
Lastly, sticky wax can be a frustrating barrier to enjoying your newly refreshed furniture. This condition may arise from using too thick a layer of wax or from environmental conditions like high humidity. To remedy this, ensure that you’re applying the wax sparingly and allowing adequate drying time between coats. If you’ve already applied a thick layer, gently buffing it might bring back the smoothness. If the stickiness lingers, don a pair of gloves and lightly rub the surface with a paper towel to help soak up the excess without disturbing the wax beneath.
Through patience and a bit of troubleshooting, you can achieve that coveted vintage cottage glow on your furniture, transforming every piece into a warm expression of rustic charm. Remember, the goal is to celebrate the natural beauty of the wood, and sometimes, a little care can make all the difference in your cottage decor journey.
Seasonal Waxing Tips for a Timeless Look
Embracing the rhythms of the seasons can elevate your waxing routine, ensuring your furniture not only looks its best but endures the inevitable wear and tear that comes with time. As the seasons change, so do the environmental factors that can impact your waxed surfaces. A keen awareness of these fluctuations empowers you to make adjustments that enhance the timeless charm of your cottage-style home, all while using furniture wax to breathe life into your cherished pieces.
In the warmer months, when humidity levels are higher, it’s important to apply wax in more controlled conditions. Ideally, choose a dry day to wax your furniture; humidity can prevent wax from curing properly, resulting in that dreaded sticky residue. Consider starting your projects early in the morning or late in the afternoon when temperatures are cooler, and the air is drier. During this time, the application should be lighter and more frequent. A thin layer of wax allows the surface to breathe, helping it cure properly without trapping moisture.
As autumn arrives, the vibrant colors of the season inspire a transition in your decor. This is the perfect time to refresh your furniture with a creamy, soft wax that emphasizes the warm hues of maple, oak, and pine. With the fall breeze beckoning cozy evenings next to a crackling fire, concentrate on spots that see more use-like coffee tables and dining surfaces. These areas may benefit from a careful reapplication of wax to protect against spills and scratches often associated with holiday gatherings.
In winter, keep in mind that heating your home can cause indoor air to dry out significantly, impacting the finish on your furniture. It’s wise to monitor the indoor humidity levels and, if necessary, increase moisture in the air with a humidifier. When applying wax during this time, consider warming the wax slightly before application; this will make it more pliable and easier to spread, ensuring an even coat that enhances the natural beauty of the wood. Moreover, a routine wax refresh during this season can help protect your surfaces from seasonal dryness.
Spring heralds a revival, and as flowers bloom, so should your furniture’s luster. Following the winter months, consider a thorough cleaning of your surfaces followed by a fresh coat of wax to invigorate the wood grain. This is also an ideal time to inspect for any damage that may have occurred during the previous seasons. Small scratches or dull patches can easily be revitalized with some easy DIY refinishing techniques, allowing the furniture to shine as brightly as the fresh blooms outside.
By aligning your waxing schedule with the seasons, you not only showcase each piece’s natural beauty but also develop a deep appreciation for the cycles of nature reflected in your home. With thoughtful application and care, your furniture will embody the essence of rustic charm, inviting warmth and comfort into every corner of your cottage sanctuary.
Exploring Different Wax Finishes and Their Benefits
The world of furniture wax offers an enchanting array of finishes, each with its unique character and benefits, allowing homeowners to tailor the look and feel of their beloved pieces. From creamy, nourishing waxes that impart a soft sheen to resilient, hard-wearing varieties designed to protect against daily wear, understanding these options is key to achieving that coveted vintage cottage glow.
Among the most popular choices, natural beeswax stands out for its ability to enrich the grain of wood while providing a protective barrier. Perfect for lighter woods like pine, this wax enhances the natural hues and adds a warm, inviting quality to your furniture. On the other hand, carnauba wax is known for its durability; it yields a high-gloss finish that has a stunning reflective quality, making it ideal for richly stained mahogany or oak pieces.
When selecting a wax, consider how you want your furniture to interact with light and how you use it daily. Soft paste waxes, for example, are easy to apply and ideal for indoor furniture, providing a gentle luster perfect for serene cottage vibes. In contrast, hard paste waxes offer increased durability, suitable for high-traffic areas or surfaces that see a lot of activity, like dining tables or kitchen counters.
Choosing the Right Finish for Your Project
It’s also essential to evaluate how much maintenance you’re willing to commit to; some finishes require more frequent reapplication. Here’s a brief overview of popular wax finishes and their benefits:
| Type of Wax | Finish | Best For | Durability |
|---|---|---|---|
| Beeswax | Soft sheen | Light woods (e.g., pine) | Moderate |
| Carnauba Wax | High gloss | Dark woods (e.g., mahogany) | High |
| Soft Paste Wax | Gentle luster | Indoor furniture | Moderate |
| Hard Paste Wax | Durable finish | High-traffic areas | High |
As you explore these options, consider not just the aesthetic but also the emotional comfort that each wax finish can bring to your space. Each application is a chance to breathe life into your furniture, honoring the craftsmanship of bygone eras while infusing it with your personal touch. Embrace the delightful journey of creating a welcoming, rustic atmosphere that reflects your lifestyle, all while enjoying the simple pleasures of cottage living.
Inspiring Cottage Furniture Makeover Ideas
Breathing new life into your cottage furniture doesn’t just transform your space; it tells a story of warmth and cherished moments. Whether it’s an old pine table passed down through generations or a recent thrift store find, applying furniture wax can elevate these pieces into stunning focal points that capture the rustic charm you adore. Imagine that cozy reading nook enhanced by a beautifully refinished chair or a dining area transformed by a lovingly polished farmhouse table – the right wax can create that inviting atmosphere, beckoning family and friends to gather.
Consider starting with a simple upgrade: painting and waxing a mismatched set of chairs. Choose a soft, muted color – perhaps a pale sage or soft blue – that resonates with the natural surroundings of your cottage. Once painted, apply a layer of beeswax to bring out the grain and add a subtle sheen, turning those chairs into beloved accents. You could also explore layering techniques, mixing different shades to create a more complex aesthetic while maintaining that cozy feel.
For larger pieces, such as buffets or cabinets, think about how you can enhance their beauty without losing their integrity. A clear carnauba wax not only provides a high-gloss finish but also protects against scratches and stains. If needed, create a two-tone effect by waxing only certain areas, like the edges or details, to draw the eye and highlight craftsmanship.
Finally, don’t forget the smaller details that can charm your space! Old picture frames, mirrors, or even decorative wooden bowls can be transformed with wax, inviting a cohesive look throughout your cottage. By selecting pieces that speak to your personality and enhancing them with thoughtful treatments, you cultivate a home that feels uniquely yours – a welcoming retreat enriched by the love and care you’ve poured into it. So grab your wax and brushes, and let creativity guide you on a delightful journey of cottage furniture makeovers.
Q&A
Q: What is the best time to apply furniture wax for a lasting finish?
A: The best time to apply furniture wax is during mild weather, ideally when temperatures are between 60°F and 80°F (15°C to 27°C). This ensures optimal drying and curing. Moreover, waxing in low humidity helps achieve a smooth finish without trapped moisture. You can explore more in the section on “Seasonal Waxing Tips for a Timeless Look.”
Q: How long should I wait before using waxed furniture?
A: It’s recommended to wait at least 24 hours before using waxed furniture. This allows the wax to cure properly, ensuring a durable finish. For the best results, consider buffing the wax after a day to enhance the shine. Check “How to Care for and Maintain Waxed Surfaces” for ongoing maintenance tips.
Q: Can I mix different types of furniture wax?
A: It’s not advisable to mix different types of furniture waxes as they may have varying ingredients and drying times. Stick to a single wax type for best results to ensure a uniform finish. Learn more in the section about “Exploring Different Wax Finishes and Their Benefits.”
Q: How can I tell if I need to re-wax my furniture?
A: You should consider re-waxing your furniture if the surface looks dull or feels sticky to the touch. Additionally, if water or spills do not bead up, it’s time to apply another layer of wax. For maintenance tips, refer to “How to Care for and Maintain Waxed Surfaces.”
Q: What tools do I need for applying furniture wax?
A: Essential tools for applying furniture wax include a lint-free cloth, natural bristle brush, or an applicator pad. These tools help apply wax evenly without streaks. Further details can be found in the section on “Essential Tools for Waxing Furniture Like a Pro.”
Q: How do I fix wax application issues like streaks or unevenness?
A: To fix streaks or unevenness in wax application, lightly buff the surface with a clean cotton cloth. If necessary, apply a thin layer of wax and buff again. Reference the “Troubleshooting: Fixing Wax Application Issues” section for more solutions.
Q: Can I use furniture wax on painted surfaces?
A: Yes, furniture wax can be applied to painted surfaces to enhance the finish and provide protection. It’s best to wait until the paint is fully cured before waxing. For more tips, check the section on “Tips for Achieving a Beautiful Vintage Finish.”
Q: Is there a difference between natural and synthetic furniture wax?
A: Yes, natural waxes (like beeswax) often provide a richer finish and better breathability, while synthetic waxes offer more durability and ease of application. Consider your needs when choosing between them. More comparisons can be found in “Exploring Different Wax Finishes and Their Benefits.”
To Conclude
Congratulations on taking the first step toward achieving that beautiful vintage cottage glow for your furniture! By applying furniture wax, you’ve not only enhanced the natural beauty of your pieces but also provided them with much-needed protection. Remember, the secret to a stunning finish lies in the quality of your products and application technique. Don’t hesitate to check out our guide on DIY Decor Projects and Rustic Home Design Tips to further elevate your cozy space.
Now that you’re equipped with the knowledge of how to use furniture wax, why not dive deeper into your rustic home journey? Explore essential tips for maintaining wooden furniture or discover seasonal gardening ideas that complement your charming decor style. If you enjoyed this guide, consider signing up for our newsletter to receive more inspiring content directly in your inbox, and share your experiences or questions in the comments below. Embrace the joy of cottage living, and keep crafting your unique haven!